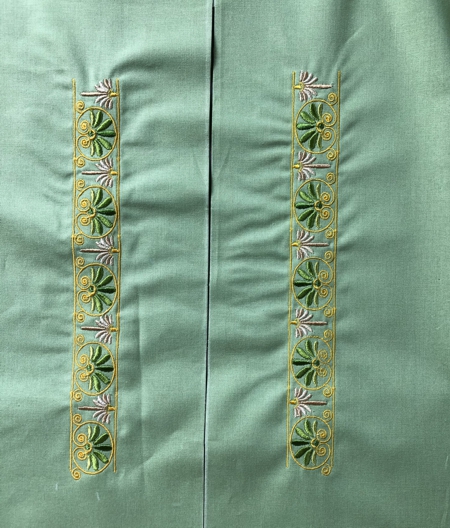
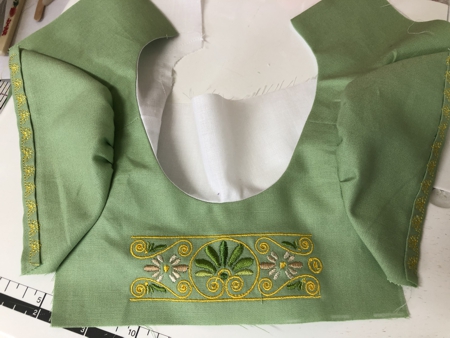
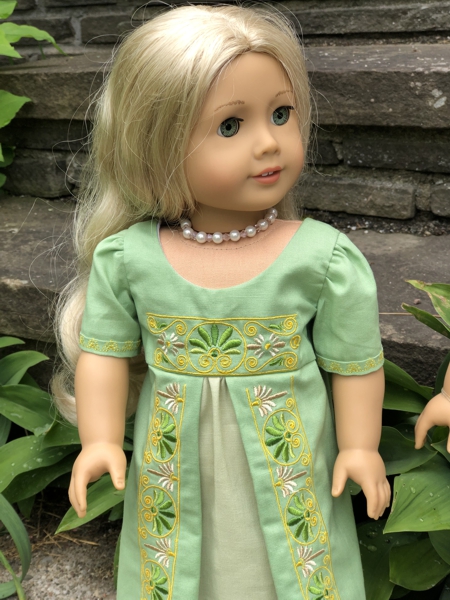
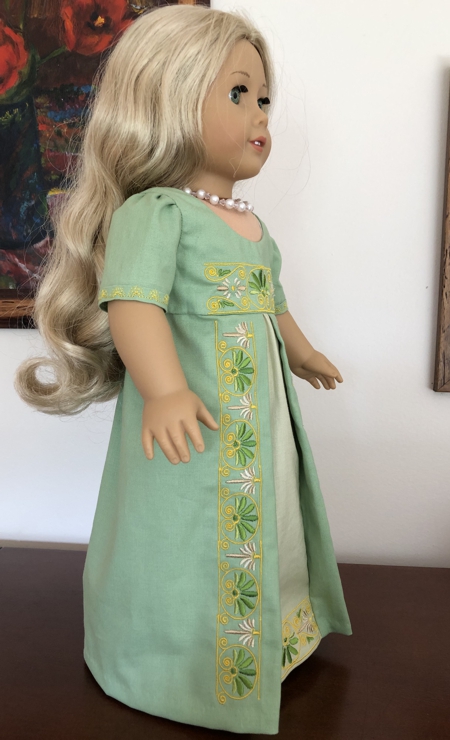
The dress is designed to fit 18-inch dolls like the American Girl Doll, Our Generation and other 18-inch dolls with a similar body. For embellishment, we used embroidery designs from the Golden Border Set.
All designs are for the large (5"x 7") and small (4" x 4") hoops, but it can be handy to use a larger hoop for this project, so you can embellish multiple areas of the dress at the same time.
|

|
You will need:
- embroidery threads, either polyester or rayon, in your choice of colors,
- about 1/2 yard of solid colored fabric (cotton is preferred), in your choice of color,
- a piece of matching fabric for the insert (cotton preferred),
- small amount of light-weight cotton fabric for the lining, (batiste is ideal),
- light-weight cut-away embroidery stabilizer, the type of "no-show mesh" used for t-shirts is great for this project,
- a piece of one-wrap Velcro tape or 3 sew-on snaps,
- chalk pencil or marker,
- quilter's ruler and rotary cutter,
- scissors,
- iron,
- sewing threads of matching colors,
- sewing pins,
- needle for hand stitching,
- printer.
|
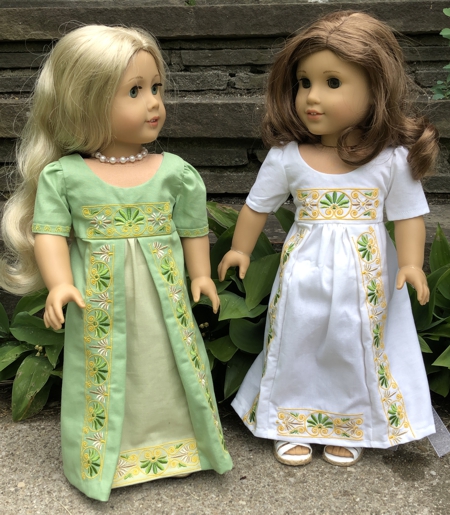
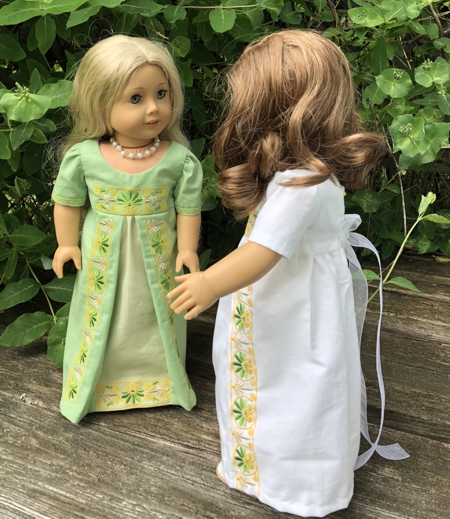
The dress in plain white can be used as an everyday gown.
|
Patterns
|
|
Download the template file for the stomacher, bodice and sleeve. To open and print the template, which is a PDF file, you will need Adobe Reader or a similar program. Adobe Reader is free to download and install.
Template Download (PDF file) Print out the templates and cut them out. |
| Note: Seam allowance of 1/4" is included with the templates. |
Embroidery
|
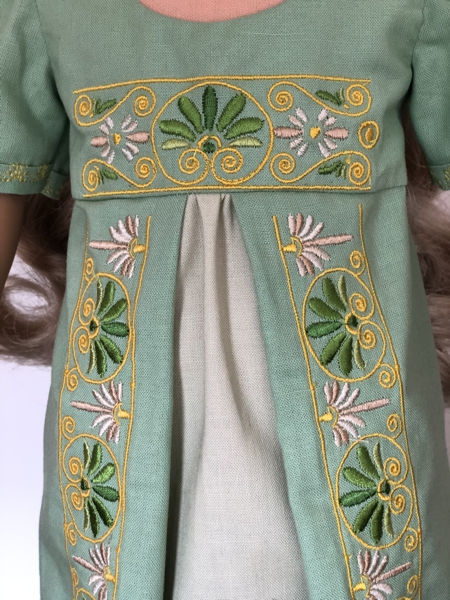
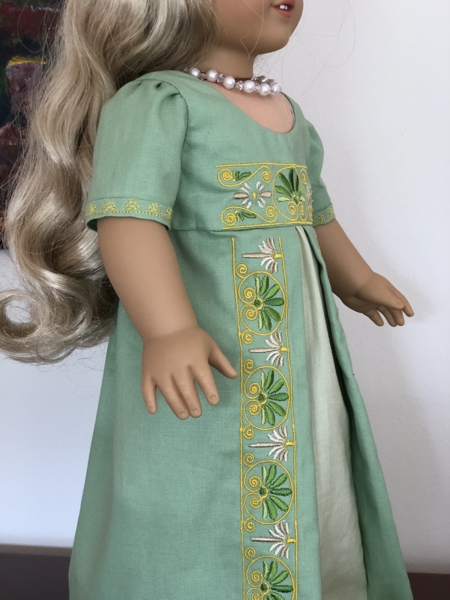
| For the dress, we used the files goldborder1, goldborder1-long, goldborder2, goldborder4 from the Golden Border Set. You can use our color card or select colors more appropriate for your fabric. |
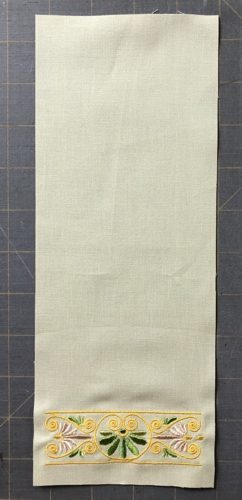
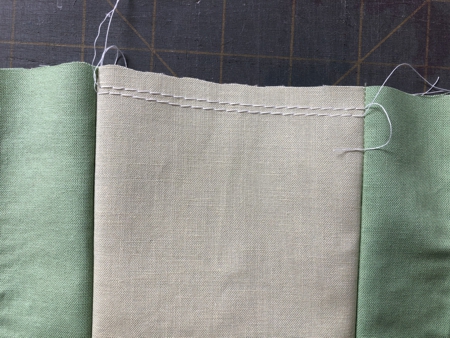
For the insert, you will need a 4" x 4" hoop. Stabilize the fabric with light-weight cut-away stabilizer and embroider the ornament (we used goldenborder4).
Trim the stitch-out - the lower margin is 1/2", the side margin 1/4", the length of the piece 11".
|
|
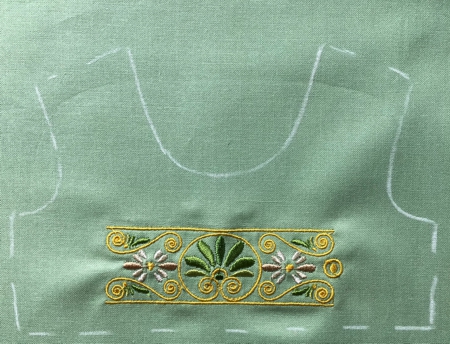
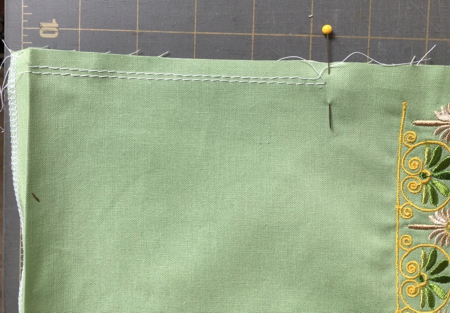
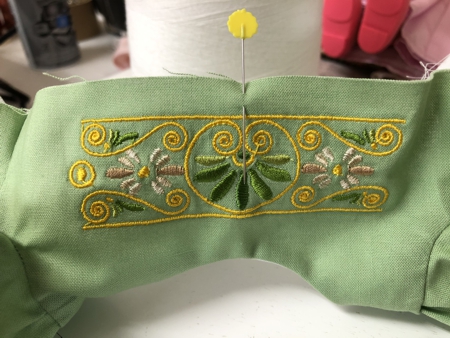
Embroider the ornament (we used goldenborder2) on a piece of fabric for the bodice. Place the paper template of the bodice front over the stitch-out and trace it with the chalk pencil. The lower margin should be 1/4" and the center of the embroidery should coincide with the center of the bodice.
|
|
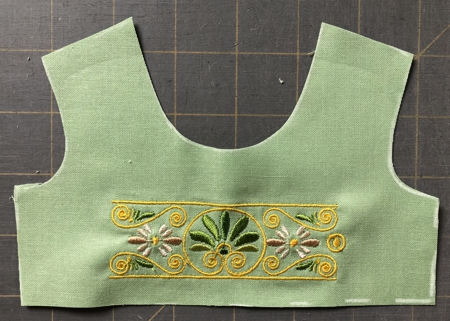
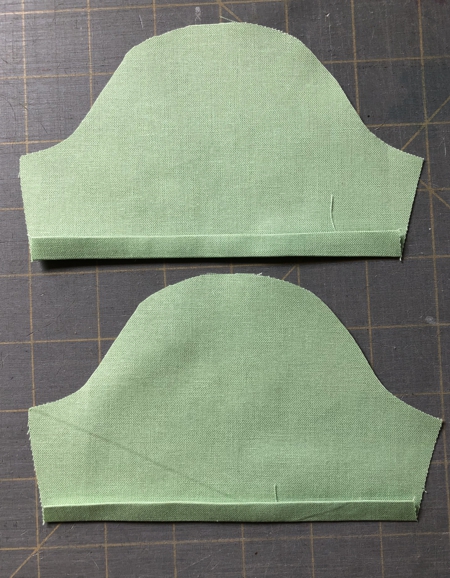
Cut out the bodice front.
|
|
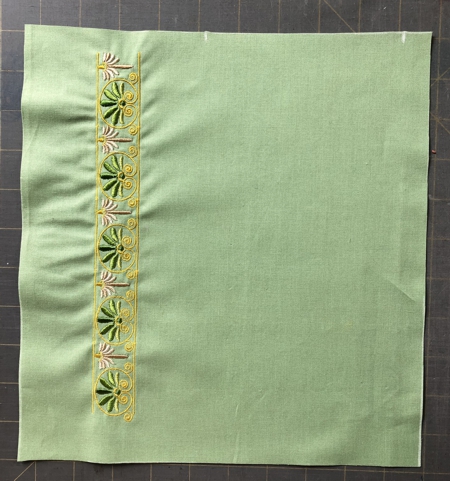
For skirt embroidery it's better to use a hoop 10"-12" long. For the skirt, we used the files goldborder1_long and goldborder1. Upload the files into the machine, first the long file, then the short one, duplicate the short file. Combine all 3 files into one line and embroider them.
Then make the mirror image of the pattern and embroider again on another piece of fabric.
If you do not have a hoop long enough to accomodate 3 files at once, you'll have to rehoop and align the designs on the fabric.
Trim the right and left edges of the skirt to 2" beyond the stitch-outs, see the picture below.
|
|
Using the paper template, trace the skirt, copy the markings and cut out. On the picture below is theleft side of the skirt. Repeat for the right side, don't forget to turn the template rightt side down.
|
|
Cutting the Other Parts of the Dress
|
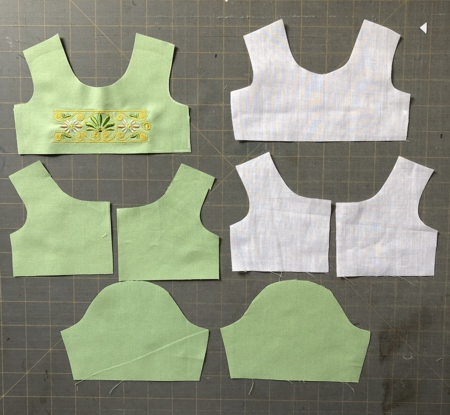
Using paper templates, cut out bodice front, backs and sleeves. Cut the front and back parts out of lining fabric.
|
|
Assembly of the Bodice
|
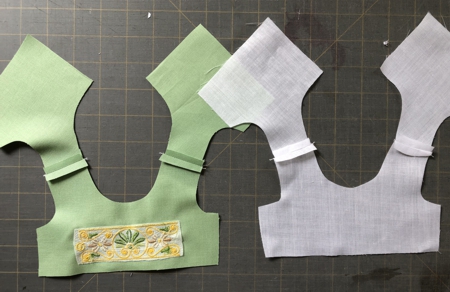
Sew the bodice parts together at the shoulders. Repeat for the lining. Press the seams open.
|
|
Stay-stitch the lining along the armholes with seam allowance 1/4".
|
|
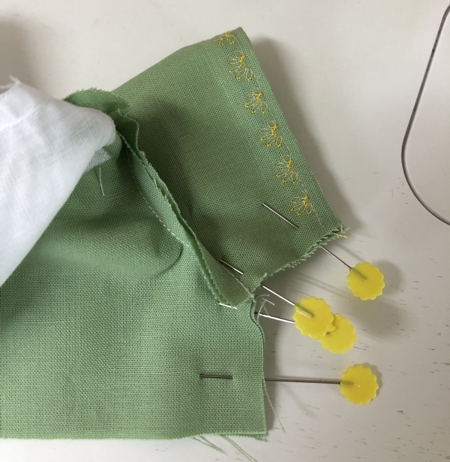
Face to face, position the bodice and lining, align all edges, pin .
|

|
Stitch along the back and neckline.
|
|
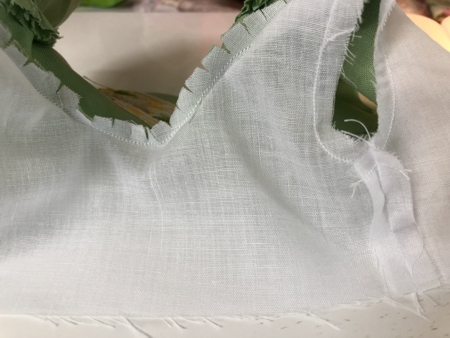
Cut the corners and clip the curves.
|
|
Turn right side out and press the seams.
|
|
Sleeves
|
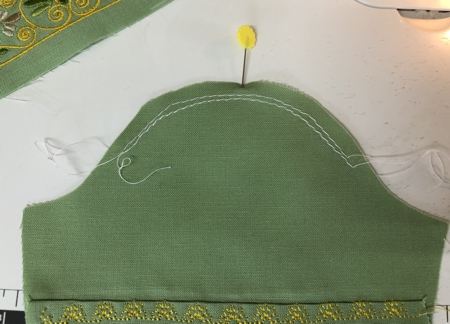
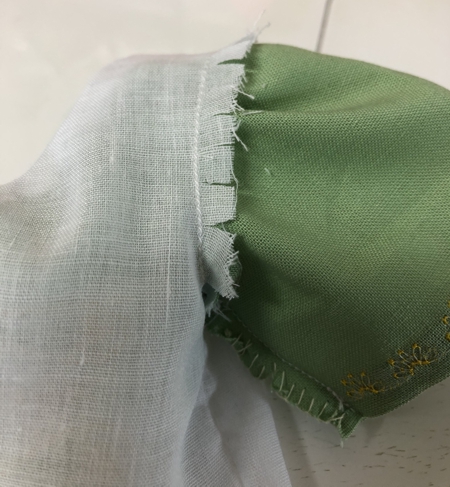
With face side up, turn the lower edge 1/4" and press. Turn 1/4" again and press.
|
|
On your sewing machine, choose a decorative stitch and sew the folded edge in place.
Sew 2 rows of gathered stitches between the dots.
Finish the side raw edges of the sleeves.
|
|
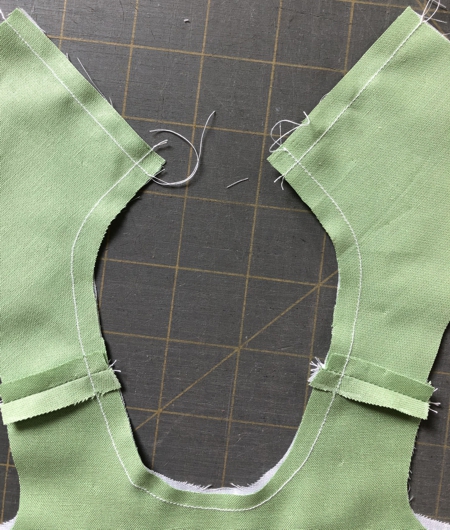
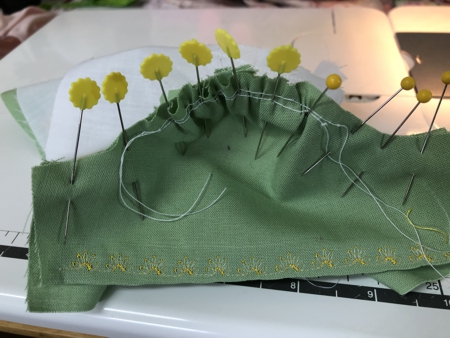
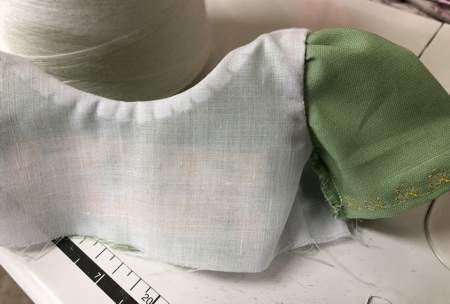
Fold the lining out of the way and pin the sleeve to the armhole.
|
|
Stitch the sleeve in place working from the side of the bodice. Remove the gathering thread.
|
|
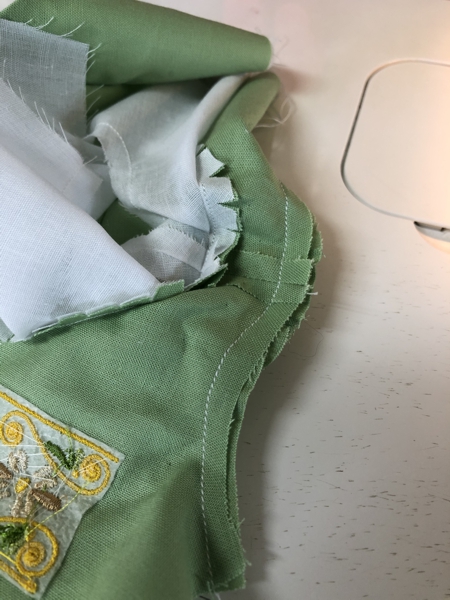
Clip the curves and press seams towards the neckline.
|
|
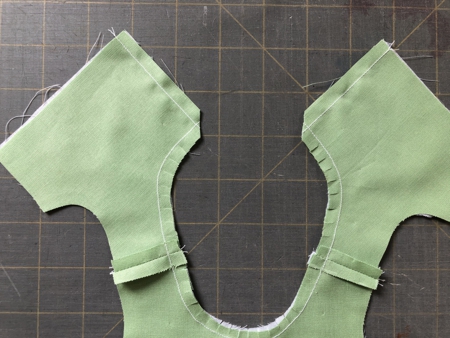
With right sides together, pin, then sew the underarm seam. Clip curves and press seam open.
|
|
Repeat for the lining.
|
|
Clip armhole curves on the lining, take care not to cut through the stitches.
|
|
With your fingers turn and press the seam allowance inside. Handstitch the lining in place along the armholes to the seam allowance of the sleeve.
|
|
Skirt
|
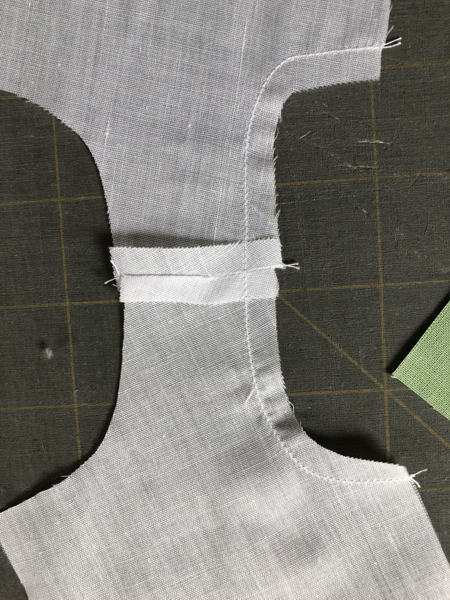
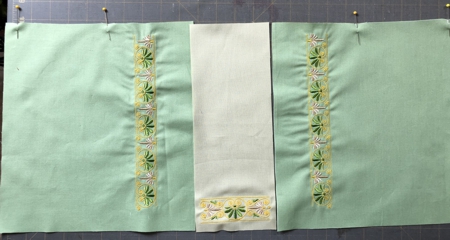
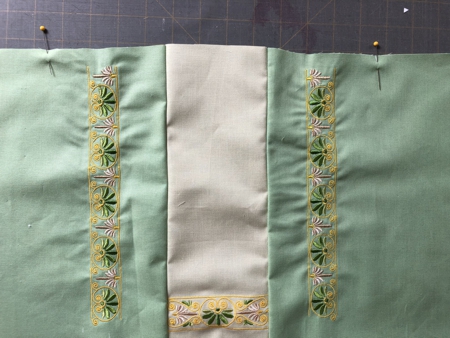
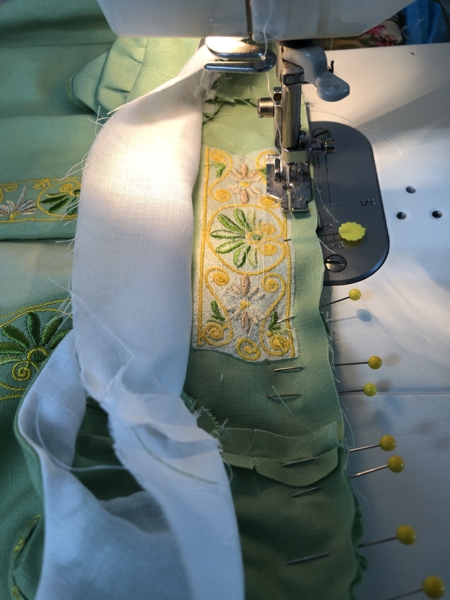
Sew the insert between the left and right parts of the skirt.
|
|
|
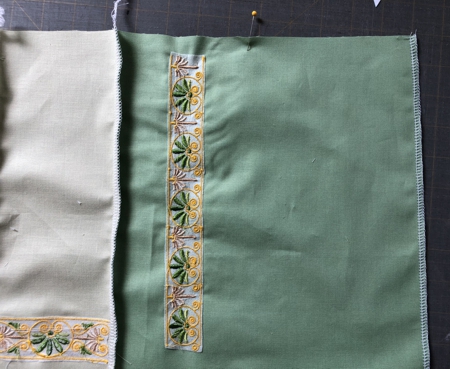
Zig-zag or serge the raw edges on the insert and skirt back. Press seams on the insert towards the skirt.
|
|
Sew 2 rows of gathering stitches on the insert.
|
|
| Sew 2 rows of gathering stitches between the dots on both sides of the skirt. Fold and press the side seams 1/2" back. |
|
Assembly of the Dress
|
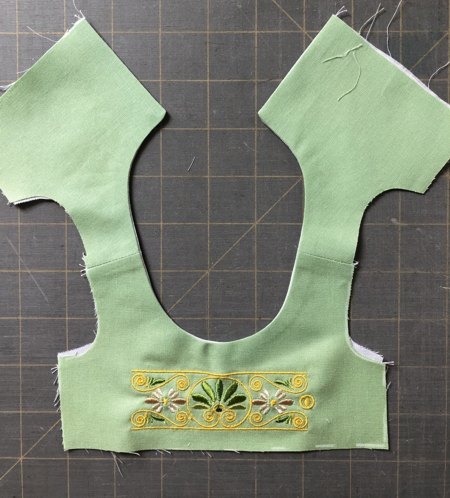
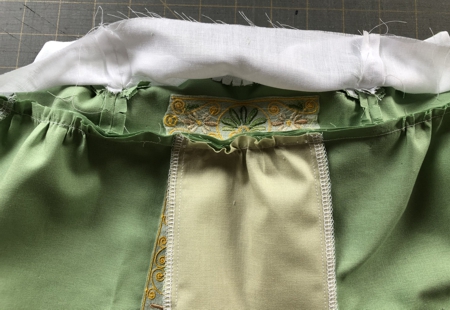
With pins, mark the center of the bodice front and the center of the insert.
|
|
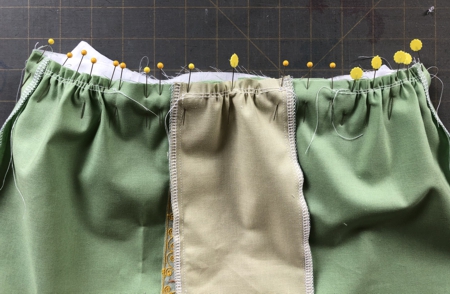
Fold the lining out of way. With right sides together, pin the bodice and skirt together at the centers, at the side seams and at the back. Pull the gathering stitches on the insert and fold the embroidered part of the skirt in a pleat so that it can be accommodated between the side seams.
Pull the gathering stitches between the side seams and back edges. Distribute the gathers evenly.
|
|
Stitch the skirt to the bodice, working from the side of the bodice. Remove all gathering threads.
|
|
Press the seam allowance up.
|
|
Fold and press the hem of the dress.
|
|
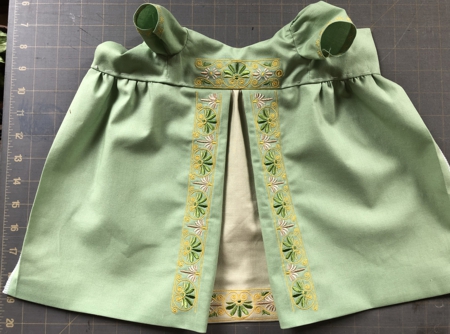
| Sew the back seam from the hem 5" up. Hand stitch the hem. Sew 3 snaps on the back. And you are done! |
|
|
|
If you want a more fitted bodice, like on the white dress, you can add a belt. Before stitching the sides of the bodice together, insert between them 14" long pieces of ribbon, then sew the side together.
|
|
Have fun!
|
|
|
|
|
Back to Golden Border Set
|
Back to Projects Page
|


