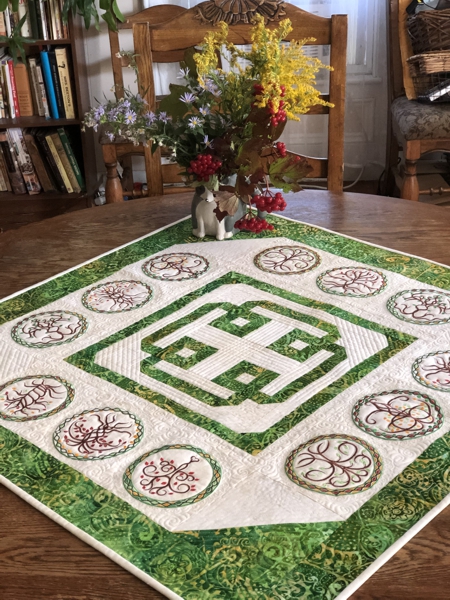
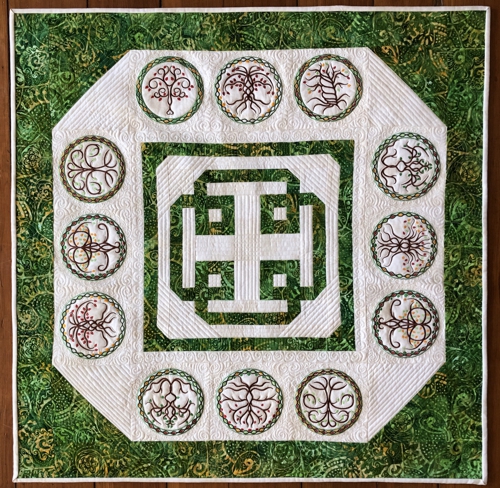
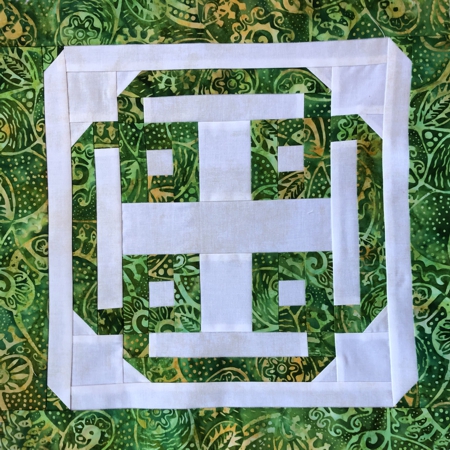
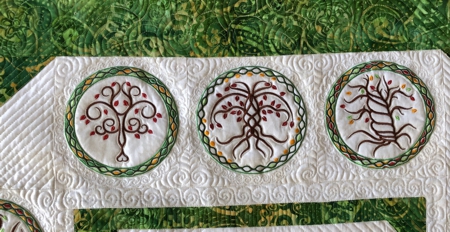
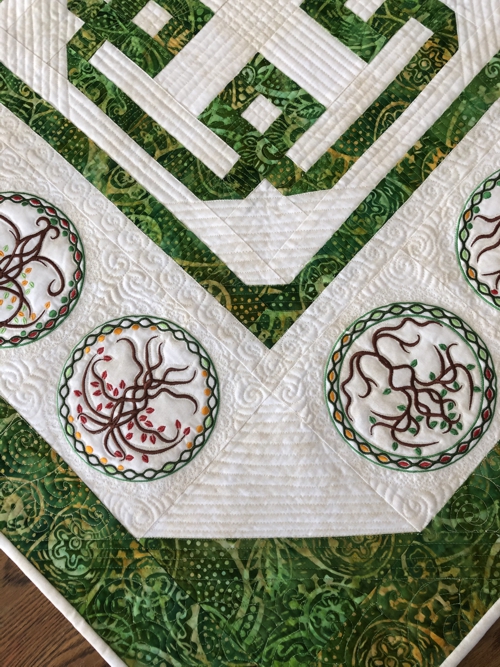
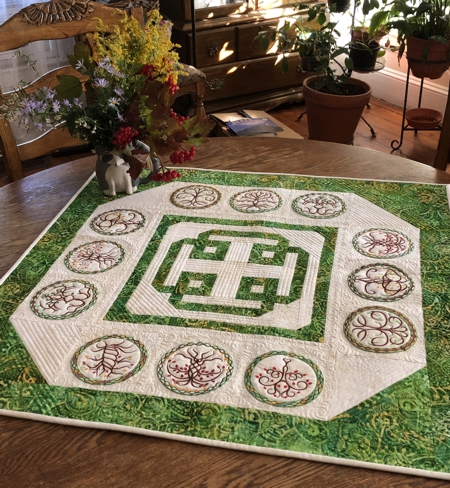
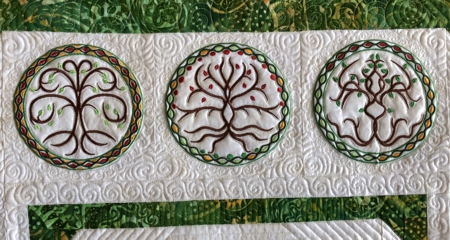
Celebrate Celtic culture with this attractive table topper! It uses designs from the Celtic Tree of Life Motif Set.
The finished size of the tablerunner is about 34" x 34".
|
|
|
You will need :
- embroidery threads either polyester or rayon - follow our color card or choose your own colors,
- 1 yard of light colored fabric,
- 1 yard of green fabric (we used patterned batik), 1 1/4 yard if you want binding of the same color,
- light-weight cut-away embroidery stabilizer,
- fabric for the backing,
- batting,
- binding, if using a different fabric,
- quilter's ruler,
- rotary cutter,
- iron,
- #12 universal needle,
- #12-#14 quilting needle.
|
Embroidery
|
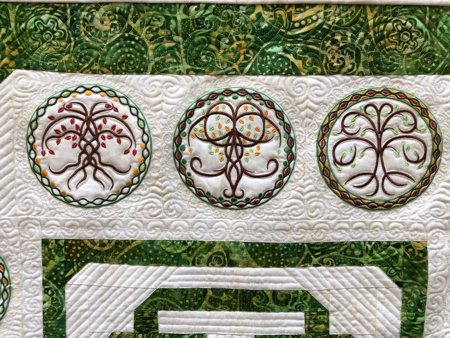
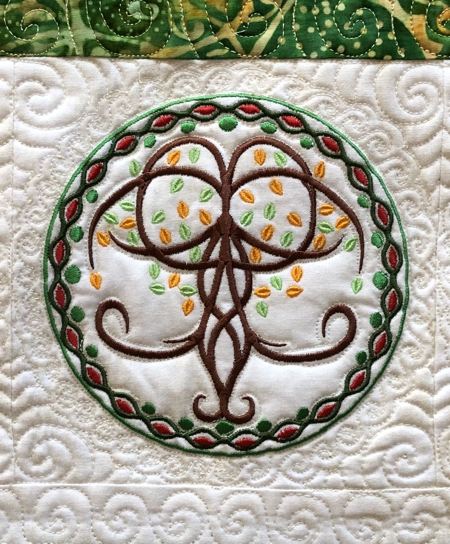
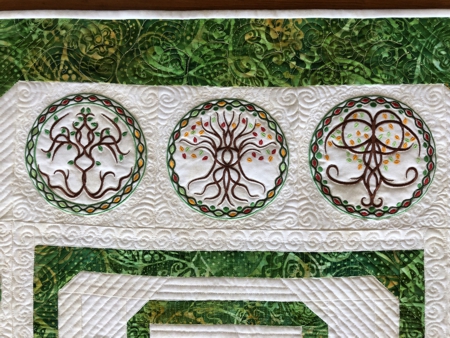
Upload the designs from the Celtic Tree of Life Motif Set into the machine. Stabilize the fabric for the background, and embroider the designs one by one. You will need 12 stitch-outs.
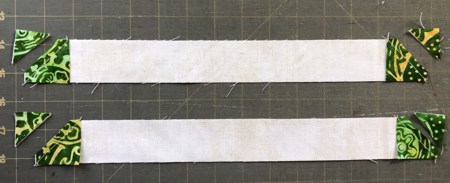
Trim the stitch-outs to 6 1/2" x 6 1/2" squares.
Sew them into 4 rows, 3 stitch-outs per row. You'll get 4 borders, 6 1/2" x 18 1/2" each. Set them aside for the time being. .
|
Cutting :
|
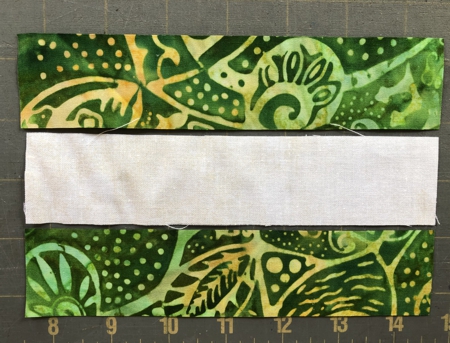
Out of both fabrics, green and light, cut 3-4 strips 1 1/2" wide and the length of the width of the fabric;
Out of just the light fabric, cut a strip 2 1/2" wide and the length of the width of the fabric.
These strips are needed for the central block. Additional cutting is described below.
|
|
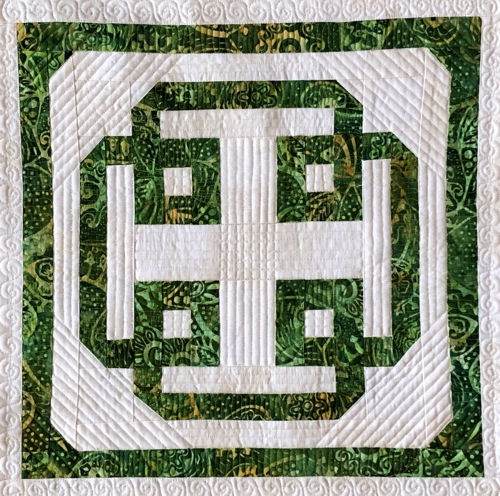
Cutting and Assembly of the central block:
|
| Note: seam allowance is 1/4", press the seam immediately after you make it. |
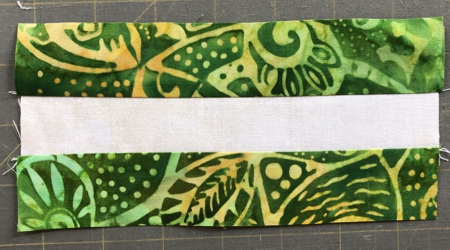
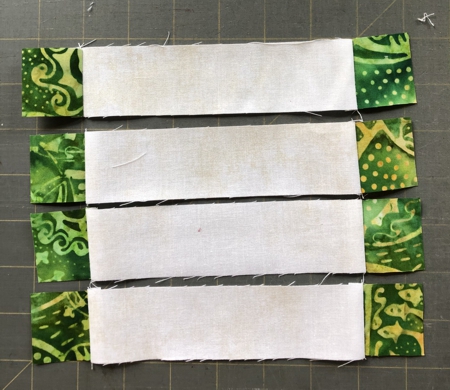
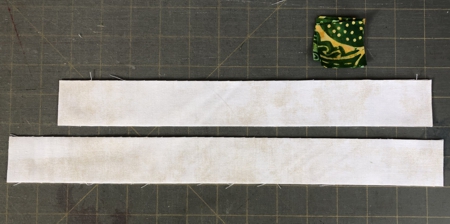
Out of the green strip, cut 2 strips 7" long each. Out of 1 1/2" wide light strip, cut 1 strip 7" long.
|
|
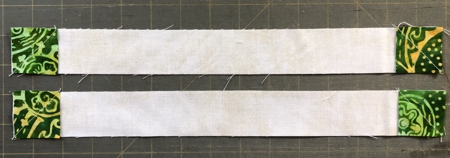
Sew the strips together with the light strip between the green strips.
|
|
Subcut the new unit into 4 strips 1 1/2" wide each.
|
|
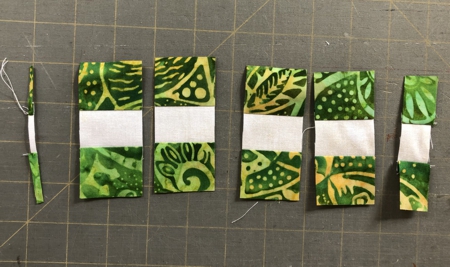
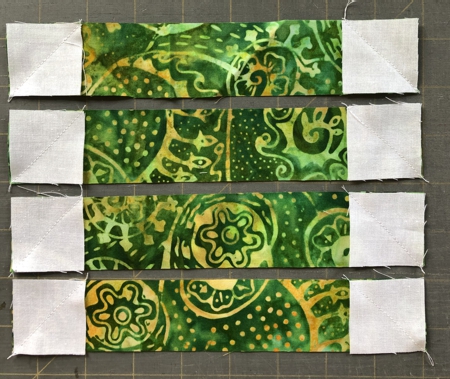
From the 1 1/2" wide green strip, cut 8 strips 3 1/2" long.
Sew the 1 1/2" x 3 1/2" strips to the left and right edges of the 2-colored strips. You'll get 4 squares:
|
|
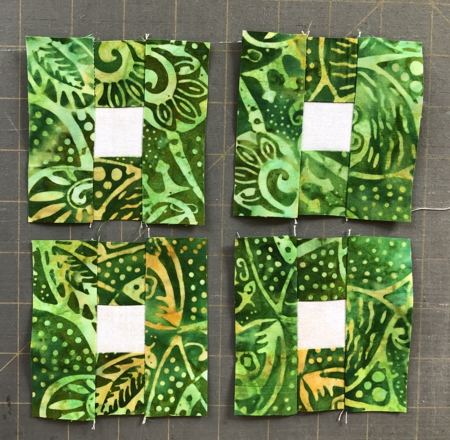
From the 2 1/2" wide light strip, cut 2 strips 3 1/2" long.
Sew the 2 1/2" x 3 1/2" strips between the squares. You'll get 2 rectangles:
|
|
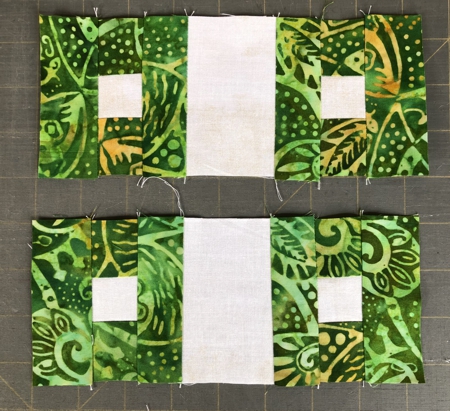
From the 2 1/2" wide light strip, cut 1 strip 8 1/2" long.
Sew the 2 1/2" x 8 1/2" strips between the rectangles. |

|
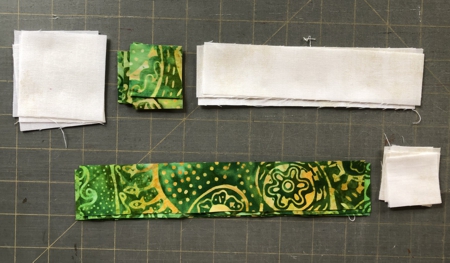
From the 2 1/2" wide light strip, cut 4 squares 2 1/2" x2 1/2".
From the 1 1/2" wide light strip, cut
- 4 strips 6 1/2" long, and
- 8 squares 1 1/2" x 1 1/2".
From the 1 1/2" wide green strip, cut
- 4 strips 8 1/2" long, and
- 8 squares 1 1/2" x 1 1/2".
|
|
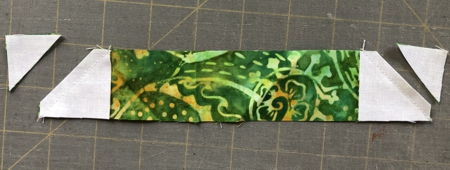
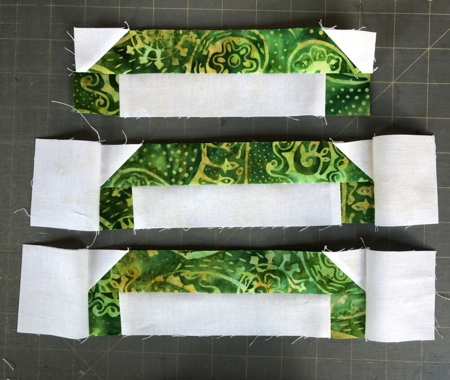
Sew the green 1 1/2" squares to the ends of the light 1 1/2" x 6 1/2" strips. You'll get 4 strips 8 1/2" long each.
|
|
Place the green 1 1/2" x 8 1/2" strips on a table, face up. Place the light 1 1/2" squares, face down, on the ends of the green strips. Align the edges. Draw diagonals. On the right square, draw from the upper left corner to the lower right corner; on the left square, from the upper right corner to the lower left corner. Sew the squares to the strips along the diagonals as shown.
|
|
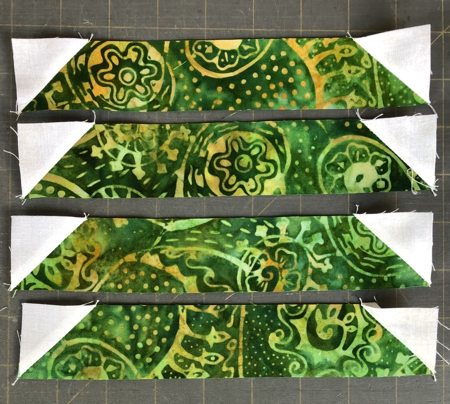
Cut the corners with seam allowance slightly less than 1/4".
|
|
| Unfold. Press. You'll get 4 strips 8 1/2" long each. |
|
Sew the green strips with light corners to the light strips with green ends. You'll get 4 new strips.
Sew the light 2 1/2" squares to the ends of the 2 new strips.
|
|
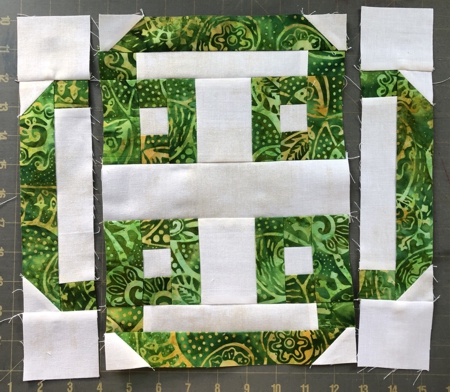
Sew the shorter strips to the upper and lower edges of the central part.
Sew the longer strips, with light square ends, to the left and right edges of the central part.
|
|
From the 1 1/2" wide light strip, cut
- 2 strips 12 1/2" long, and
- 2 strips 14 1/2" long.
From the 1 1/2" wide green strip, cut 4 squares 1 1/2" x 1 1/2".
|
|
| Place the 14 1/2" strips on a table, face up. Place the green 1 1/2" squares, face down, on the ends of the strips. Align the edges. Draw diagonals. On the right square, draw from the upper left corner to the lower right corner; on the left square, from the upper right corner to the lower left corner. Sew the squares to the strips along the diagonals as shown. |
|
| Cut the corners with seam allowance slightly less than 1/4". Unfold and press. |
|
Sew the light strips to the upper and lower edges of the central part.
Sew the light strips with green corners to the left and right edges of the central part.
|
From the 1 1/2" wide green strip, cut
- 2 strips 14 1/2" long, and
- 2 strips 16 1/2" long.
|
Sew the shorter strips to the left and right edges of the central part.
Sew the longer strips to the upper and lower edges of the central part.
|
|
From the 1 1/2" wide light strip, cut
- 2 strips 16 1/2" long, and
- 2 strips 18 1/2" long.
|
Sew the shorter strips to the left and right edges of the central part.
Sew the longer strips to the upper and lower edges of the central part. The central part is ready.
|
Adding Borders:
|
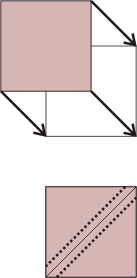
For the first border we need 4 corner squares. Out of green and light fabric each, cut a square measuring 6 7/8".
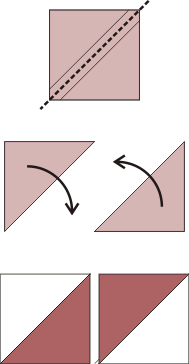
Place both squares face to face, align all edges. Draw a diagonal. Topstitch 1/4" on both sides of the diagonal
|
|
Cut along the diagonal and open the half-triangle squares. Press.
|
|
Sew 2 embroidered borders to the upper and lower edges of the central part.
|
Sew the corner squares to the remaining 2 embroidered borders.
|
Sew these borders to the left and right edges of the central part.
|
For the second border, out of green fabric, cut 2 strips measuring 3 1/2" x 30 1/2" and 2 strips measuring 3 1/2" x 36 1/2".
|
|
|
Sew the shorter strips to the upper and lower edges, sew the longer strips to the left and right right edges of the working piece.
|
Quilting and Finishing
|
Now place the backing on a flat surface (table) face down. Cover with batting. Spread your working piece over it.
Pin all layers together.
We quilted in a free-motion style all over the quilt. If you use a regular home sewing/quilting machine, as we do, start from the center and gradually move to the edges.
|
|
|
| Press with heavy steam. Square the quilt. Finish the raw edges with the binding. |
|
Have fun!
|
|
|
|
|
|

|
|
Back to Celtic Tree of Life Motif Set
|
Back to Projects Page
|


