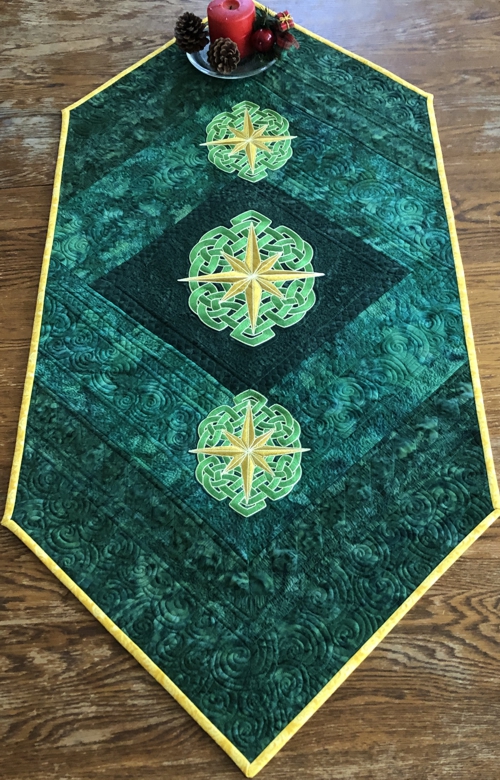
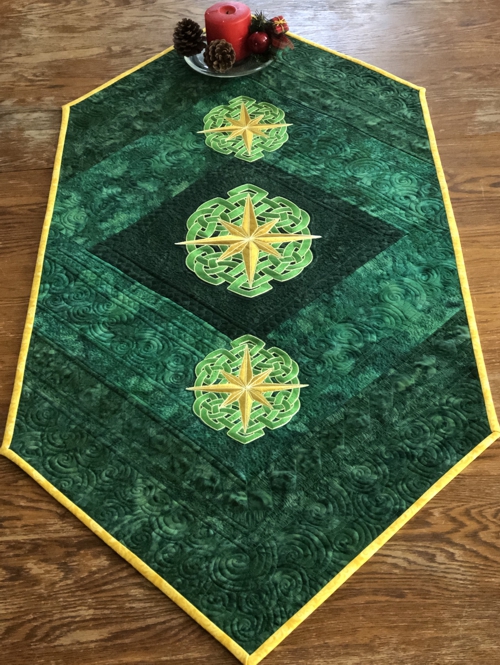
For this tablerunner we used the design of Celtic Star for the commercial and mega hoops. The design is also available for a large hoop (5"x7").
The finished size of the tablerunner is about 21" x 48".
|
|
You will need :
- embroidery threads, either polyester or rayon - we used bright green, dark gold and light gold,
- 3 green fabrics of different shades (we used batiks): 1 fat quarter for the central part (the darkest green) , and 1/2 yard each of 2 other greens;
- golden colored fabric for the binding,
- medium- to heavy-weight cut-away embroidery stabilizer,
- fabric for the backing,
- batting,
- quilter's ruler,
- rotary cutter,
- iron,
- #12 universal needle,
- #14-#16 quilting needle.
|
Cutting:
|
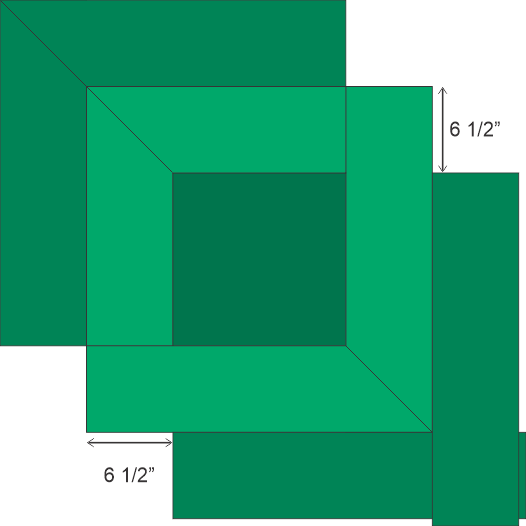
Out of the fabric for the central part, the darkest green, cut a square measuring 12 1/2 " x 12 1/2",
Out of the second green fabric, cut
- 2 strips measuring 6 1/2" x 19" and
- 2 strips measuring 6 1/2" x 25".
Out of the third green fabric, cut 4 strips measuring 6 1/2" x 25".
Cut the golden fabric for the binding strips (we usually cut them 2 1/2" wide).
|
|
Assembly:
|
| Note: seam allowance is 1/4", press the seam immediately after you make it. |
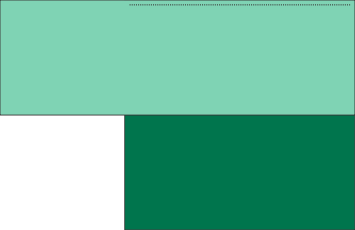
Place the square on the working table face up. Position one of the 6 1/2" x 19" strips of the second fabric over one of the edges of the square. One end of the strip should align with the edge of the square, while the other should protrude.
Pin. Sew together finishing the stitching 1/4" from the edge of the square.
|
|
Unfold and press.
|

|
Place the second 6 1/2" x 19" strip along an adjacent side of the square. The protruding ends should overlap.
Pin. Sew together finishing stitching 1/4" from the edge of the square side.
|

|

|
To make mittered corners, fold one of the free ends over the other to make an angle, align the corners. When the miter looks right to you, press the line.
|

|
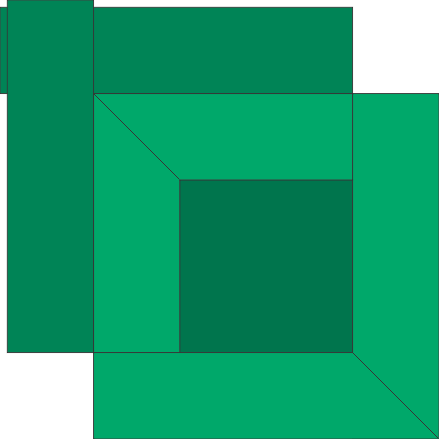
Now attach the 6 1/2" x 25" strips of the same color to the other two sides of the working piece. Align one short end of the strip with the green strip already attached. Pin. Sew together, ending the stitching 1/4" from the edge of the square side.
Repeat for the other strip.
|

|
Make mittered corners as described above.
|

|
Attach the strips of the third color, aligning one of the short edges of the strip with the seam between the green strips of the second color. Pin. Sew together finishing stitching 1/4" from the edge of the working piece side.
Repeat for the second strip.
|
|
| Make a mitered corner. |

|
Attach the last pair of strips in the same way. One end of each strip should be positioned 6 1/2" from the corner of the lighter green strips.
|
|

|
Embroidery:
|
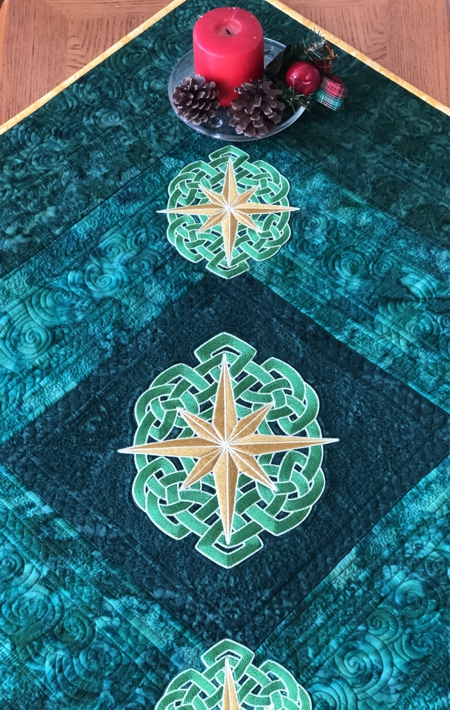
Mark the position of the embroidery on the top. We made the largest design in the center of the dark green square and 2 smaller designs on the strips . If you have a printer and embroidery software, print-outs of the designs will be helpful. Otherwise, you can cut out a rectangle of the size of the designs and use them to determine the position of the designs on the fabric.
Stabilize the chosen area. Hoop fabric tightly and embroider the designs one by one.
|
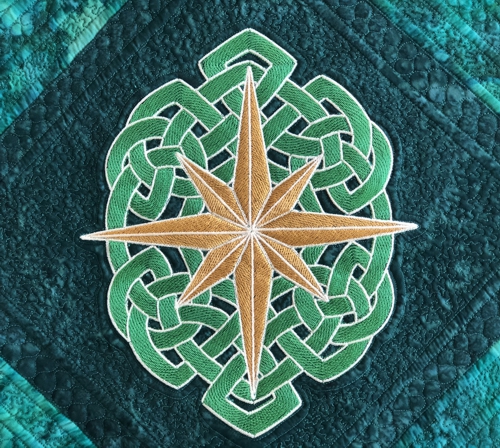
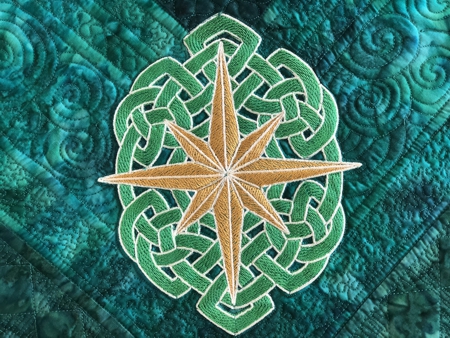
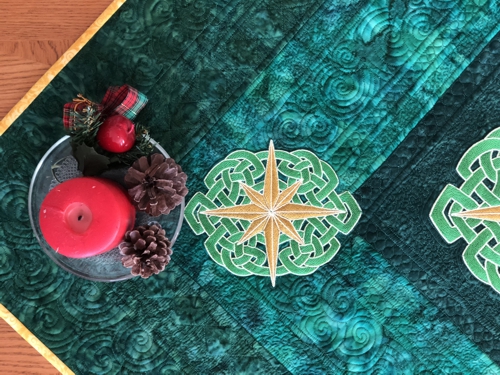
Close-up of the central star.
|
|
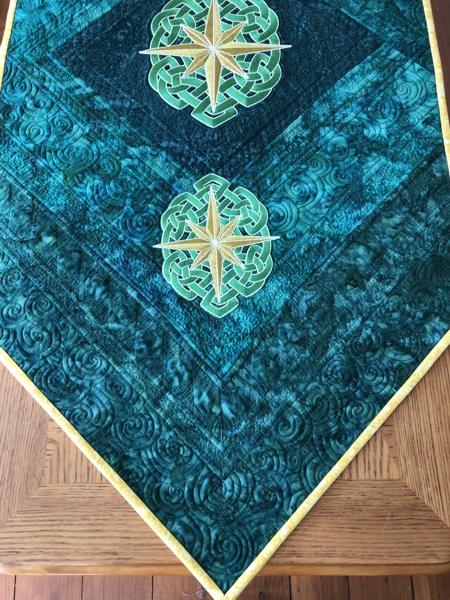
Close-up of one of the side stars stitch-outs.
|
|
Quilting and Finishing
|
Now place the backing on a flat surface (table) face down. Cover with batting. Spread your working piece over it.
Pin all layers together.
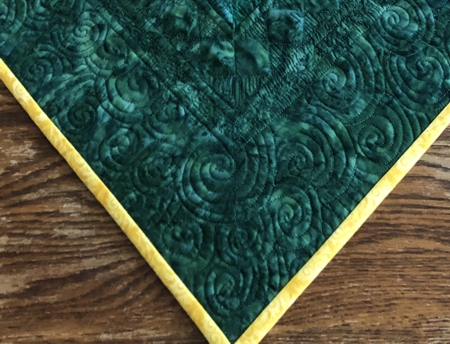
We quilted in a free-motion style all over the quilt. |
|
Press with heavy steam. Square the quilt: trim the pointed edges first, then decide on the width of the tablerunner and cut away the sides accordingly. We left 2 1/2" margins on each side of the central square. You can make the tablerunner wider or narrower, according to your needs.
|

|
| Finish the raw edges with the binding. |
|
| Have fun! |
|
|
|
|
Back to Celtic Star
|
Back to Projects Page
|