We have a large selection of snowflake designs in different styles that wouldbe suitable for this project, for example Snowflake Set #30211, Geometric Snowflake Set # 30128, Hearts and Flowers Snowflake Set # 30125, Shades of Winter Snowflake Set #30113, Snowflake Set #16461. We used the designs from the one-color Snowflake Set. All designs in this set are for the small hoop (4" x 4").
|
|
You will need :
- embroidery threads either polyester or rayon,
- craft felt, red and white, (the amount of felt you need depends on the size and number of your chairs),
- white pom-poms, about 4" in diameter, or white acrylic yarn to make pom-poms and tapestry needle,
- light-weight embroidery stabilizer,
- rotary cutter or scissors,
- #12-14 sewing needle,
- sewing thread of matching colors,
- chalk or fabric marker and quilter's ruler.
|
Cutting.
|
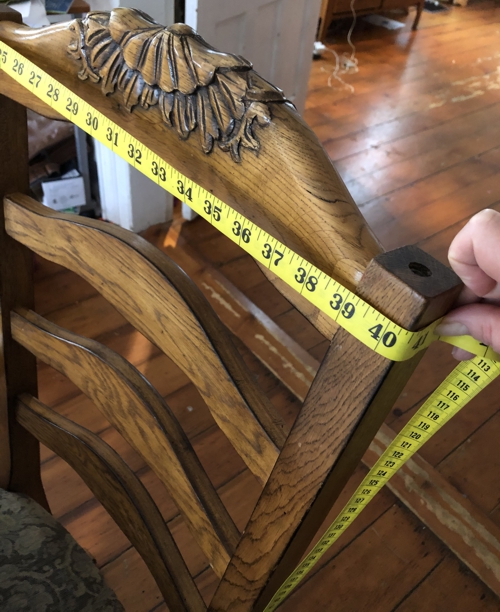
Measure the circumference of the chair back at its widest part. Divide the measurement by 2 and add 1" for ease and seams.
Thus the circumference of our chair is 41". Divided by 2 = 20 1/2", plus 1" = 21 1/2". We round it up to 22".
|
|
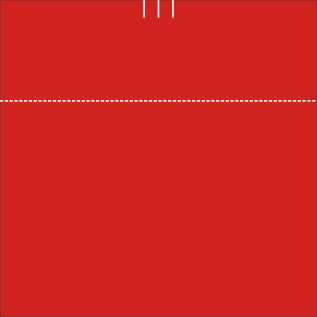
On red felt, with chalk or marker, draw a square measuring 22" x 22".
|
Measure 7" from the top edge and draw a line across the square, dividing into a top and bottom rectangles.
|

|
Mark the center point of the top edge. Measure 1" to each side of the mark.
|
|
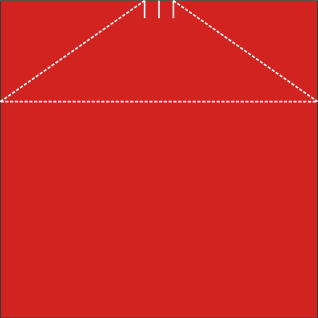
Connect the bottom corners of the top rectangle with the marks on the upper edge.
|
|
Cut out. Using this pattern, cut out as many parts as you need. You need 2 for each chair.
|

|
Out of white felt, for each cover, cut 2 strips measuring 10" x 22" (or the width of the chair). This part should be of the same width as the red part.
|
|
Sew the white strips to the lower edges of the red parts. Seam allowance 1/2".
Open the seam and top-stitch 1/4" on each side of the seam.
|

|
Embroidery
|
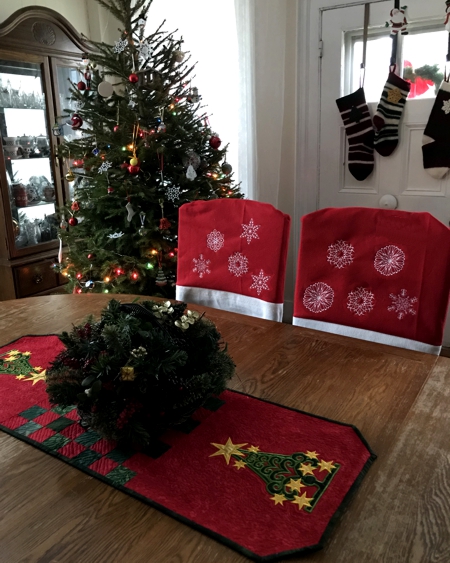
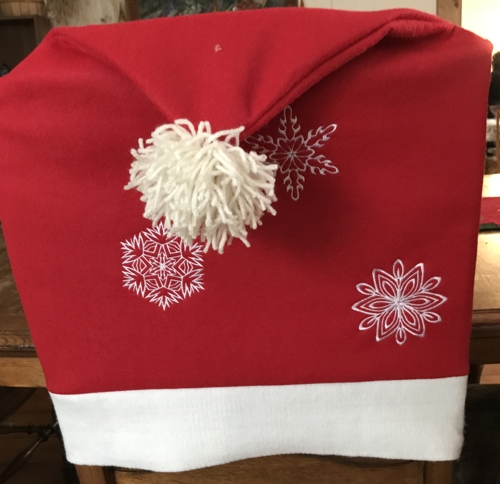
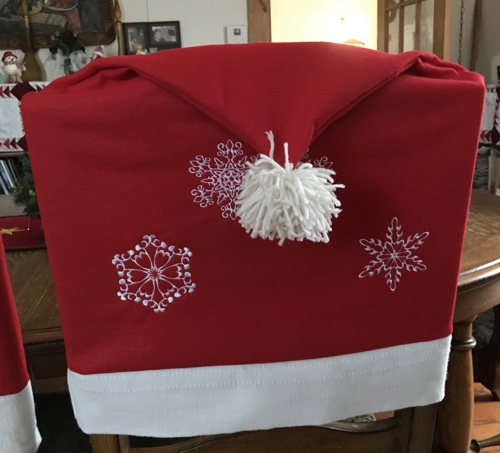
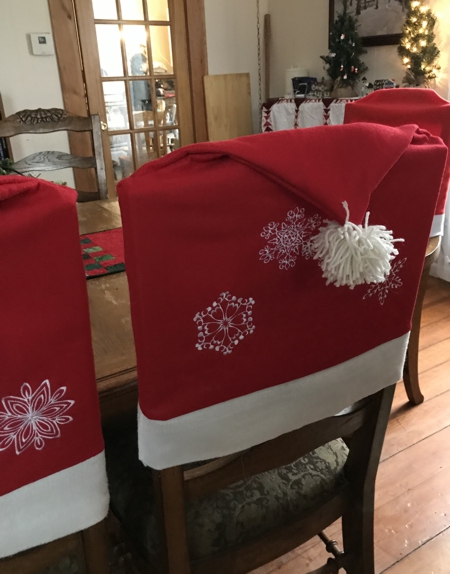
Distribute the snowflake patterns on the red part of the working piece. Use light-weight embroidery stabilizer. Embroider the designs one by one.
|
|
Assembly:
|
Position 2 parts together, face inside, align all edges. Pin.
Topstitch along the sides, leaving the lower side open. Seam allowance about 1/2".
|
Fold the white strip in half using it to cover the seam between the red and white felt. Pin. Topstitch in place.
|
|
Turn the working piece right side out. Sew a pom-pom to the point.
|
|
If you do not have a pom-pom, use white yarn to make it. There are different methods to make a pom-pom, here is the easiest and fastest one.
Tuck the end of yarn between the index and middle fingers. Start wrapping the yarn around 4 fingers leaving the thumb free.
Remove the yarn from fingers.
Tie the center with a separate length of yarn, leaving the ends about 10" long. Shape the pom-pom.
|
|
Insert the ends into a tapestry needle and secure the pom-pom to the hat tip.
|
|
|
|
Back to Snowflake Set
|
Back to Projects Page
|


