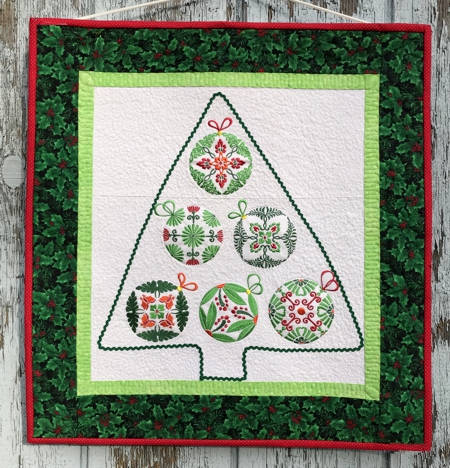
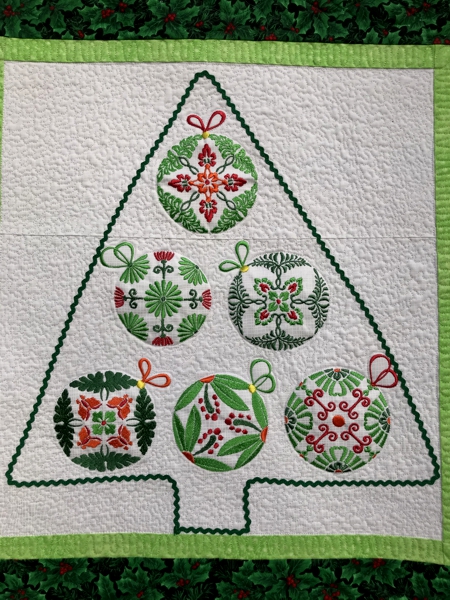
This small, cute Christmas-themed wall quilt features the designs from the Floral Christmas Ornament Set.
All designs are for the small hoop (4"x 4"), but if you have a bigger hoop, you can embroider several of the designs at one time.
The finished size of the quilt is about 20 1/2" x 21 1/2".
|
|
You will need :
- embroidery threads, you can use either our color card or choose your own colors,
- white cotton fabric for the central part,
- small amount of lime green fabric for the first border,
- Christmas patterned fabric for the second border,
- red binding,
- forest green rick-rack,
- light- to medium- weight embroidery stabilizer,
- batting and backing,
- iron,
- sewing pins and quilting pins,
- quilting and sewing threads of matching colors,
- quilting and sewing needles,
- quilter's ruler and rotary cutter.
|
Embroidery:
|
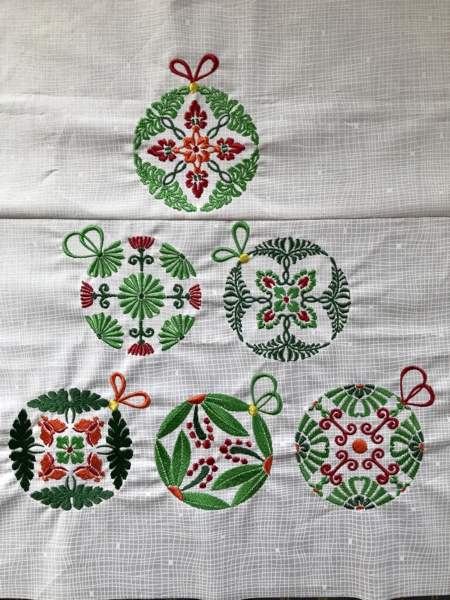
Stabilize 2 pieces of white fabric with cut-away stabilizer. Upload the files from the Floral Christmas Ornament Set into the machine. Hoop the first piece of fabric in a small hoop. Embroider one design so that the bow looks upright.
Hoop the second piece of fabric in a 8" x 12" hoop, if you have one. Upload the remaining files. On the screen of your machine, open the files one by one and position them in 2 columns: 2 files in one column, and 3 files in the second column. Try to space the designs evenly. When you have arranged all 5 designs, emroider them one by one.
|
Cutting
|
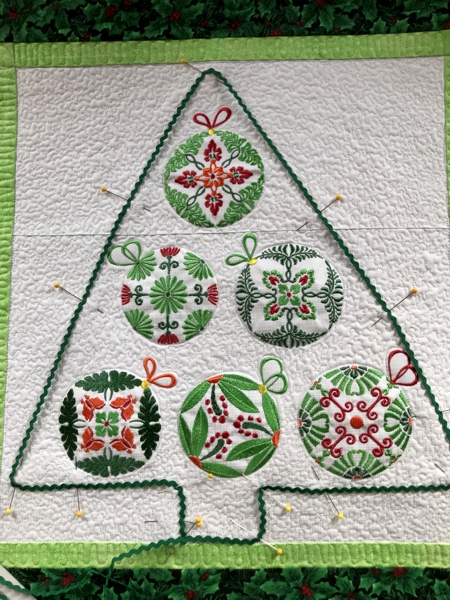
Align the first and the second embroidered pieces so that embroidery forms a pyramid shape. Trim the matching edges and sew the pieces together. Press the seam. Trim the piece to 14 1/2" x 15 1/2".
|
|
Out of lime green fabric, cut
- 2 strips measuring 1 1/4" x 14 1/2" and
- 2 strips measuring 1 1/4" x 17".
Out of patterned fabric for the second border, cut
- 2 strips measuring 2 1/2" x 16" and
- 2 strips measuring 2 1/2" x 21 1/2".
|
Assembly:
|
Note: seam allowance is 1/4", press the seam immediately after you make it.
|
Sew the shorter lime strips to the upper and lower edges of the central part.
|

|
| Sew the longer lime strips to the left and right edges of the central part. |

|
| Sew the shorter strips of the patterned fabric to the upper and lower edges of the working part. |

|
| Sew the longer strips of the patterned fabric to the left and right edges of the working part. |

|
Quilting and Finishing:
|
Now place the backing on a flat surface (table) face down. Cover with batting. Spread your working piece over it.
Pin all layers together.
We quilted in a free-motion style all over the piece. |
| Press with heavy steam. Square the quilt. Finish the raw edges with the binding. |
With rick-rack and sewing pins lay out the shape of a tree around the ornaments.
|
|
Topstitch the rick-rack in place.
|
|
Have fun!
|
|
|
Back to Floral Christmas Ornament Set
|
Back to Projects Page
|


