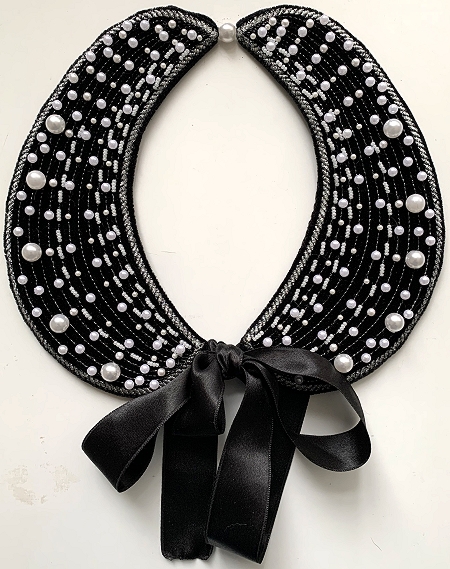
These are instructions on how to embroider the files from the Detachable Peter Pan Collar.
There 4 files in the set: 2 files with different patterns on the collar and 2 files with their mirror images.
All files are embroidered in the same way.
|
|
You will need :
- embroidery threads either polyester or rayon, any color (we used silver metallic),
- fabric for the collar (we used black velvet on a knitted base ),
- 1 1/2 yard of 5/8" - 7/8" wide satin ribbon, cut it in half to get 2 equal pieces,
- fabric for the lining (we used poly satin silk),
- medium-weight cut-away embroidery stabilizer,
- sewing pins, scissors, fabric marker, iron,
- embroidery or metallic needle #12,
- sewing needle and thread of matching color,
- faux pearls of different sizes, or any other beads of your choice,
- needle and invisible thread for attaching beads.
|
Embroidery:
|
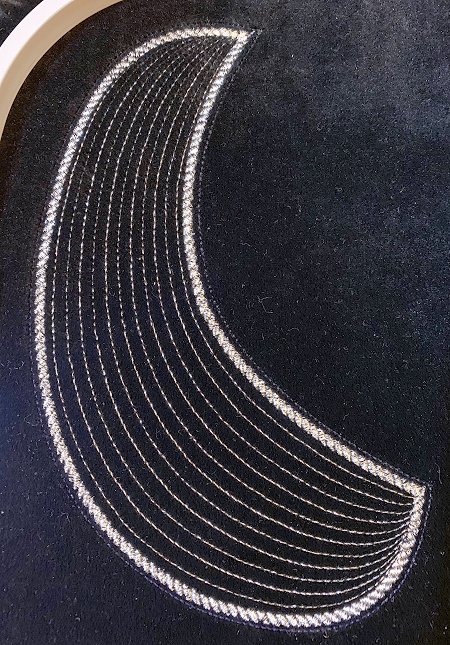
Hoop fabric with cut-away stabilizer. Tighten the hoop.
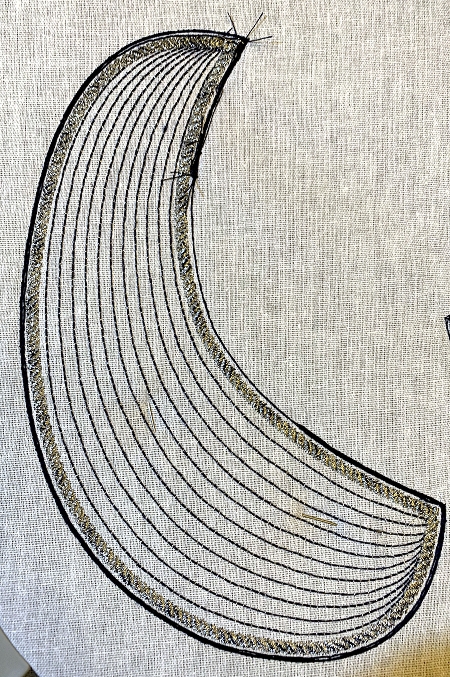
Choose between files 1 and 2. We show how we embroidered and decorated file 2, file 1 is embroidered in the same way. Upload the file into the machine. Start embroidering.
The first color will embroider the outline of the collar and stop. Change thread if needed.
The second color will embroider the pattern on the collar. Change thread if needed.
The third color will embroider the decorative edge of the collor.
|
|
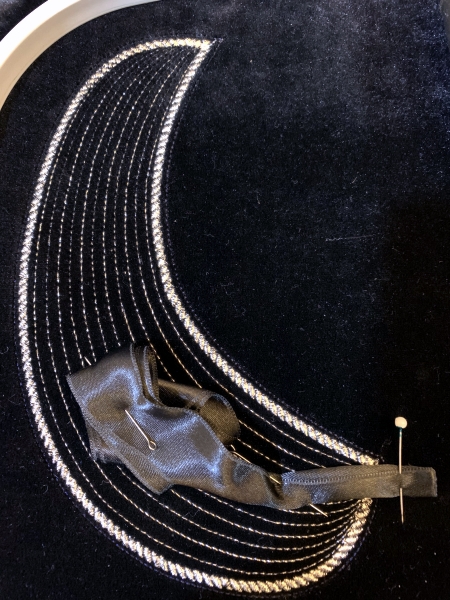
Before starting the 4th color, pin a piece of ribbon as shown on the picture below: fold one end in half and pin in the corner outside the embroidery. Fold the remaining length of ribbon and pin on the collar away from the edges of the stitch-out.
|
|
Cover the stitch-out with the lining fabric, face down. You can pin it outside the embroidery field.
Start the machine, it will embroider the outline of the collar over the lining.
|
|
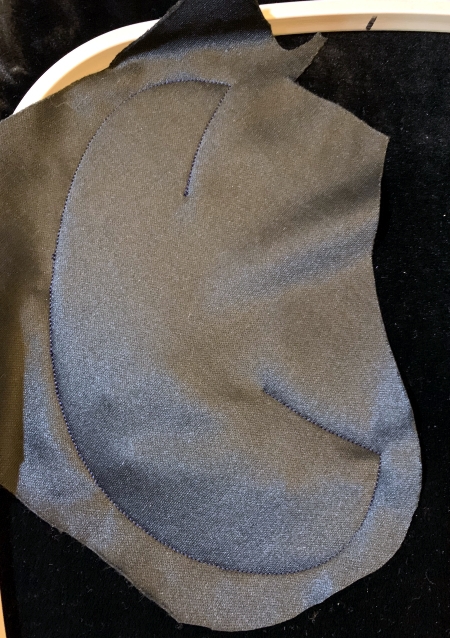
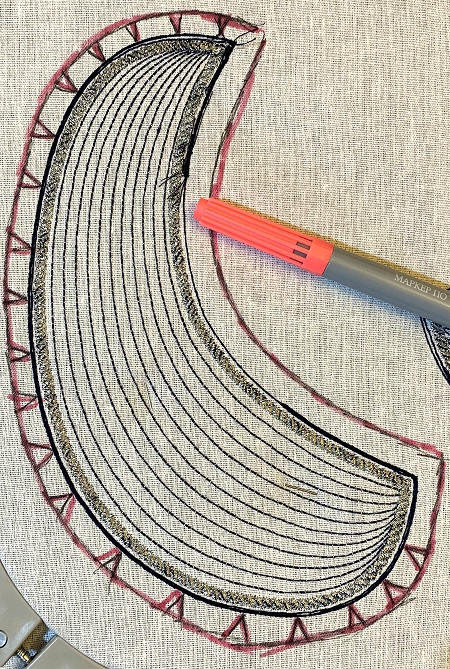
Open the hoop. Place the piece on the table with the back side facing up.
|
|
With a fabric marker, draw seam allowance of about 1/2", with notches on the curves.
|
|
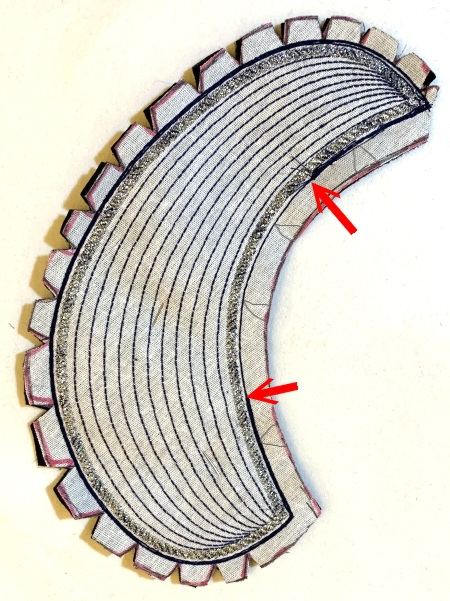
Cut out the piece with seam allowance. Cut out the notches, taking care not to cut through the stitches.
Turn the working piece right side out through the unsewn opening.
|
|
|
In the same way make the mirror image of the file.
|

|
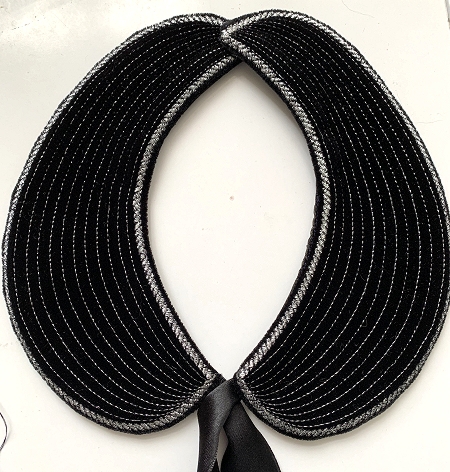
| Straighten all edges, press from the lining side. Hand-stitch the opening closed. |
|
Decorating:
|
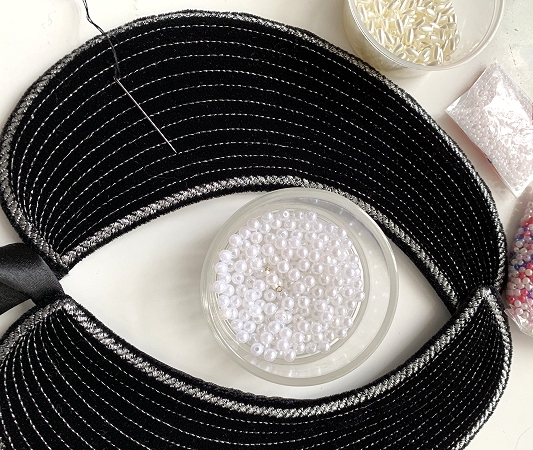
| Prepare beads, needle and thread for decorating the collar. |
|
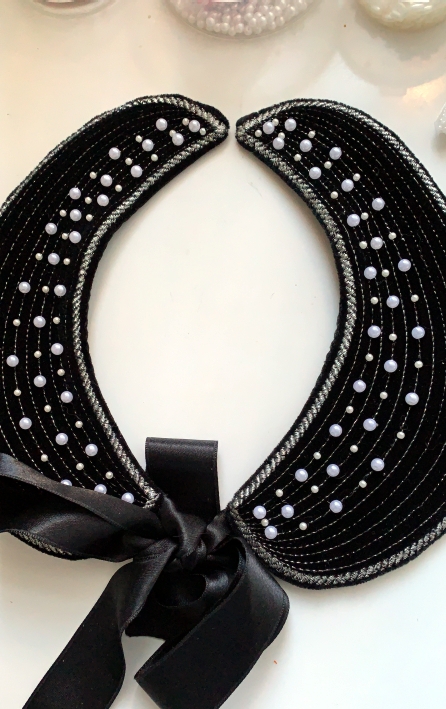
Attach the beads along the embroidered lines.
|
|
Sew together or connect the back corners of the collar (we used a large pearl bead).
|
|
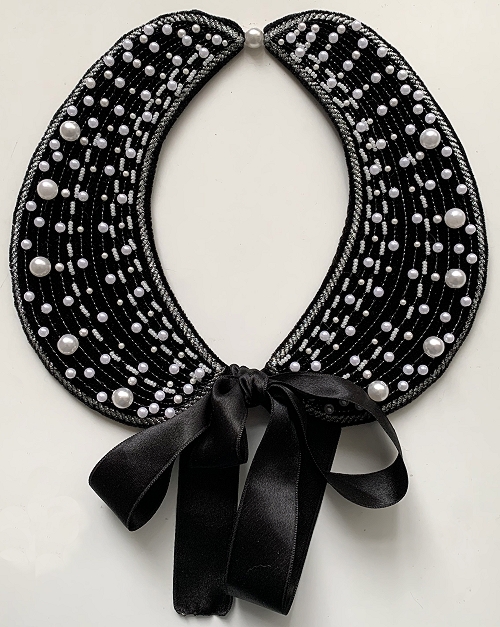
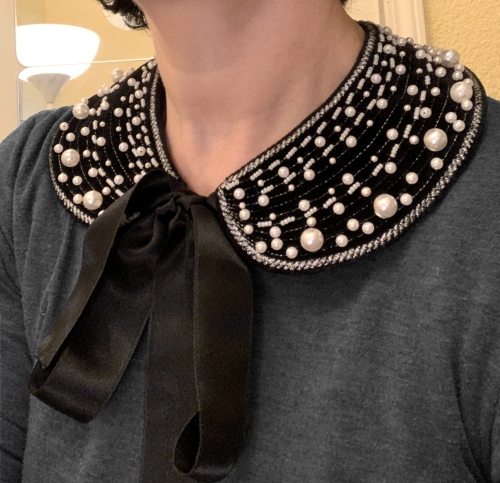
| Have fun! |
|
|
|
Back to Detachable Peter Pan Collar
|
Back to Projects Page
|


