These are instructions on how to embroider the Doll Collar.
The collar will fit 18"-19" dolls such as American Girl, Our Generation, My Life As, Gotz and other dolls of similar size, with neck circumference 6".
|
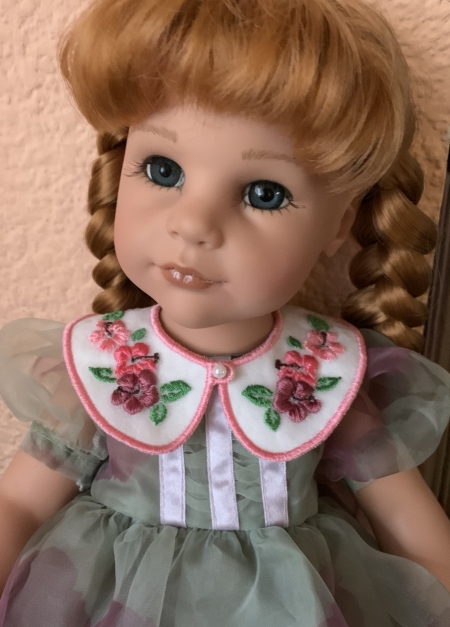
Our model is Hannah Gotz, 19 1/2" doll.
|
|
You will need :
- embroidery threads, either polyester or rayon; you can use our colors cards, or choose your own colors,
- organza,
- a small piece of cotton fabric (we recommend solid pastel colors),
- water-soluble embroidery stabilizer,
- applique scissors,
- 2-4 sewing pins or temporary adhesive, or narrow scotch tape,
- a small bead or button.
|
Embroidery:
|
There are 2 files in the set, L and R, they are embroidered almost in the same way.
|
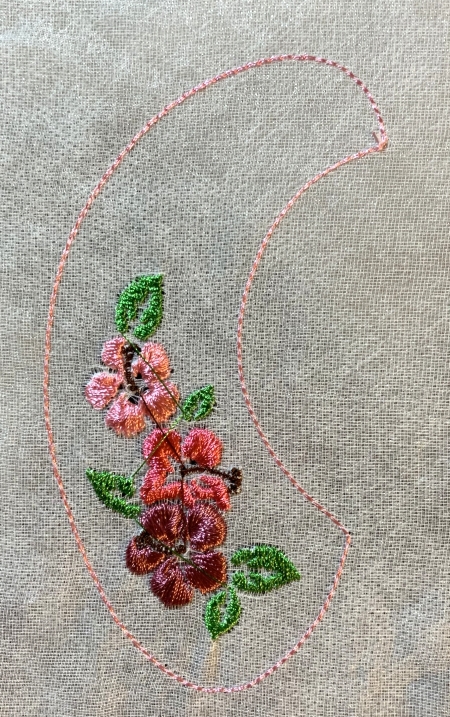
Step One: Upload the L file from the set into the machine. Select threads.
Hoop a layer of watersoluble mesh and organza. Tighten the hoop. If your hoop is old, consider wrapping the long sides of the hoop with stripes of muslin for better grip.
Start the machine. The first color will embroider the outline of the collar and stop.
|
Step Two: The colors 2-4 embroider flowers, color 5 embroiders the flower's pestles and color 6 embroiders leaves. Change threads as needed. Embroider the design up to the last 2 colors, 7 and 8.
|
|
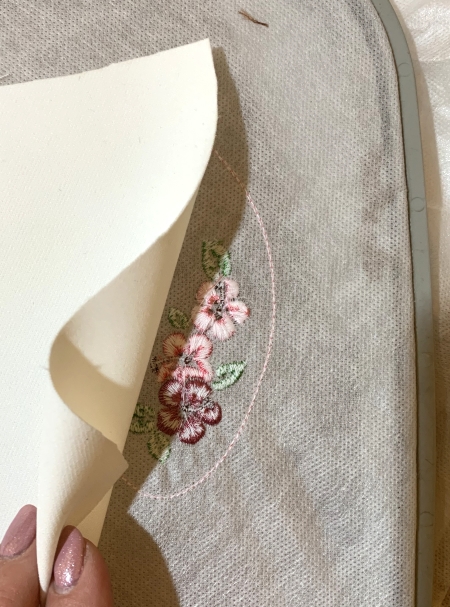
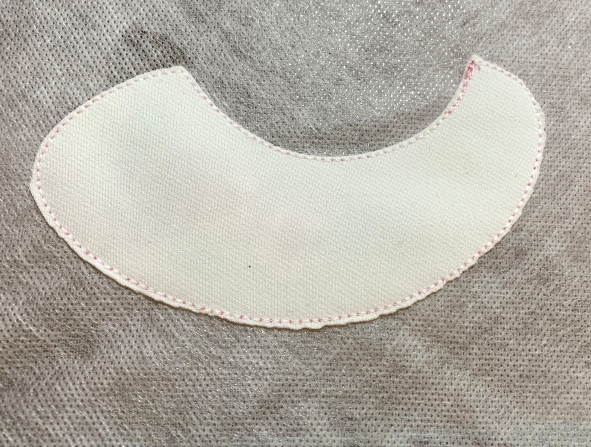
Step Three: Before you start embroidering color 7, take the hoop from the machine and place a piece of fabric over the back of the collar.
|
|
| Pin the fabric to the stitch-out from the front outside the embroidery area. You can also use either a temporary adhesive or scotch tape. Be careful choosing an adhesive, make sure your adhesive is not water-based and apply it to the fabric, not to the stabilizer. |
|
Return the hoop to the machine and start it. It will embroider the outline of the collar again.
|
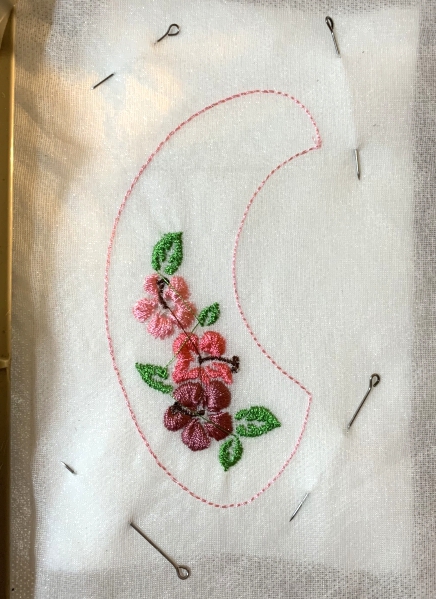
| Step Four: Take the hoop from the machine and with a pair of sharp scissors cut away the back fabric. Take care not to cut through the stitches or through the watersoluble mesh. |
|
Step Five: The last color finishes the raw edges.
|
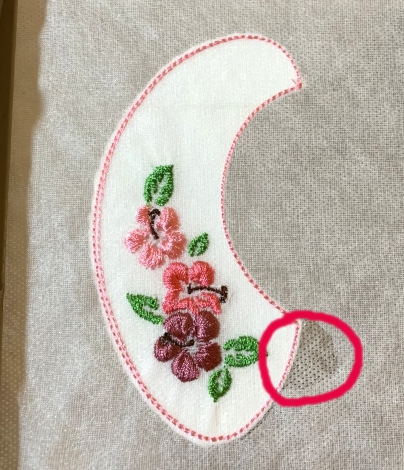
For the file R repeat steps 1-4. After you cut away the backing fabric, also cut away some organza in the place shown on the picture below.
|
|
| Step Six: Take the stitch-out from the hoop, cut away the excess stabilizer, wash away the remainder. Let the stitch-outs dry. Press if needed. |
Step Seven: Cut away the excess organza. Attach a bead or button.
|
| Note: You can cut away organza around the stitches after Step 4, but be very careful not to cut through the stabilizer. |

|
|
Have fun!
|
|
Back to Doll Collar
|
|


