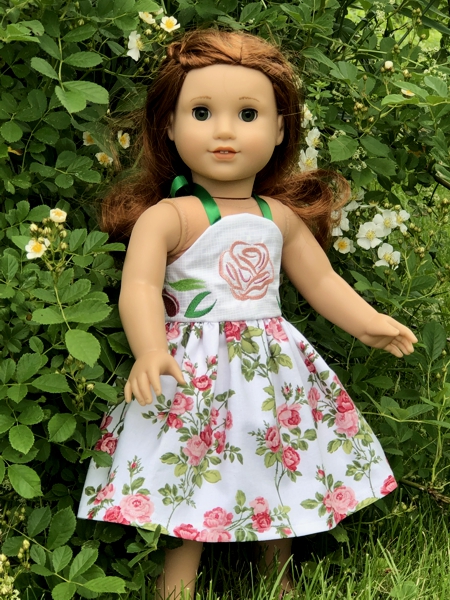
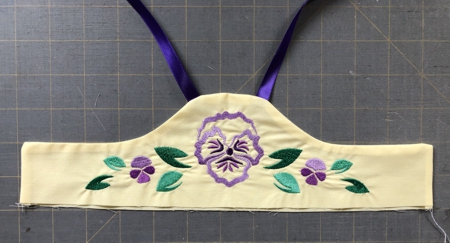
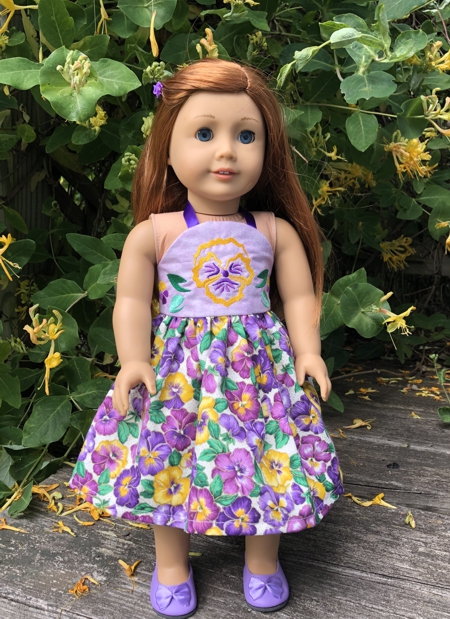
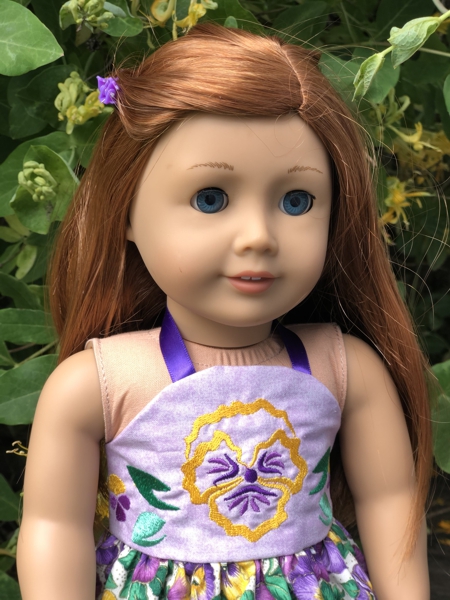
These are instructions on how to embroider the bodice for a halter-top dress and assemble the dress. The designs are from the Halter-Top Doll Dress Set.
The dress is designed to fit 18-inch dolls like the American Girl Doll, Our Generation and other 18-inch dolls with a similar body.
|

|
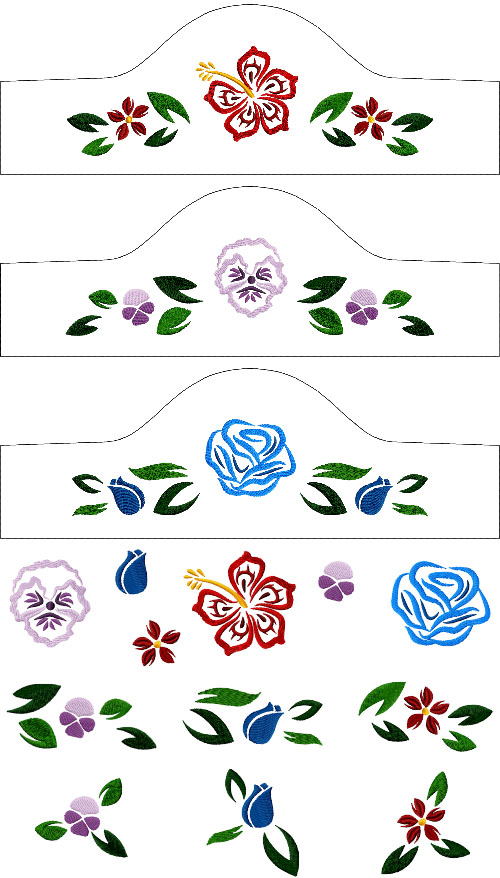
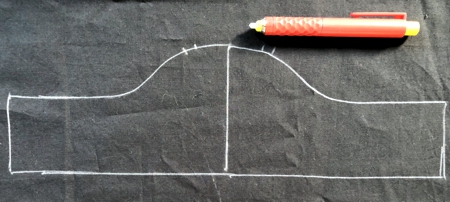
There are 15 files in the set. 3 of them are for the Commercial Hoop (at least 12" long), the rest are for the small hoop (4" x 4"). The files for the 12" long hoop contain the outline of the bodice and the embroidery on it. However, if you do not have a hoop this size, you can use the small designs together with the paper template which is enclosed with the set.
|
|
You will need:
- embroidery threads, either polyester or rayon, in your choice of colors,
- a small amount of solid colored fabric (cotton is preferred), in your choice of color, for the bodice,
- matching fabric for the skirt (7 1/2" x 30" for the short skirt, 10 1/2" x 30" for the long dress),
- small amount of light-weight cotton fabric for the bodice's lining,
- light-weight iron-on cut-away embroidery stabilizer,
- 3/8" wide satin ribbon,
- a piece of one-wrap Velcro tape or 3 sew-on snaps,
- chalk pencil or marker,
- "Fray Check" glue,
- quilter's ruler and rotary cutter,
- scissors,
- iron,
- sewing threads of matching colors,
- sewing pins,
- needle for hand stitching,
- printer.
|
|
Embroidery
|
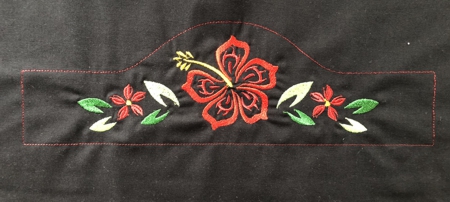
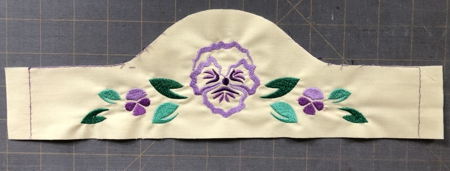
If you have a 12" long hoop, upload the "Bodice" file into the machine.
Stabilize the solid-colored fabric with light-weight iron-on stabilizer.
Select threads. Embroider the file.
|
|
Add 3/4" inches on each short side of the stitch-out.
|
|
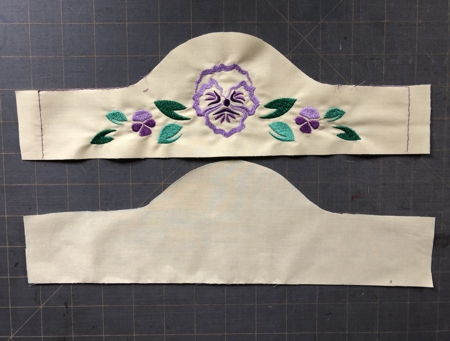
Cut out the bodice stitch-out. Remove the running stitch outline. Do not remove the stabilizer.
|
|
Using the stitch-out as a template, cut out the lining.
|
|
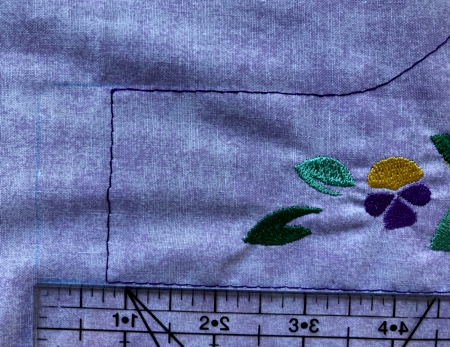
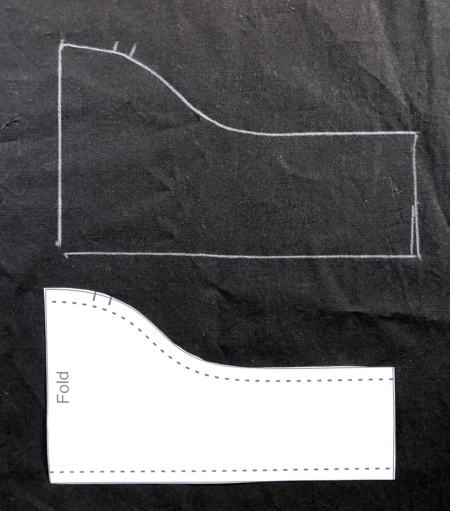
If you do not have a long hoop, print out the template of the bodice (attached to these instructions as a separate PDF file).
Cut it out. Position it on fabric and trace the outline with a chalk pencil.
|
|
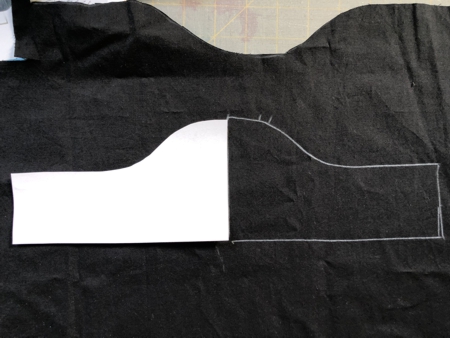
Flip the template and trace its mirror image.
|
|
Now choose the embroidery files for the bodice and embroider them one by one within the outline you have made.
|
|
Assembly of the Bodice
|
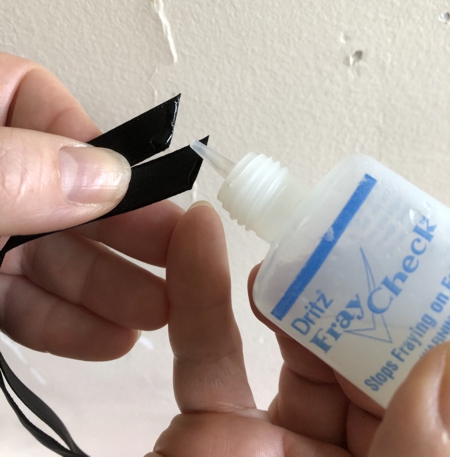
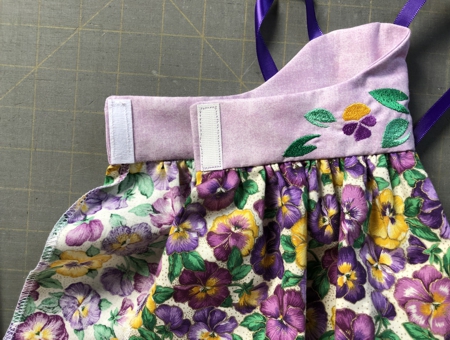
Cut 2 pieces of 3/8" wide satin ribbon. The pieces should be 13"-15" long. Apply a small amout of Fray Check to one end of each piece.
|
|
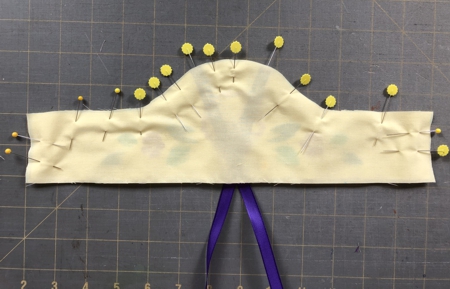
Pin the ends on the ribbons in the places indicated on the template.
|

|
Cover the working piece with the lining, right side to right side. Pin them together.
|
|
Topstitch along one short side, along the upper edge, then along the other short side. Seam allowance 1/4".
Cut the corners and clip the curves.
Turn right side out and press.
|
|
Adding a Skirt
|
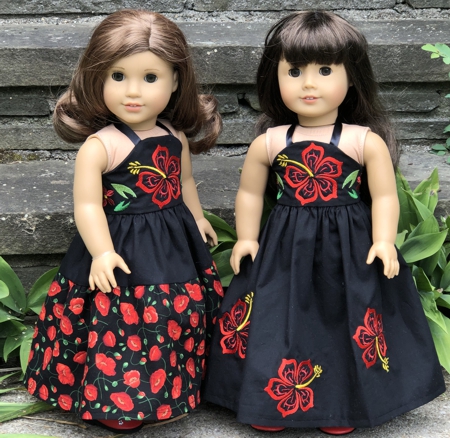
You can make any size skirt you like.
For the shorter skirt, we used a 7 1/2" wide and 30" long piece of fabric. For the longer skirt we used a piece measuring 10 1/2" x 30 1/2".
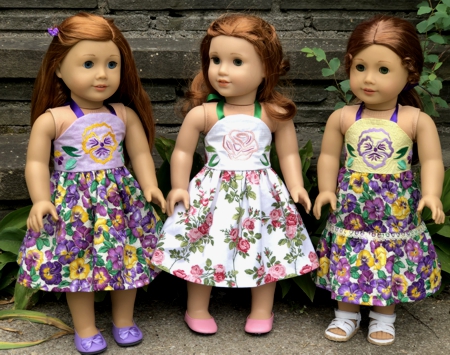
You can use either patterned fabric or embroider the solid-colored fabric using the designs from the set.
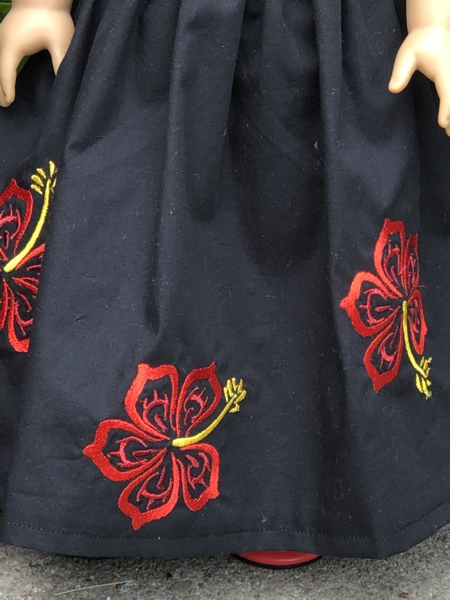
For example, for this long skirt, we used the design of a hibiscus.
|
|
For this long skirt we used a strip of black and a strip of patterned fabrics.
|
|
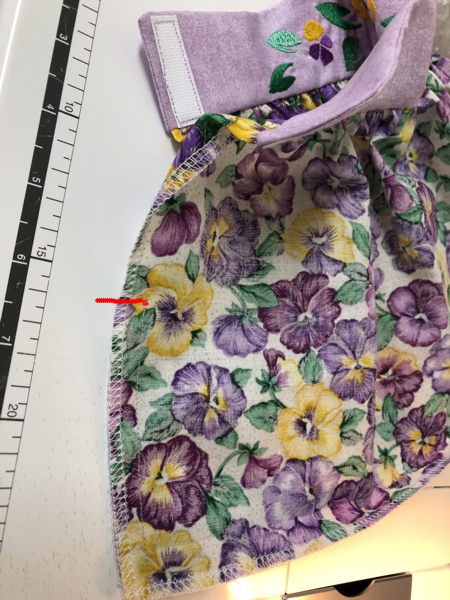
Zig-zag or serge the raw edges on the fabric: both short sides and one of the long sides.
Fold and press the sides 1/2" back. Fold and press the finished long edge 1/2" back.
|
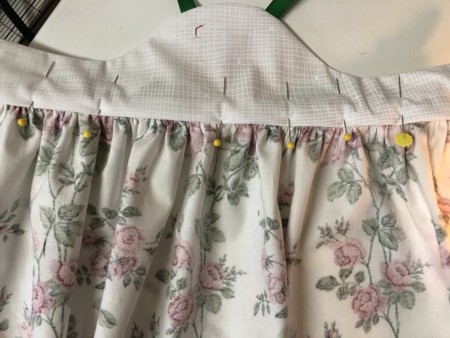
| Sew 2 rows of gathering stitches along the unfinished edge of the fabric strip between the folded edges. |
| With pins, mark the center of the bodice front and the center of the skirt. |
Fold the lining out of way. With right sides together, pin the bodice and skirt together at the centers. Pull the gathering stitches on the skirt. Distribute the gathers evenly. Pin the bodice and skirt together.
|
Stitch the skirt to the bodice, working from the side of the bodice. Seam allowance 1/4".
Remove all gathering threads. |
Press the seam allowance up.
|
Fold and pin the lower edge of the lining. Hand stitch it in place. Press.
|
|
Put the dress on your doll to figure out the exact position of the Velcro tape.
Sew the tape in place.
|
|
Sew the back seam from the hem 5" up. Press it open.
|
|
Fold back and finish the hem.
|
|
|
Have fun!
|
|
|
|
Back to Halter-Top Doll Dress Set
|
Back to Projects Page
|


