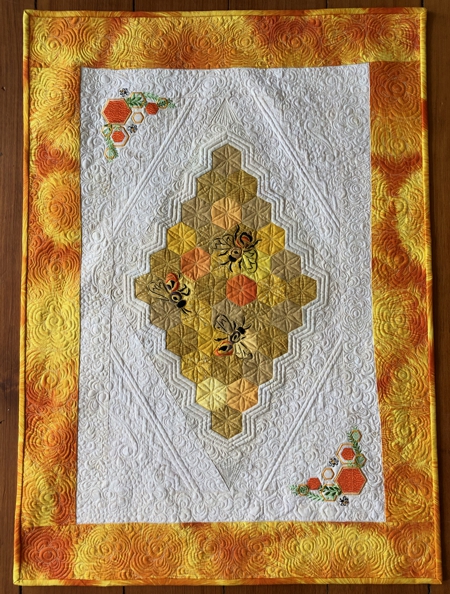
For this unique table runner, we used the designs from the Bee Set and Honeycomb Border Set.
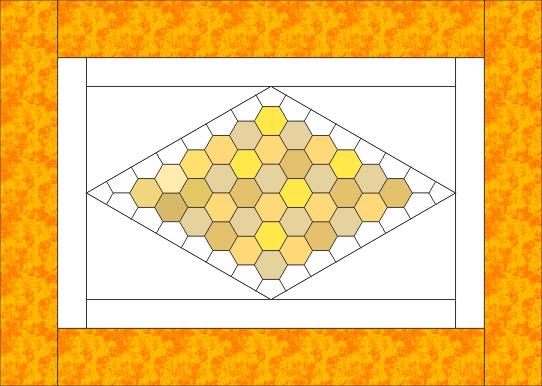
The finished size of the tablerunner is about 26" x 36".
|

|
You will need :
- embroidery threads according to the color cards of the designs,
- scraps of different yellow and pale orange fabrics for the honeycomb in the central part,
- about 1/2 yard of light-colored fabric for the central part (we chose pale cream fabric),
- about 1/2 yard of bright patterned fabric for the borders,
- light-weight cut-away embroidery stabilizer,
- fabric for the backing,
- batting,
- quilter's ruler,
- rotary cutter,
- iron,
- #12 universal needle,
- #12-#14 quilting needle.
|
For the central part, you will need hexagon-shaped pieces. If you have a hexagon ruler, cut hexagons with finished height of 2". If you do not have the ruler, please download the template here.
|
| Download the template file for the hexagon. To open and print the template, which is a PDF file, you will need Adobe Reader or a similar program. Adobe Reader is free to download and install. |
| Template Download (PDF file) |
Print out the template and cut it out. Seam allowance of 1/4" is included with the template.
|
Cutting:
|
Out of the yellow and orange scraps, cut 36 hexagons.
Out of light-colored fabric, cut:
- 28 hexagons.
- 2 rectangles measuring 8" x 13 1/2",
- 2 strips measuring 2 1/2" x 26" and
- 2 strips measuring 2 1/2" x 15 1/2".
Out of fabric for the borders, cut
- 2 strips measuring 4 1/2" x 30", and
- 2 strips measuring 4 1/2" x 27 1/2".
Use the remaining border fabric for the binding.
|
|
Assembly:
|
| Note: seam allowance is 1/4", press every seam immediately after you make it. |
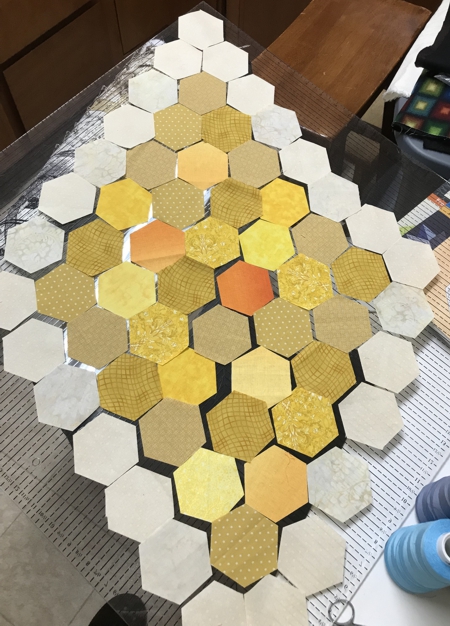
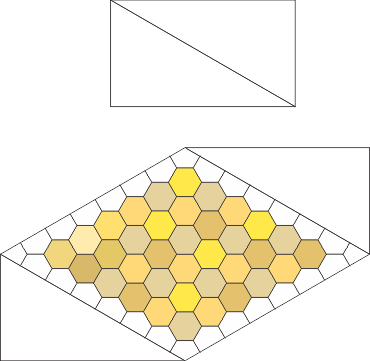
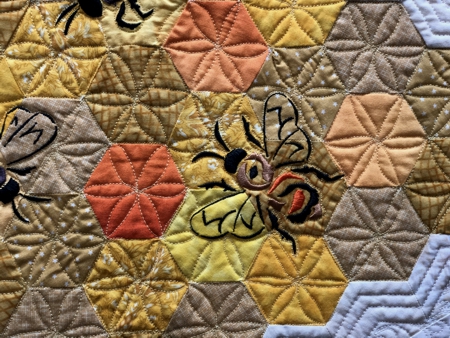
Arrange the colored hexagons in a diamond shape.
- Start with 1 hexagon on top.
- Put 2 hexagons in the second row.
- Put 3 hexagons in the third row.
- Go on up to 6 hexagons in the 6th row, then start decreasing hexagons.
- 5 hexagons in the 7th row, 4 in the 8th row.
- You will be back down to 1 hexagon in the 11th row.
Then add a row of light-colored hexagons around the colored ones.
|
|
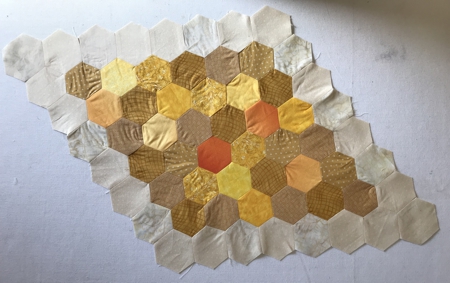
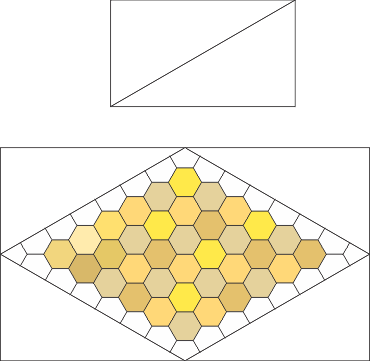
Sew the hexagons together one-by-one to make the central part.
|
|
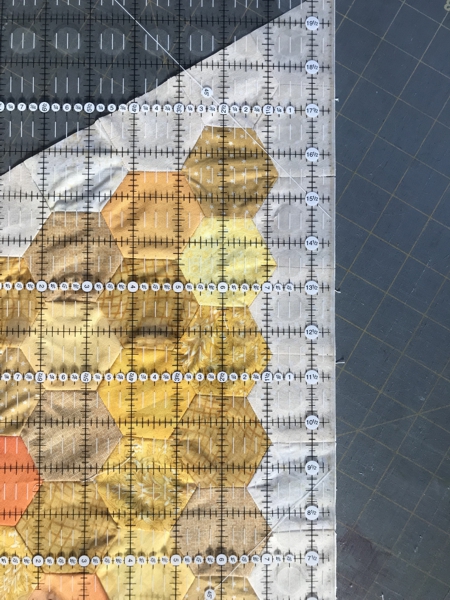
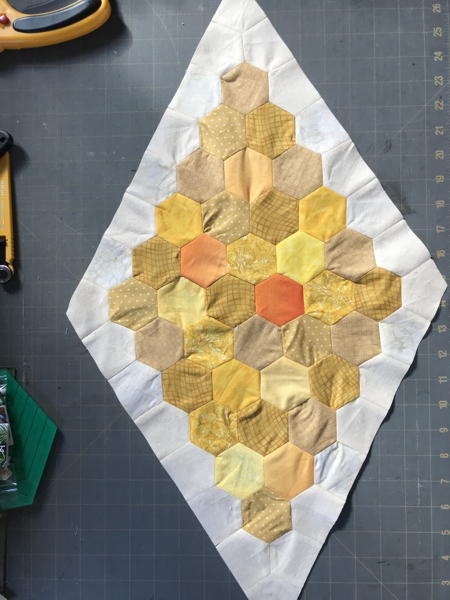
With a rotary cutter and quilter's ruler even the edges of the piece to form a diamond shape.
|
|
|
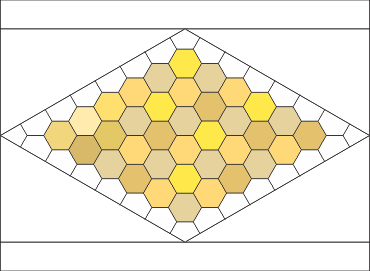
Cut one of the 8 x 13 1/2" rectangles diagonally from the upper left corner to the bottom right corner to form 2 triangles. Sew these triangles to the upper right edge of the central part and lower left edge of the central part.
|
|
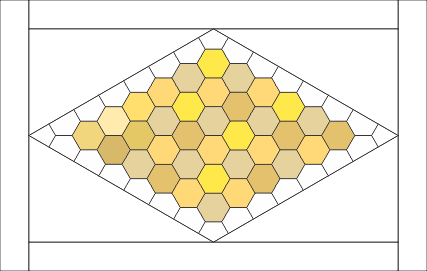
| Cut the other 8 x 13 1/2" rectangles diagonally from the upper right corner to the bottom left corner to form 2 triangles. Sew these triangles to the upper left edge of the central part and lower right edge of the central part. |
|
Measure the length of the working piece. It should be about 25 1/2". Adjust the length of the light-colored 2 1/2" x 26" strips accordingly. Sew them to the long edges of the working piece.
|
|
Sew the 2 1/2" x 19 1/2" to the short edges of the working piece.
|
|
Sew the 4 1/2" x 30" borders to the long edges and the 4 1/2" x 27 1/2" borders to the short edges of the tablerunner.
|
|
Embroidery:
|
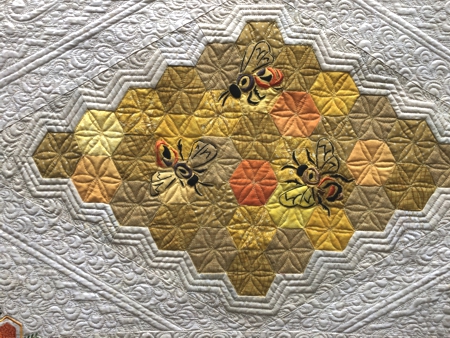
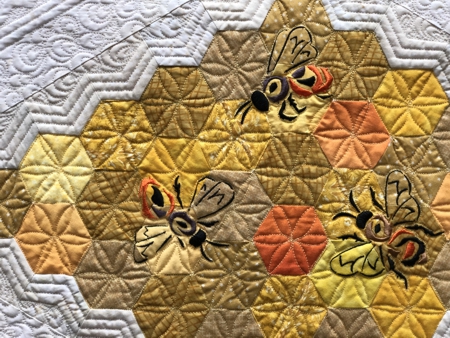
Mark the position of the Bees on the central part. If you have a printer and embroidery software, print-outs of the designs are helpful. Otherwise, you can cut out paper templates to represent the designs.
Stabilize the chosen area. Hoop the fabric tightly and embroider the designs one by one.
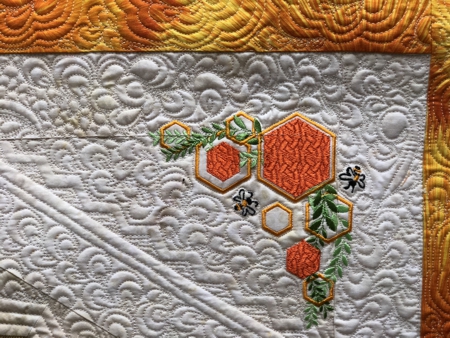
In the opposite light-colored corners of the tablerunner, we chose to embroioder the square designs from the Honeycomb Border Set.
Feel free to use either these designs or other embellishments, such as flowers.
|
|
Quilting and Finishing
|
Now place the backing on a flat surface (table) face down. Cover with batting. Spread your working piece over it.
Pin all layers together.
We quilted in a free-motion style all over the quilt. |
|
| Press with heavy steam. Square the quilt. Finish the raw edges with the binding. |

|
| Have fun! |
|
|
|
|
|
Back to Bee Set and Honeycomb Border Set
|
Back to Projects Page
|


