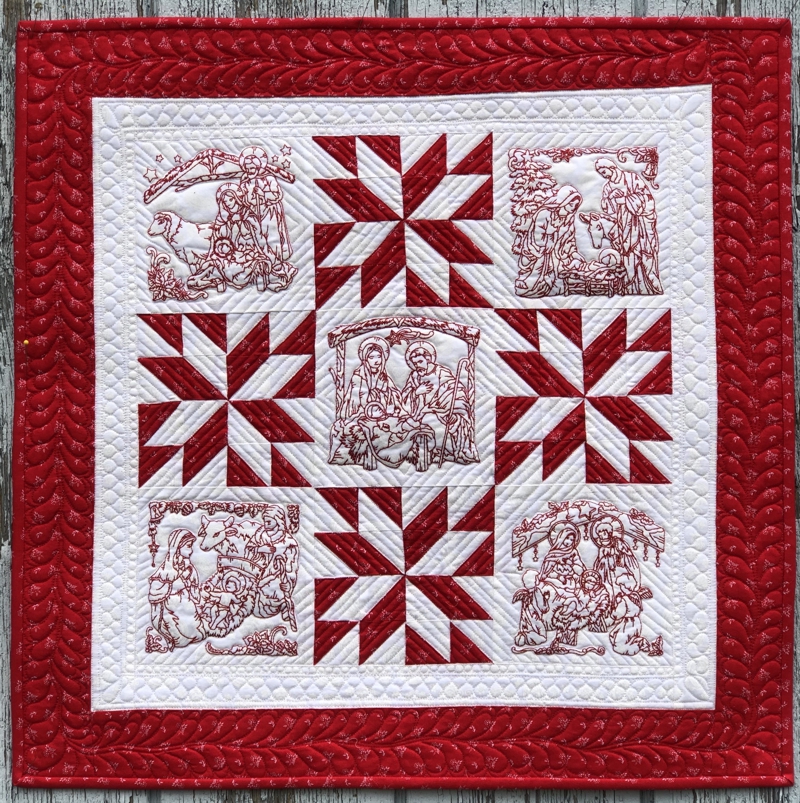
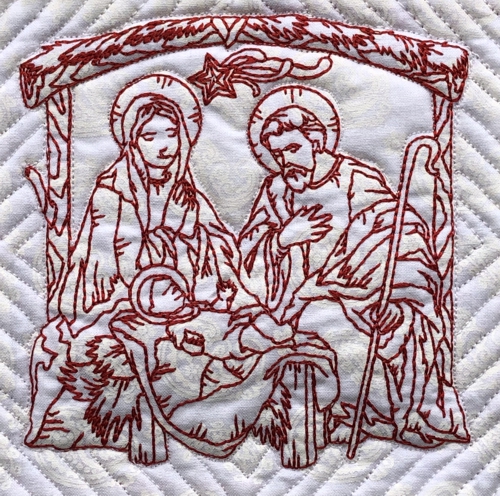
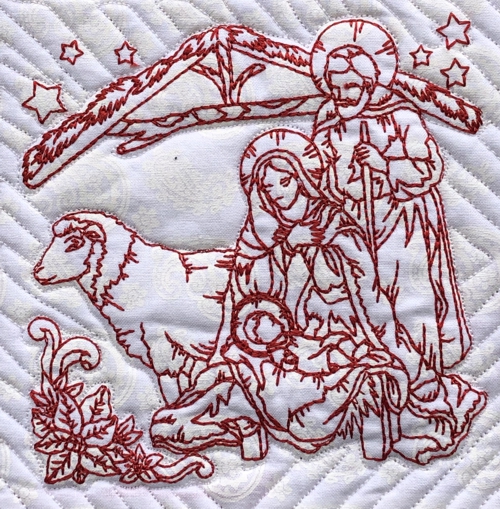
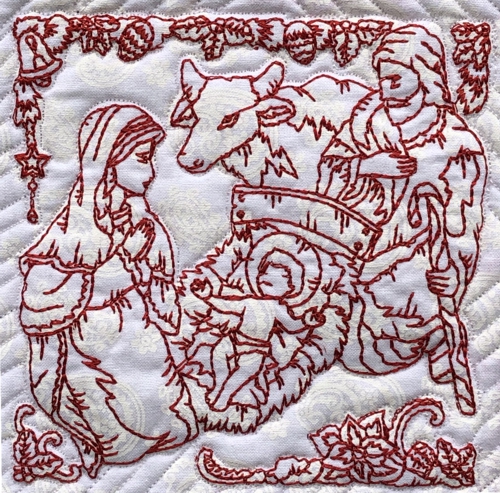
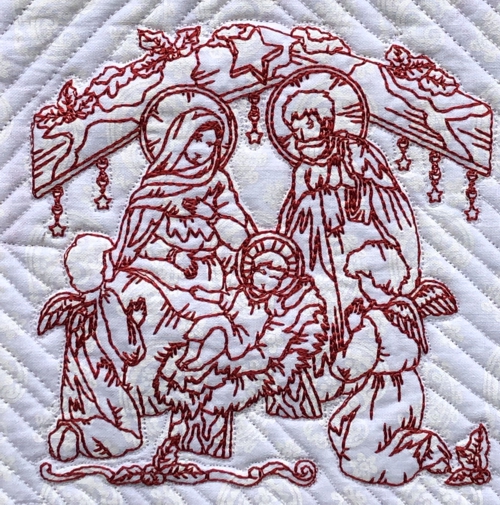
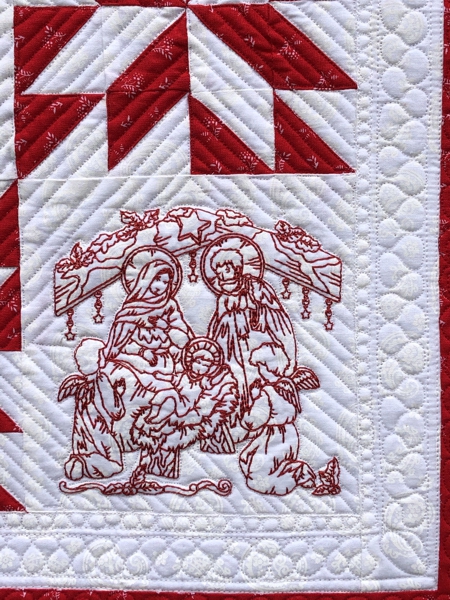
This bright Christmas-themed quilt features designs from the One-Color Nativity Set.
The finished size of the quilt is about 25" x 25". |
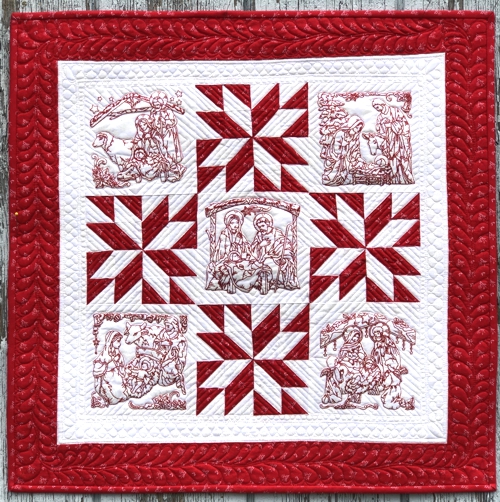
Click to enlarge
|
You will need :
- red embroidery threads, either polyester or rayon,
- 1/2 yard of white fabric,
- about 1 yard of red fabric,
- light-weight cut-away embroidery stabilizer,
- fabric for the backing,
- batting,
- quilter's ruler,
- rotary cutter,
- iron,
- #12 universal needle,
- #12-#14 quilting needle.
|
Cutting:
|
Out of the white fabric, cut
- 5 squares measuring 6 1/2" x 6 1/2" each,
- 2 strips measuring 2" x 18 1/2",
- 2 strips measuring 2" x 21 1/2".
Cut the remaining fabric into several strips 2 7/8" wide and the maximum length your fabric permits.
Out of red fabric, cut
- 2 strips measuring 3 1/2" x 21 1/2",
- 2 strips measuring 3 1/2" x 27 1/2"
Cut the remaining fabric into several strips 2 7/8" wide and the maximum length your fabric permits.
Use the remaining red fabric for the binding.
|
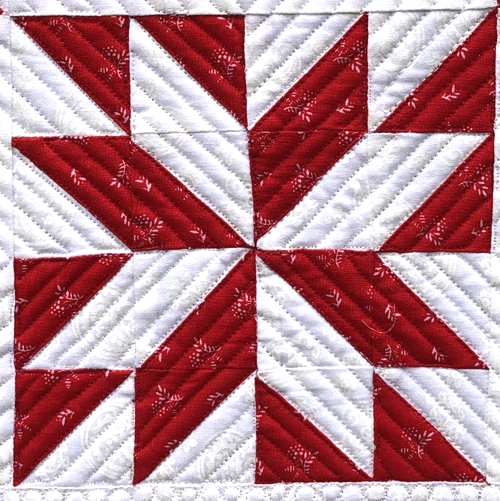
Annie's Choice Block:
|
Note: seam allowance is 1/4", press each seam after you make it.
|
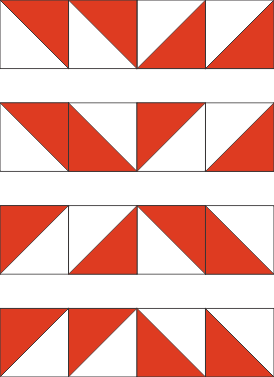
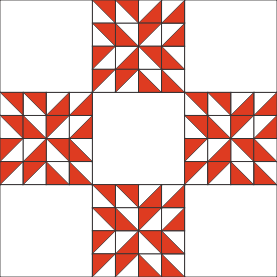
The block consists of 16 red-and-white half-triangle squares. You will need 4 blocks for the quilt.
|
|
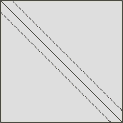
For each block subcut the 2 7/8" wide red and white strips into 8 squares each.
|
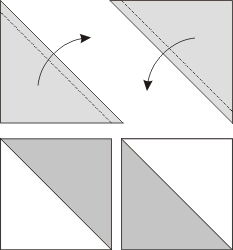
| To sew half-triangle squares, position the 2 3/8" x 2 3/8" squares in pairs, each pair with 2 different fabrics, face to face. You'll get 8 pairs. |
| With a pencil, draw a diagonal across the top square. Stitch 1/4" from the pencil line on both sides. |
|
|
| Cut along the line. Open the new squares. Press the seam towards the darker color. Trim the "ears". Repeat for all the pairs. You should get 16 two-color squares, measuring 2" x 2". |
|
Assembly of the block:
|
Following our diagrams below, sew the squares into 4 rows:
|
|
Now sew all 4 rows together.
|

|
Assembly of the Quilt Top:
|
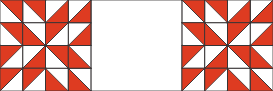
The quilt consists of 3 rows. For the first and third rows, sew the pieced block between 2 solid white squares.
|

|
For the second row, sew the white square between 2 pieced blocks.
|
|
Sew all 3 rows together.
|
|
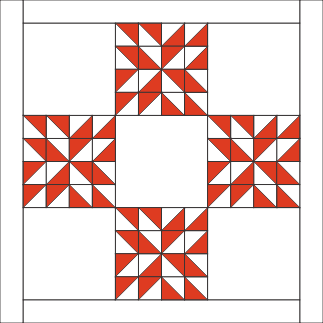
First Border: sew the 2" x 18 1/2" strips to the upper and lower edges.
Sew the 2" x 21 1/2" strips to the left and right edges.
|
|
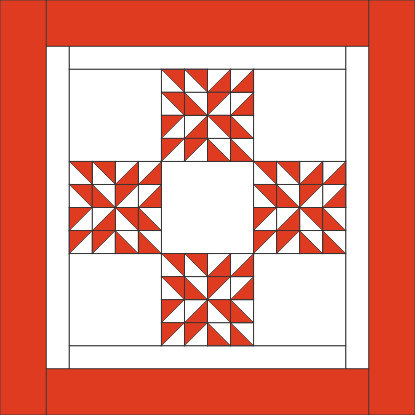
Red Border: Sew the 3 1/2" x 21 1/2" strips to the upper and lower edges.
Sew the 3 1/2" x 27 1/2" strips to the left and right edges.
|
|
Embroidery:
|
Working with one design at a time, stabilize a white square with light-weight cut-away stanilizer. Hoop the fabric tightly and embroider the Nativity designs one by one.
|
|
|
|
|
Quilting and Finishing
|
Now place the backing on a flat surface (table) face down. Cover with batting. Spread your working piece over it.
Pin all layers together.
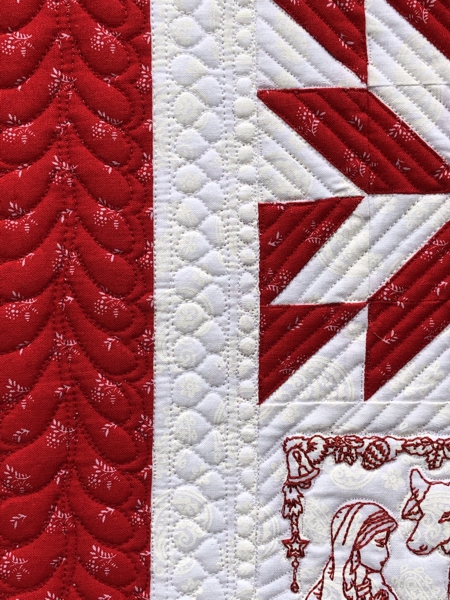
We quilted in a free-motion style all over the quilt. |
|
|
| Press with heavy steam. Square the quilt. Finish the raw edges with the binding. |
|
| Have fun! |
|
|
Back to One-Color Nativity Set.
|
Back to Projects Page
|