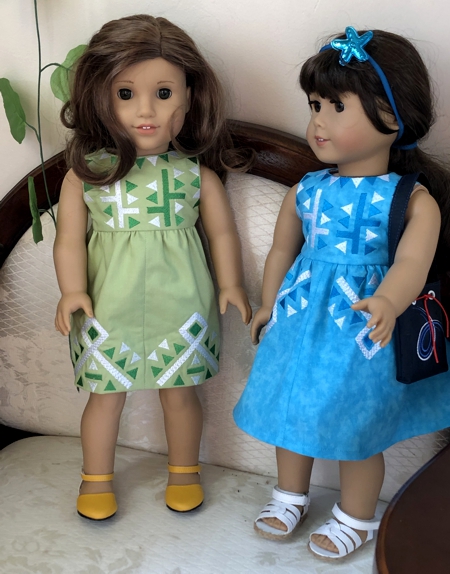
These are instructions on how to sew doll dresses using the designs from the Retro Summer Dress for 18-inch Dolls.
The dress fits 18-inch dolls, such as Americal Girl, Our Generation, My Life As dolls, and some other dolls with similar bodies. There are two versions of the dress, featuring a higher waistline and straight skirt and regular waistline with wider skirt.
|
|
You will need :
- embroidery threads, either polyester or rayon, the choice of colors is yours, select them to match the colors of your fabrics,
- light-weight cut-away stabilizer,
- cotton fabric for the dress,
- light-weight cotton or cotton/polyester blend batiste for the lining,
- either sew-on snaps or ultra-thin hoop and loop (Velcro) tape 1/4",
- sewing pins,
- scissors (both small and large),
- chalk pencil,
- quilter's ruler,
- sewing needle for hand-stitching,
- sewing thread,
- iron.
|
NOTE: Seam allowance is 1/4", included in the patterns.
|
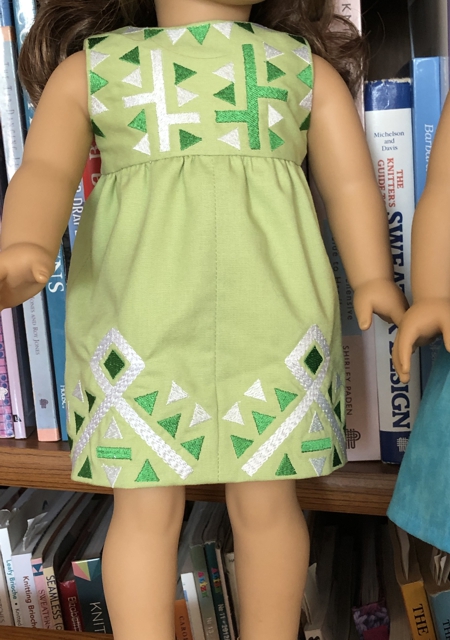
Green Dress
|
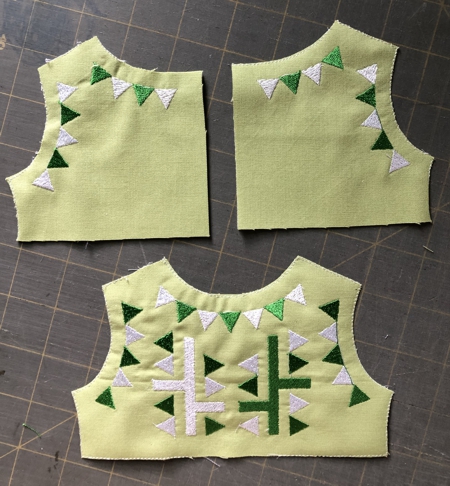
Bodice - Embroidery:
|
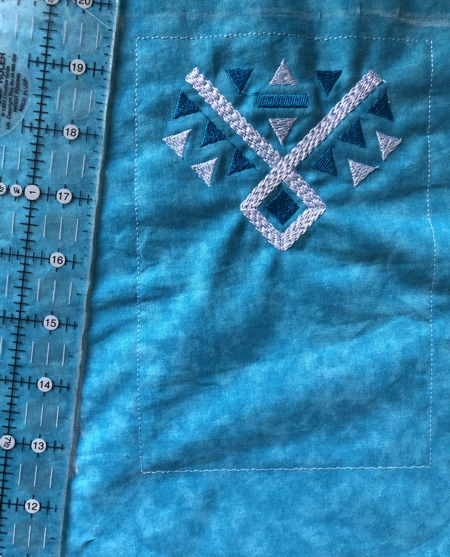
Hoop fabric with light-weight cut-away stabilizer. Embroider the bodice parts - there are 3 files: bodice_back_highwaistL, bodice_back_highwaistR, bodice_front_highwaist.
Cut them out.
|
|
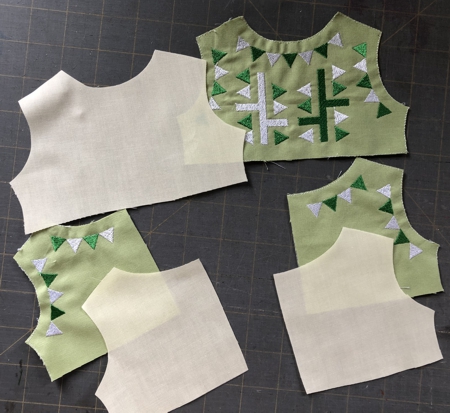
Using the stitch-outs as templates, cut the same parts from the lining fabric.
|
|
Sewing the Bodice
|
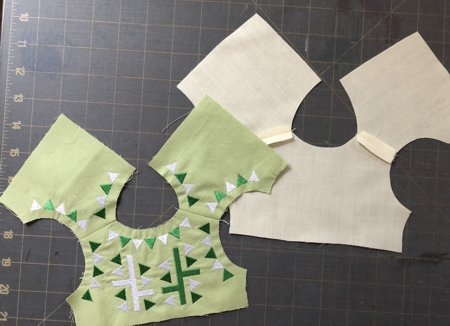
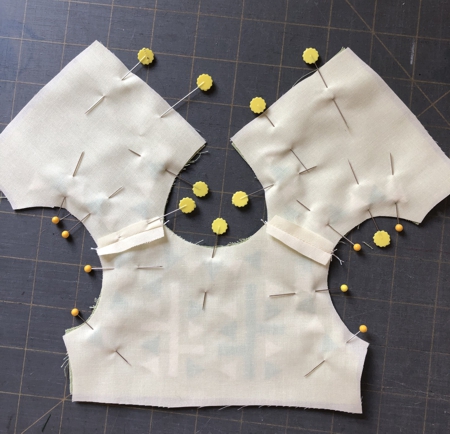
Pin the front and backs together at the shoulders, face-to-face. Stitch. Press seams open.
|
|
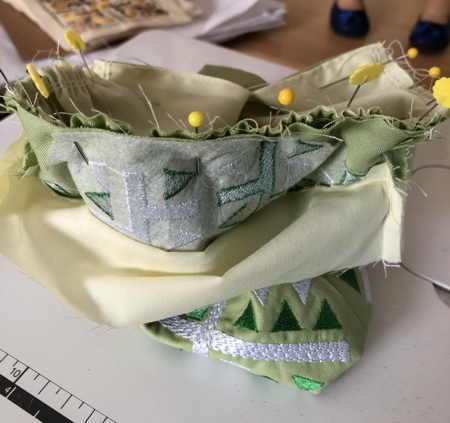
Lay the lining over the dress, face-to-face. Align at shoulders and all edges. Pin the lining and bodice together around the armholes, neckline and center back.
|
|
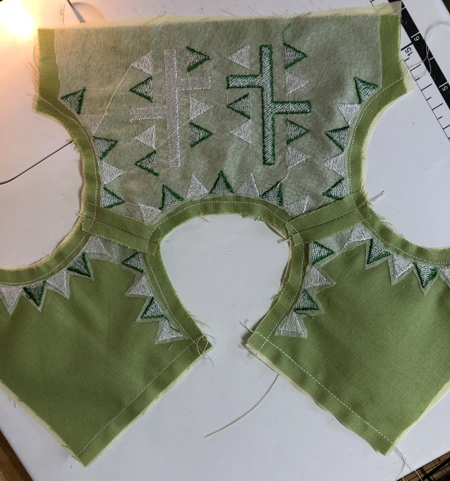
Stitch the bodice and lining together at center back, neckline and around the armholes.
|
|
Clip the corners and the curved seams.
|
|
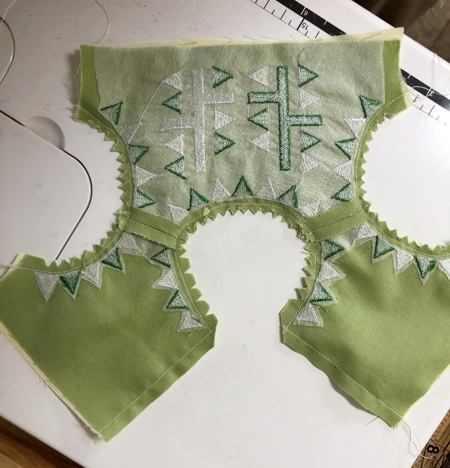
Turn right side out. Press.
|
|
Open the bodice and the lining at the sides, align the sides of the lining and the sides of the bodice separately. Pin.
Stitch together. Press the seam open.
Repeat for the other side.
|

|
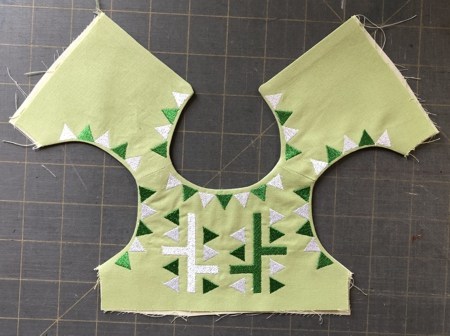
Press the side seams open.
|
Skirt
|
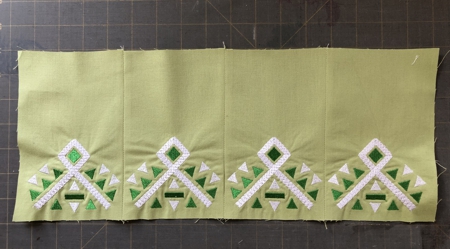
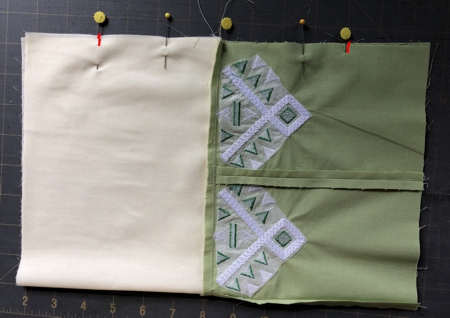
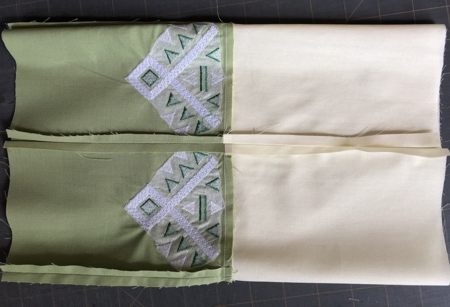
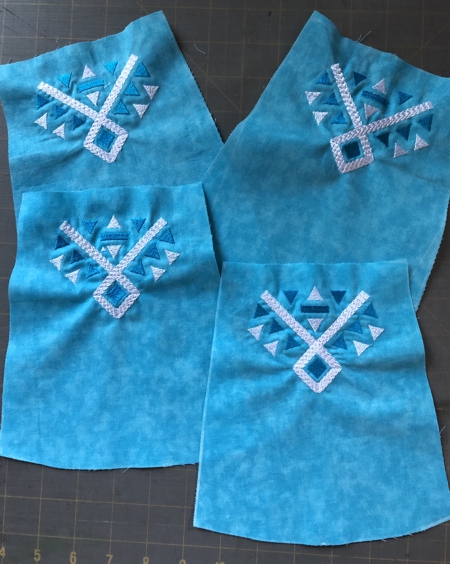
For the skirt, embroider the "skirt" file four times. Cut out. Remove excess stabilizer.
|
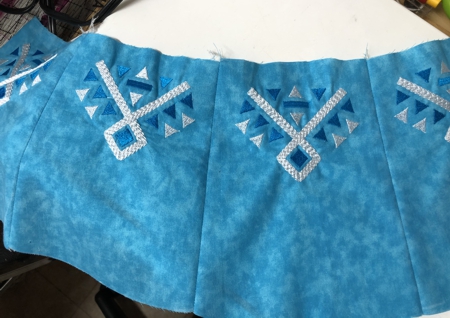
Sew the four parts together in a row. Press seams open.
|
|
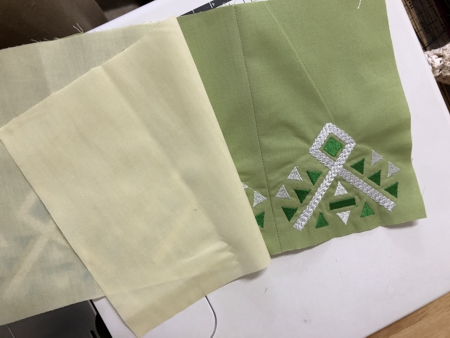
Using the strip as a template, cut the same strip out of lining fabric.
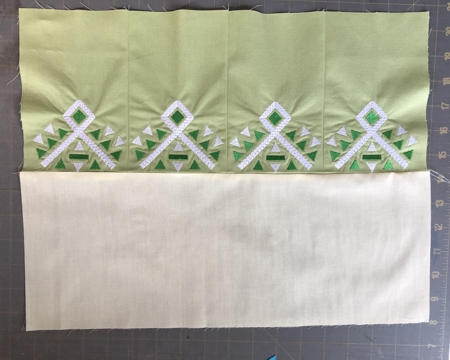
Position the lining over the skirt, face to face, align all edges.
|
|
Stitch the lining to the skirt along the lower edge.
|
|
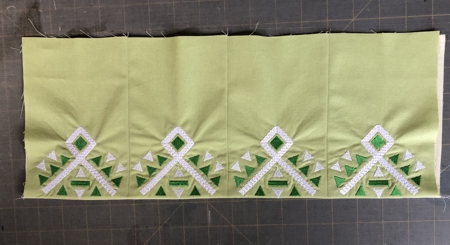
Press the seam, fold the lining to the back and press the hem.
|
|
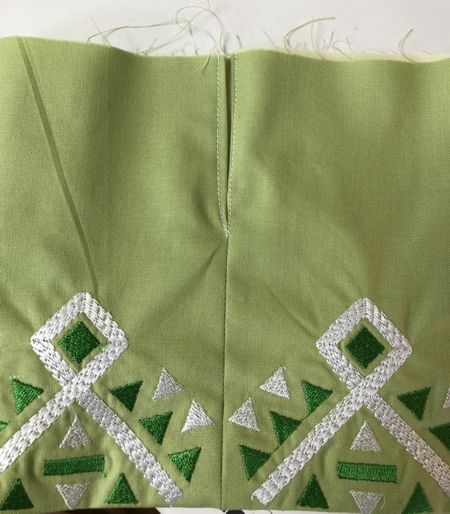
Unfold the skirt and lining and fold again into a tube, align the edges. Pin, leaving unpinned 2" from each edge (see red markings)
|
|
Topstitch between the red marks. Open and press the seam.
|
|
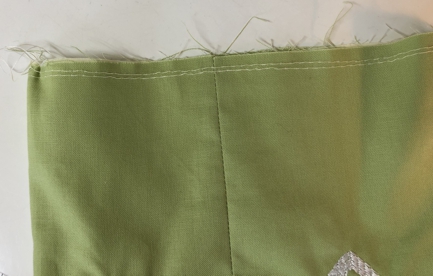
Fold the lining back onto the skirt. Align the unstitched opening on the skirt and the lining. Either topstitch on the sewing machine, or handstitch the skirt and lining in this part.
|
|
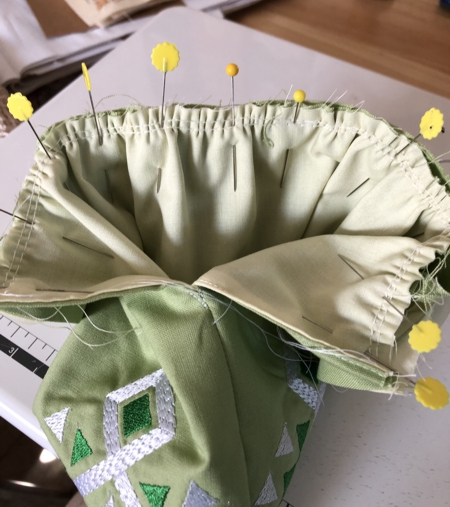
Along the upper edge of the skirt, sew two rows of gathering stitches.
|
|
Find the center on the lower edge of the bodice, mark with a pin.
|
With the right sides together, align the bodice and skirt front seam. Pin both pieces together at the center point, fold the lining away.
|
Draw up the gathering stitches from both sides to fit along the bodice edge. Align the side seams of the skirt with the side seams of the bodice. Arrange the fullness evenly and pin in place. Take care not to pin the lining.
|
|
Stitch in place, taking care not to catch the lining. Rip the gathering threads.
|
|
Press the seam to the bodice.
Fold the lower edge of the lining and pin. Either slipstitch by hand or topstitch the edge in place.
|
Put the dress on a doll and mark the position of the snaps. Sew 3 snaps on the back.
|
|
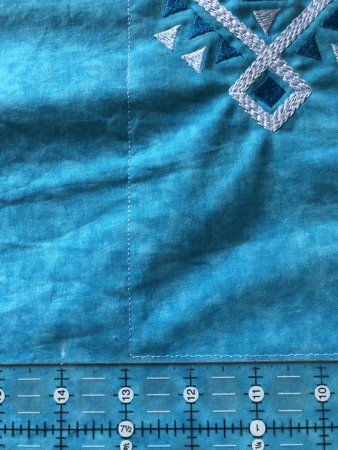
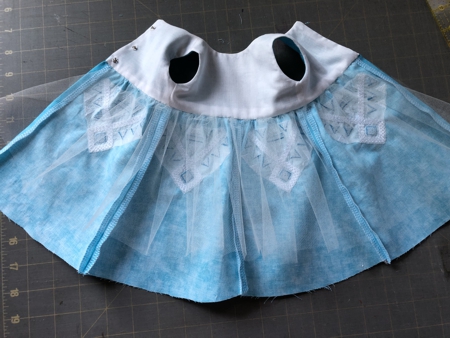
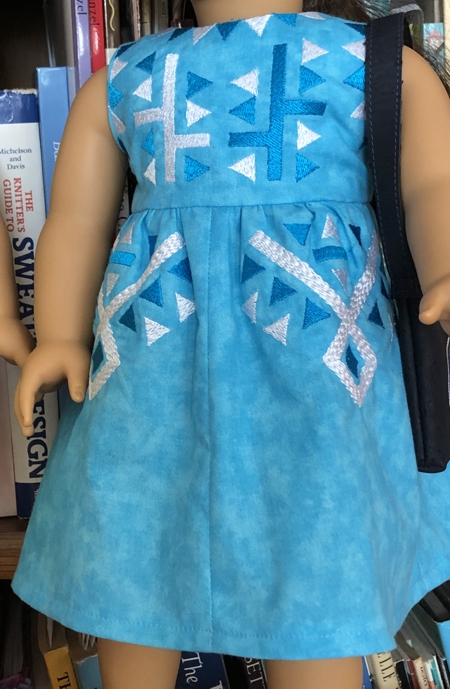
The Blue Dress
|
For the blue dress, embroider the bodice's parts: bodice_backL, bodice_backR, bodice_front. Then proceed in the same way as for the green dress.
|
The Skirt
|
For the skirt, embroider the "skirt" file 4 times. Before you cut out the stitch-outs you'll have to change the pattern a little. First of all, decide whether you want the embroidery on the lower or upper part of the skirt. For the blue dress we decided that the embroidery should be towards the top.
|
Measure 1" along the lower edge of the stitch-out.
|
|
Measure 1/4" along the upper edge of the stitch-out. Connect both marks. Repeat on the other side of the stitch-out.
|
|
Measure 1/4" from the center of the lower edge. Connect all marks with a curved line.
|
|
Cut the stitch-outs along the drawn lines. Rip out the basting.
|
|
Zig-zag or serge the left and right sides of the skirt parts, then sew them in a strip. Press seams open.
|
|
At this point you should decide whether you want a lining for the skirt or not. If not, just sew 2 rows of gathering stitches along the upper edge and attach to the bodice as decribed for the green dress.
If you need a lining, out of very light-weight fabric, we use nylon netting, cut a piece measuring 5" x 25".
Along the upper edge of the skirt, sew two rows of gathering stitches.
Along the upper edge of the lining, sew two rows of gathering stitches.
|
Pin the skirt to the bodice as described for the green dress.
Then pin the lining.
Stitch all 3 layers together.
Proceed as described for the green dress: attach the bodice to the skirt, fold the lower edge of the lining and pin. Either slipstitch by hand or topstitch the edge in place.
Sew on snaps or Velcro tape to the bodice.
|
|
Zigzag or serge the lower edge of the skirt. Fold the hem 1/2" back, press. Either topstitch or slip-stitch the hem by hand.
|
|
Have fun!
|

|
|
Back to Retro Summer Dress for 18-inch Doll
|
Back to Projects Page
|


