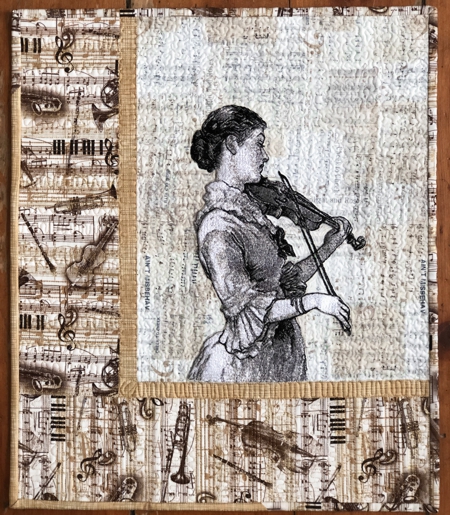
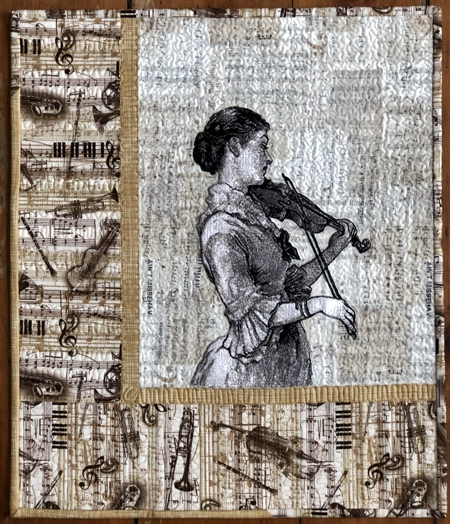
This small and easy wall quilt features the design Violinist.
It makes a great gift for any violin lover!
The finished size of the quilt is about 17 1/2" x 20".
|
|
You will need :
- embroidery threads according to the color card of the embroidery design (you MUST follow the color card for photo-stitch designs such as this one),
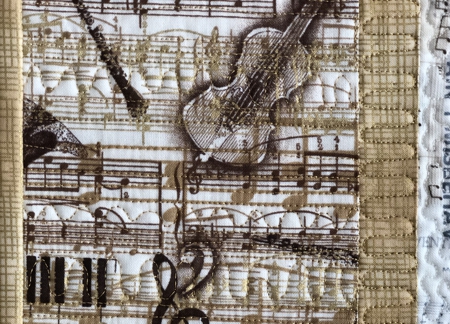
- 1 fat quarter of light-colored fabric for the background (we used light gray with a musical print),
- 1/4 yard of golden fabric for the first border and binding (the fabric for the second border has golden highlights in it, so we used golden fabric for the first border and binding)
- 1 fat quarter of patterned fabric for the second border (we used monochrome fabric featuring musical notation and musical instruments),
- medium-weight iron-on cut-away embroidery stabilizer,
- backing and batting,
- quilter's ruler and rotary cutter, or pencil and scissors,
- iron,
- sewing and quilting threads of matching colors,
- #12 sewing needle, #12 or #14 quilting needle.
|
Cutting:
|
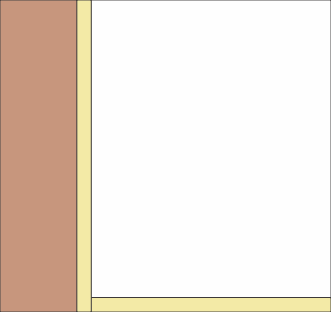
Out of fabric for the background, cut a piece measuring 13" x 16".
Out of fabric for the first border, cut
- 1 strip measuring 1 1/4" x 13" and
- 1 strip measuring 1 1/4" x 16 3/4".
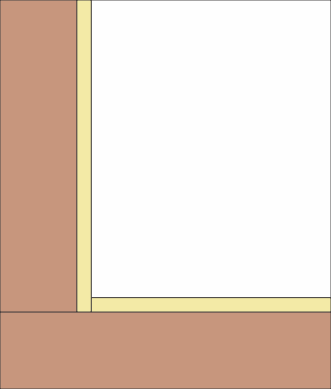
Out of fabric for the second border, cut
- 1 strip measuring 4 1/2" x 16 3/4" and
- 1 strip measuring 4 1/2" x 18 3/4".
|
Assembly of the Top:
|
Sew the 1 1/4" x 13" strip to the bottom edge of the 13" x 16" piece.
|

|
Sew the 1 1/4" x 16 3/4" strip to the left edge of the working piece.
|

|
Sew the 4 1/2" x 16 3/4" border to the left edge of the working piece.
|
|
Sew the 4 1/2" x 18 3/4" strip to the bottom edge of the working piece.
|
|
Embroidery:
|
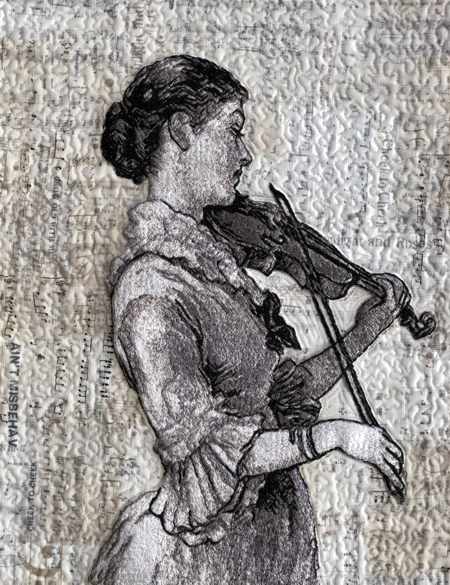
Upload the file of the Violinist into your embroidery machine. Print out the included JPG color card. Select threads according to the color card.
Stabilize the central part of the quilt top with medium-weight iron-on cut-away embroidery stabilizer. Hoop tightly. If your hoop does not hold the fabric strongly enough, wrap the long sides of the hoop with strips of muslin. You can also pin the fabric to these strips.
Embroider the design.
|
|
Quilting and Finishing:
|
Now place the backing on a flat surface (table) face down. Cover with batting. Spread your working piece over it.
Pin all layers together.
We quilted in a free-motion style all over the working piece. |
|
| Press with heavy steam. Square the quilt. Finish the raw edges with the binding. |
|
|
|
Back to Violinist
|
Back to Projects Page
|


