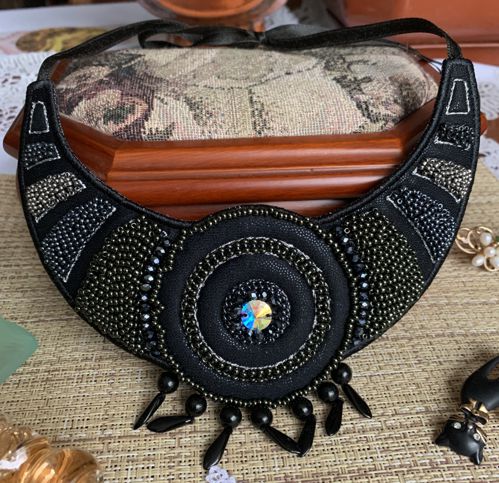
These are instructions on how to embroider the Art Deco Necklace In-the-Hoop.
The design is for a large hoop (5"x7").
|
|
Stitches: 11,169
Size: 116.5 x 173.1 mm (4.59" x 6.91")
Colors: 6/6
|
You will need :
- embroidery threads of any color but contrast to your fabric,
- a piece of spunbond nonwoven fabric large enough to be hooped; as an alternative you can use medium-weight cut-away stabilizer, or 2-3 layers of watersoluble mesh,
- Puffy Foam 2mm thick (we used one by Sulky),
- a piece of Lutradur, as an alternative you can use a piece of polyester craft felt,
- Lycra/spandex fabric for the face of the gorget and for the lining, (you can also use very thin and stretchy faux leather for the face of the necklace),
- fabric or universal glue,
- applique scissors,
- 1/4" wide satin or organza ribbon,
- several sewing pins,
- iron,
- (optional) additional embellishments, such as beads or rhinestones.
|
Embroidery
|
Note: you can embroider the whole necklace with one color, or any combination of colors. The colors are separate mainly to make the machine stop in the right places.
|
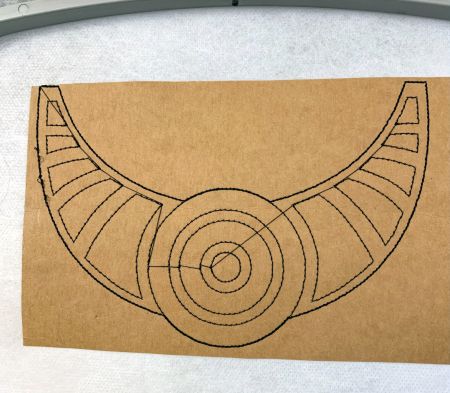
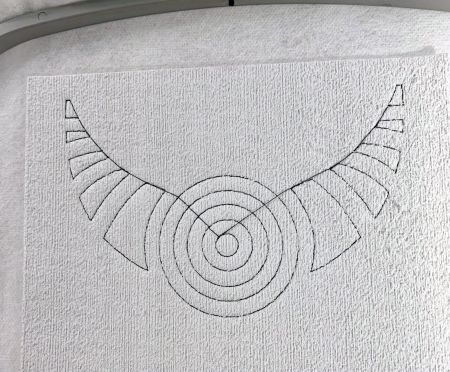
Step One: Hoop a piece of spunbond nonwoven fabric or several layers of watersoluble mesh. Cover the hoop with a piece of felt or Lutradur.
Upload the file into the machine. Start the machine. It will embroider the outlines of the design. |
|
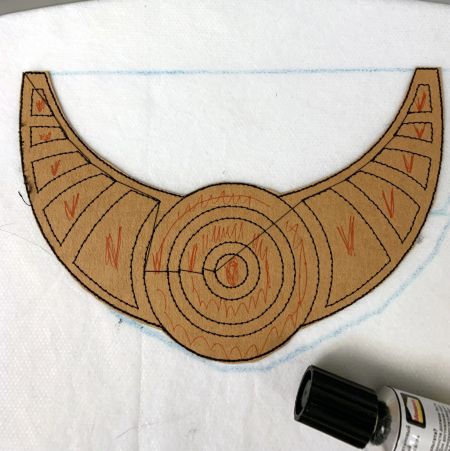
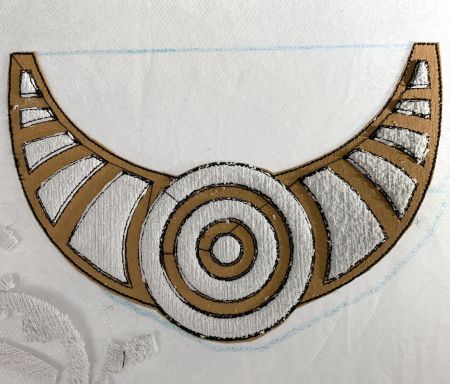
Step Two: Take the hoop from the machine and cut away the Lutradur or felt around the outline as close to the stitches as possible. Be careful not to cut through the stitches.
Place very small drops of glue in places marked in red pencil on the picture below. Take care not to put too much glue, only small drops, and only in the marked shapes.
|
|
Cover the stitch-out with a sheet of puffy foam. Press lightly with fingers .
|
|
| Step Three: Return the hoop to the machine and start it. It will embroider the outlines over the puffy foam. |
|
| Carefully remove the excess foam, leaving it only inside the closed shapes. If you used glue, it will help to keep the parts in place. |
|
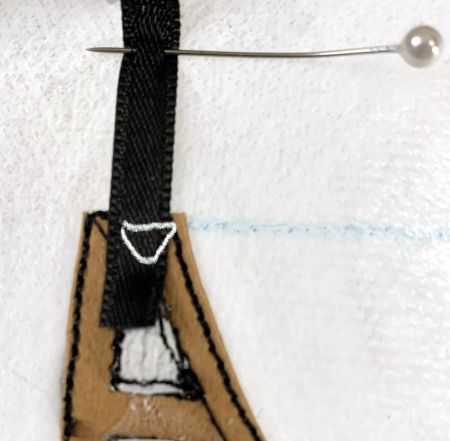
Step Four: Pin 2 pieces of ribbon in the corners as shown on the pictures below.
Start the machine. It will sew the ribbons to the felt. |
|
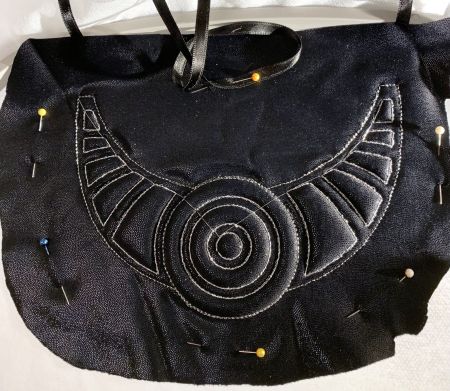
| Step Five: Place a piece of Lycra fabric over the stitch-out, stretch it a little bit and pin to the material in the hoop outside the stitch-out. Start the machine. It will embroider the same outline over the fabric. |
|
| Step Six: Cut away the fabric around the outline close to the stitches. Take care not to cut through the stitches, through the spunbond/stabilizer and cut away the ribbons. |
|
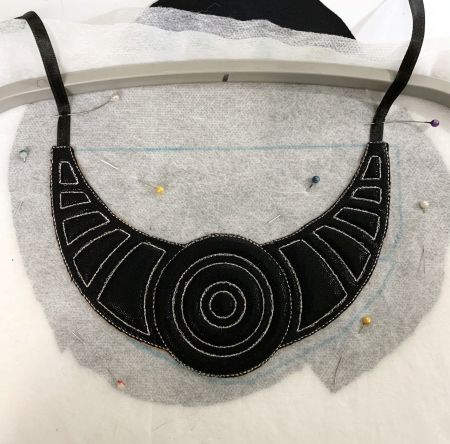
Step Seven: Before you start embroidering color 5, pin a piece of Lycra fabric to the back of the hoop. Check that the ribbons are not on the embroidery field.
Return the hoop to the machine. |
|
Start the machine. Color 5 will embroider the outline again and secure the lining.
Cut away the excess fabric around the outline. This is how the back of the hoop will look like.
|

|
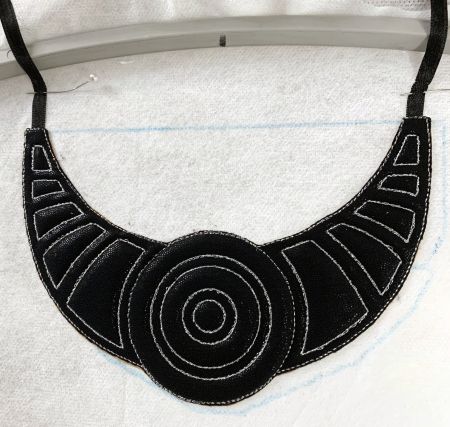
Step Eight: Color 6 will finish the raw embroidery. For this step you can choose either a matching or contrast color.
|
|
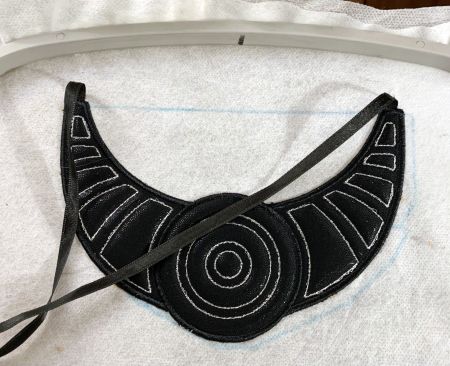
Step Nine: Very carefully cut away the spunbond/or stabilizer around the embroidery. If using watersoluble stabilizer, do not place the whole necklace in water, but use a little bit of water to remove stabilizer around the edges.
|
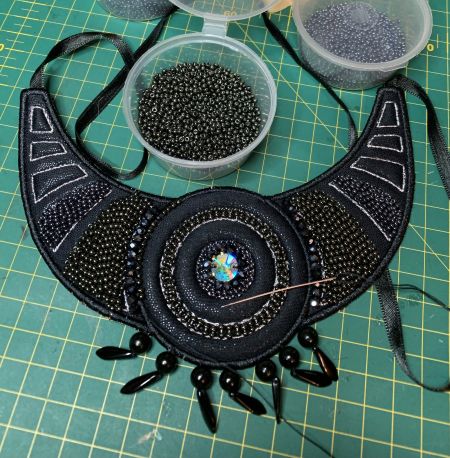
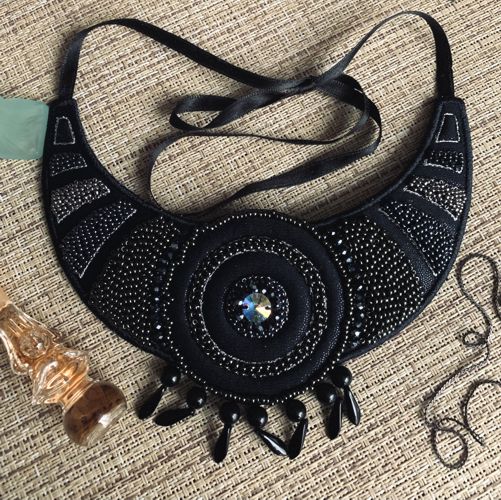
Step Ten (optional): Embellish the necklace with beads and/or crystals.
|
|
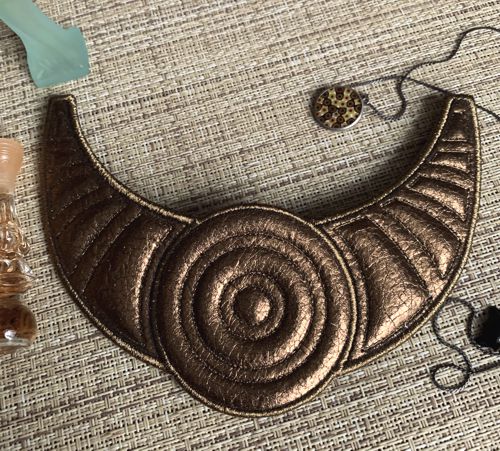
| The gorget can be embroidered on thin faux leather. We followed all above steps, except the fourth one, nstead of ribbons we planned to use a chain. The faux leather with metallic glamor does not need additional embellishments. |
|
| Have fun! |
|
Have fun!
|
|
Back to Art Deco Necklace in the Hoop.
|
Back to Projects Page
|


