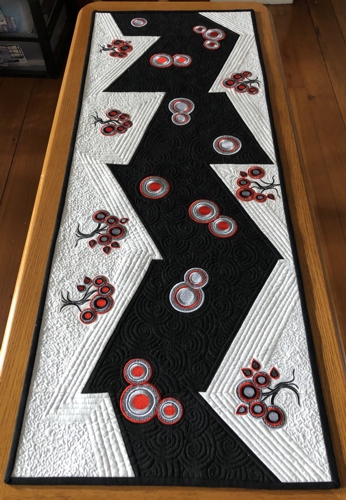
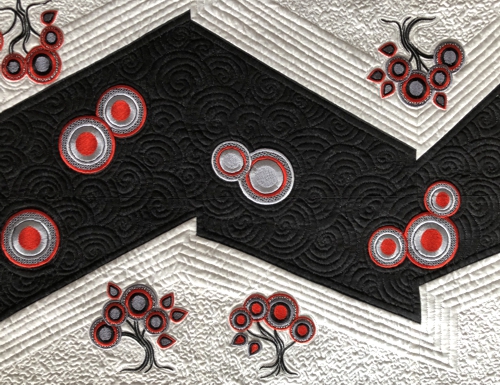
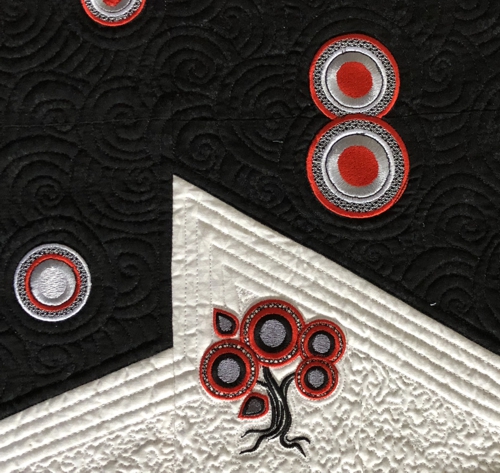
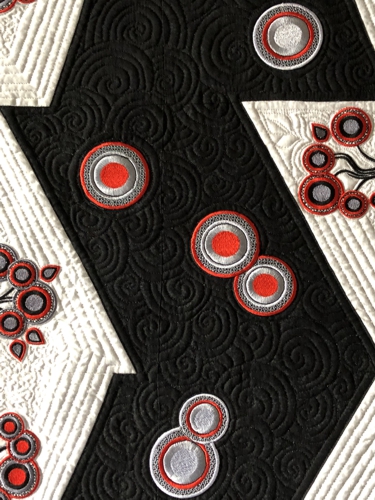
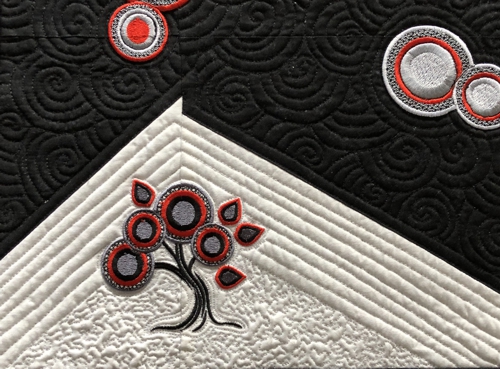
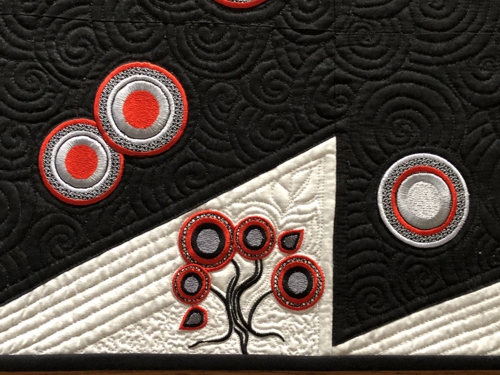
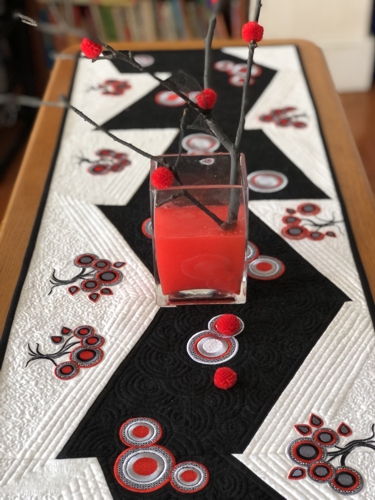
This quilted tablerunner features a modern look. We chose black, white and red to make it a little bit spooky. Embroidery patterns used are from the Abstract Season Tree Set and Abstract Circle Set.
The finished size of the tablerunner is about 16 1/2" x 43". |
|
You will need :
- embroidery threads either polyester or rayon - we used black, dark and light gray and red,
- about 1/2 yard each of white and black fabrics,
- light-weight cut-away embroidery stabilizer,
- fabric for the backing and binding (we used black binding, but it can be red with our color choice),
- batting,
- quilter's ruler,
- rotary cutter,
- iron,
- #12 universal needle,
- #14 quilting needle and matching quilting threads.
|
Cutting:
|
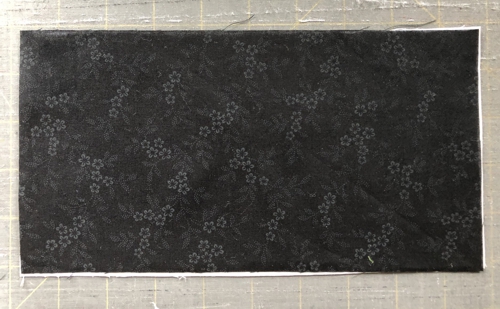
Out of each fabric, black and white, cut
- 4 squares 9 1/2" x 9 1/2" each, and
- 2 rectangles 5" x 9 1/2" each.
Use the remaining black fabric for the binding.
|
Cutting and Assembly:
|
| Note: seam allowance is 1/4", press the seam immediately after you make it. |
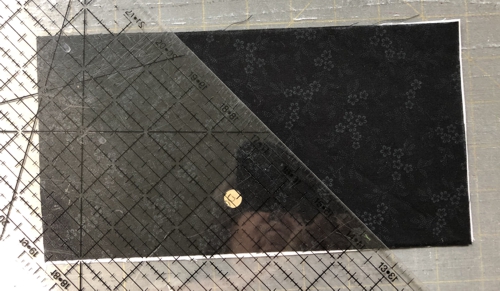
Position a white rectangle, face up, on your work table. Cover with a black rectangle, face up. Align all edges.
|
|
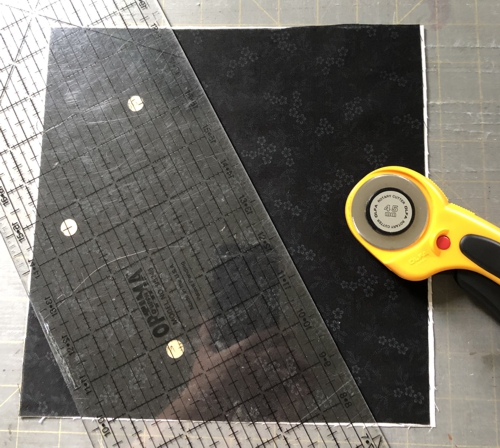
Position a ruler over the rectangles under any angle.
|
|
Cut.
|
|
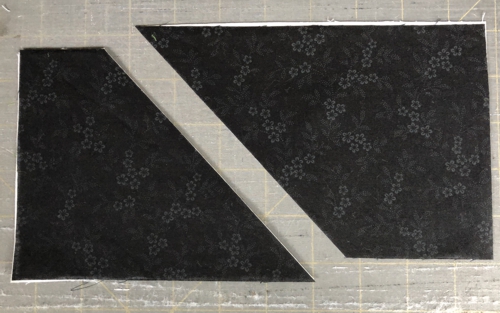
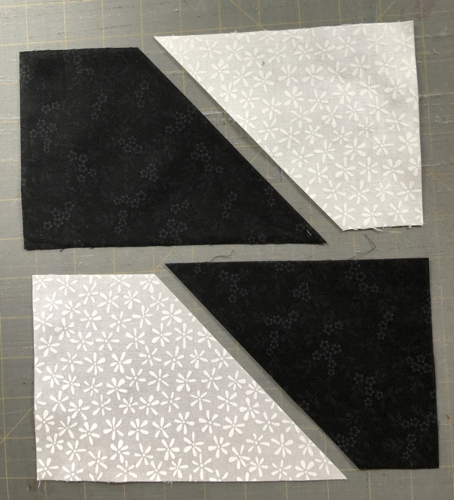
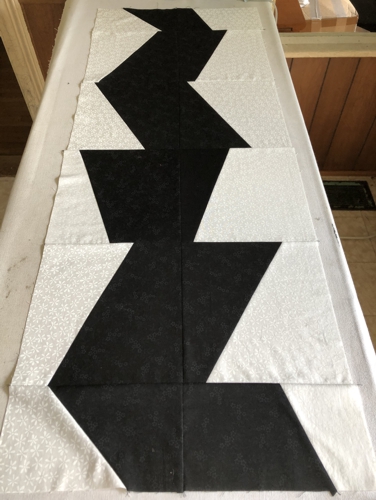
Make black and white pairs: right black shape with the left white shape and left black shape with the right white shape.
|
|
Sew the pairs together to get 2 black-and-white rectangles.
Repeat with the remaining black and white rectangles to get another pair of black-and-white rectangles. Try to cut the rectangles at different angles.
|
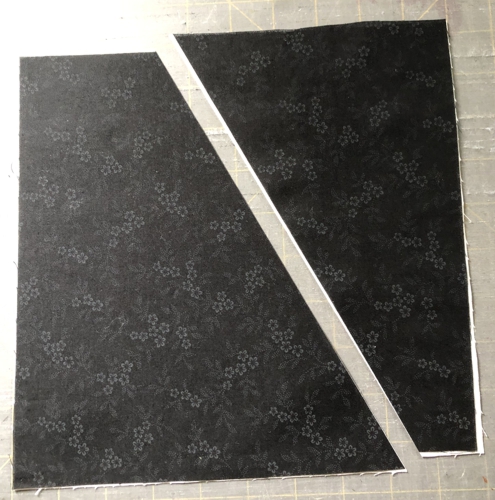
In the same way work with the black and white squares. First divide them into pairs: a white square, face up, on the table, cover with a black square, face up.
Cut under any angle.
|
|
|
Make black-and-white pairs as described above.
|
|
Sew the parts into black-and-white squares.
Repeat for all remaining squares. Try to cut the squares at different angles. |
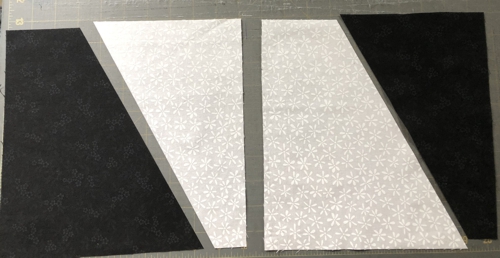
On the table, lay the new black-and-white squares out into 2 rows. Place the rectangles at the ends of each row. All the black ends of the squares and rectangles should be on one side of the row, and all the white ends on the other.
Sew the rows.
Next, sew the rows together. We aligned the rows so that the black edges were on the inside.
|
|
Embroidery:
|
Mark the position of the embroidery patterns. On the black central part we embroidered the designs from the Abstract Circle Set and on the white part, the designs from the Abstract Season Tree Set.
If you have a printer and embroidery software, print-outs of the designs can be helpful. If you do not, you can cut out rectangles of the same size as the designs and arrange them on the fabric to determine the position of the embroidery.
Stabilize the chosen area. Hoop the fabric tightly and embroider the designs one by one.
|
|
Quilting and Finishing
|
Now place the backing on a flat surface (table) face down. Cover with batting. Spread your working piece over it.
Pin all layers together.
We quilted in a free-motion style all over the quilt. |
|
| Press with heavy steam. Square the quilt. Finish the raw edges with the binding. |
|
|
|
|
| Have fun! |
|
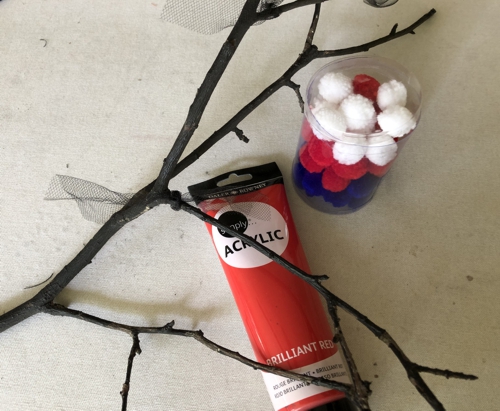
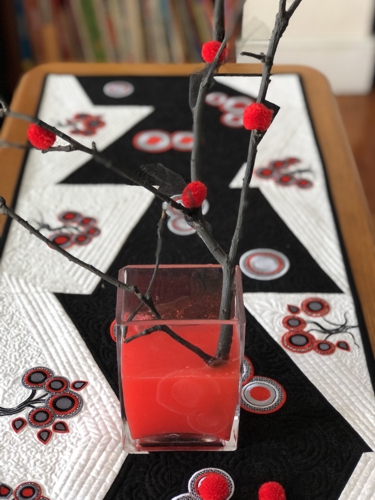
To make this "spooky" still life, use a red vase, dry twigs and some red pom-poms. If you do not have a red vase, use a transparent glass one and some red paint and water.
|
|
Glue pompoms onto the twigs. Fill a vase with water and add some red paint. Place the twig into the vase.
|
|
|
|
Back to Abstract Season Tree Set and Abstract Circle Set
|
Back to Projects Page
|


