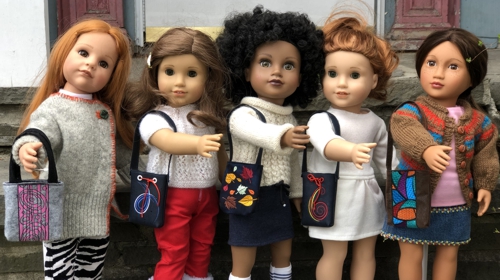
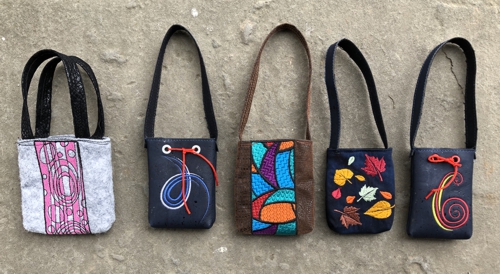
This project describes how to make doll-sized tote bags featuring machine embroidery.
|
|
|
You will need :
- embroidery threads either polyester or rayon ,
- fabric for the tote; you can use cotton fabric, craft felt, cork fabric, or thin faux leather,
- light-weight cut- and/or tear-away embroidery stabilizer,
- quilter's ruler and rotary cutter, or scissors and pencil,
- iron,
- #12 universal needle,
- temporary spray adhesive for fabric, such as Sulky KK2000 or similar product,
- (optional) eyelets and the tools for installing them
|
All the bags are made in roughly the same way. The difference is only in the fabric and finishing details.
|
Gray Tote Bag
|
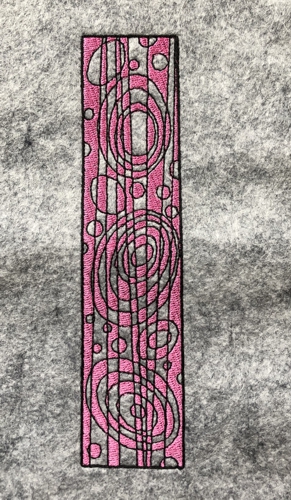
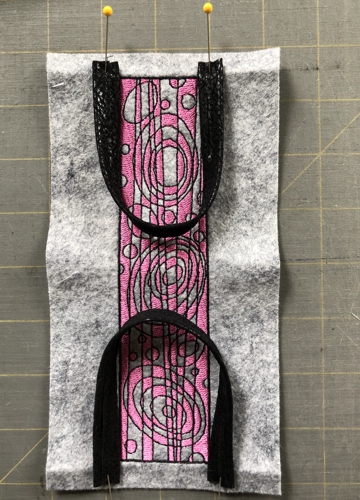
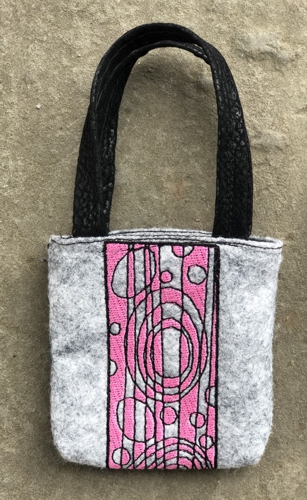
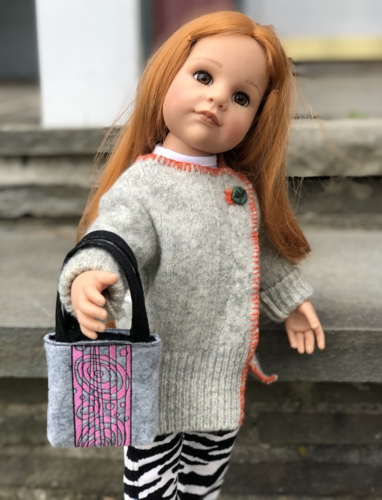
For this bag we used craft felt, tear-away stabilizer and the embroidery design of a bookmark from the Zen Art Bookmark Set. The finished size of this bag is about 3" wide x 3 1/2" high x 3/4" deep.
Stabilize a piece of felt with light-weight stabilizer. Select thread for the embroidery. We decided on hot pink and black. Make the embroidery and tear away the excess stabilizer.
|
|
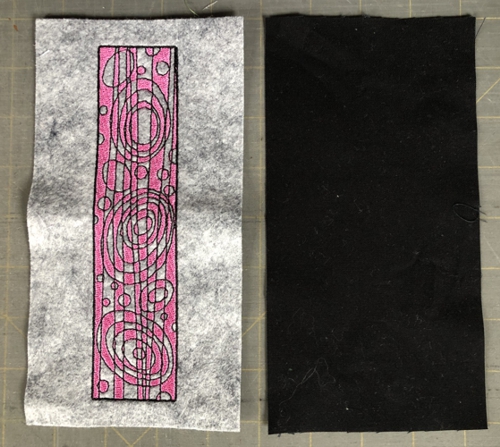
Trim the stitch-out to 4" wide and 8" long - it's 1/2" margins beyond the short sides of the stitch-out and 1 1/4" margins beyond the long sides of the bookmark. Out of cotton fabric, cut a piece of the same size for the lining.
Fold the short edges of the outer bag and the lining 1/2" back and press.
|
|
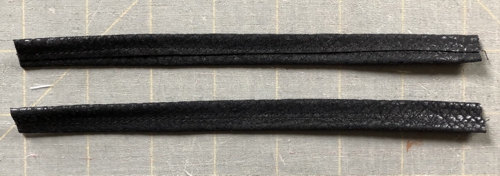
To make handles, out of thin faux leather, cut a strip 1" wide and 14" long. Fold one long edge to the wrong side towards the middle, topstitch in place. Fold the other long edge slightly overlapping the first edge. Topstitch in place. Cut in half to get 2 handles.
|
|
Fold the handles and pin to the short edges of the outer bag. Topstitch in place.
|
|
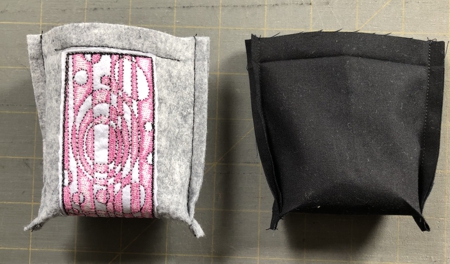
Fold the outer bag and the lining in half, right side inwards, aligning the edges. Stitch the sides with seam allowance 1/4".
|

|
Make box corners on the bag and the lining. For this separate the front and back panels at the corners. Center the side seam with the center of the bottom. Stitch perpendicular to the side seam across the corner with seam allowance 1/4".
|
|
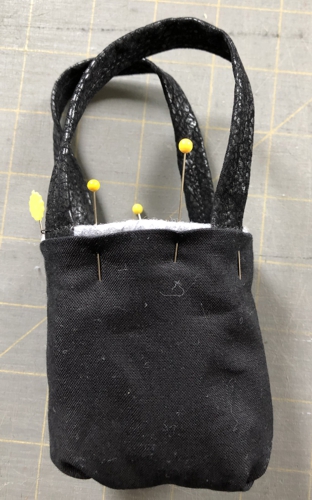
Turn the lining right side out and insert the outer bag inside the lining. Tuck in and align the upper edges. Pin.
|
|
Stitch along the upper edge. Turn the bag right side out.
|
|
|
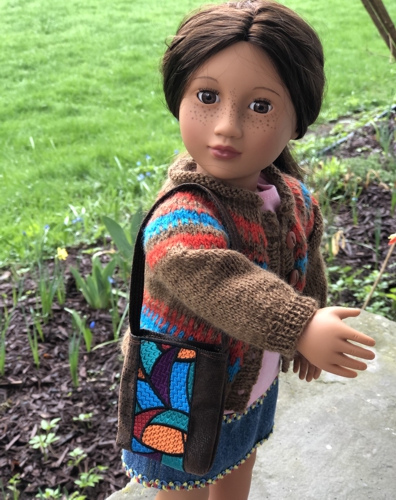
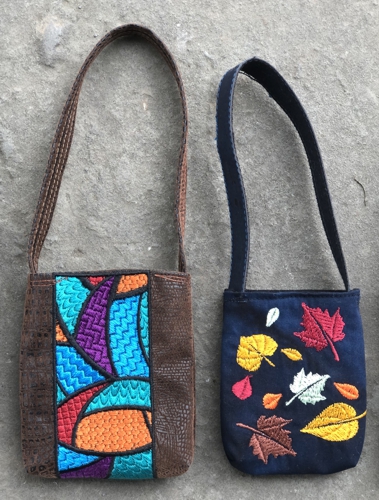
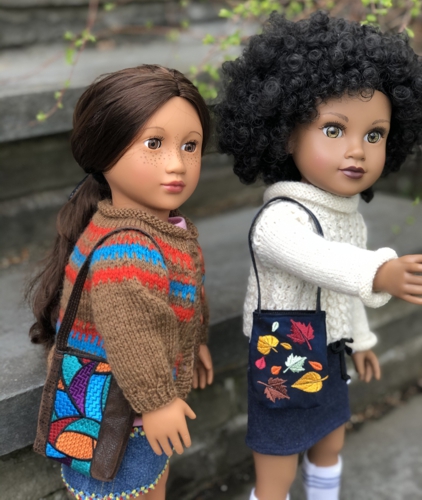
The shoulder bag below is made in a similar way. We used faux leather and the embroidery design of a bookmark from the Stained Glass Bookmark Set.
Instead of 2 handles we attached one long shoulder strap. It's 10" long, and 10 1/2" before it is attached.
|

|
|
The bag with the leaves is made of cotton fabric. We actually used a test stitch-out of one of the designs from the Autumn Flurry Set for it. Its finished size is 3" high and 2 1/2" wide.
|
|
|
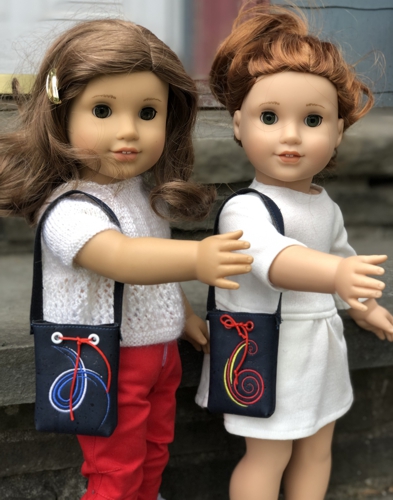
Shoulder Bags from Cork Fabric
|
Cork fabric is very easy to work with and you need only scraps of it. We used the designs form the Swirls and Whirls Set.
We decorated these bags with eyelets and decorative cord.
|
|
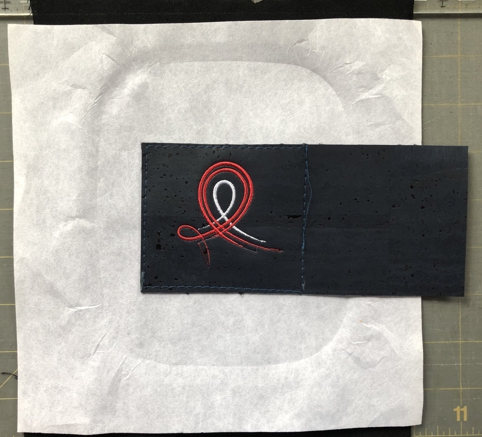
We do not recommend to hoop the cork fabric. We hooped a layer of cotton fabric and a piece of tear away stabilizer over the fabric. Then, with the help of the embroidery machine, we marked the center of the embroidery. We topstitched one half of the 3 1/2" x 6" piece of cork fabric over the embroidery area. Then we did the embroidery
Instead of top stitching the cork fabric on, you can use temporary fabric adhesive. Always add 1/4" seam allowance on all sides of the piece.
|
|
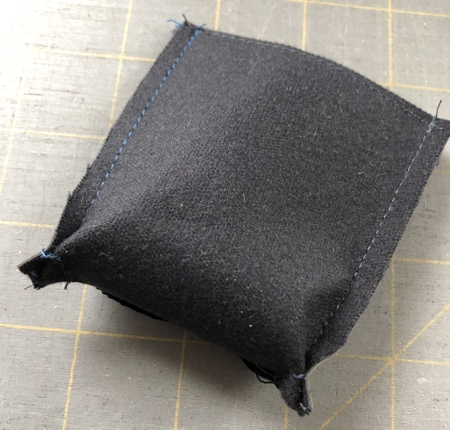
Remove the stabilizer and trim the cork and underlining fabric to dezired size. Stitch the sides and box corners.
|
|
Turn right side out.
Out of cork fabric, cut a strip 1/4" wide and about 9" long for the shoulder belt. Attach the ends to the side seams of the bag.
|
Optional: with the help of a punch, make 2 holes on each side of the bag. Attach eyelets. Thread a piece of thin cord through the holes and tie the ends.
|

|
|
|
Back to Zen Art Bookmark Set
|
| Back to Stained Glass Bookmark Set |
| Back to Autumn Flurry Set |
| Back to Swirls and Whirls Set |
Back to Projects Page
|


