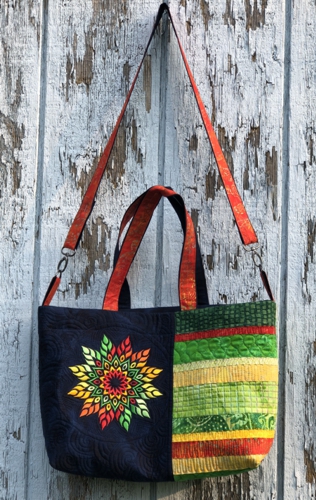
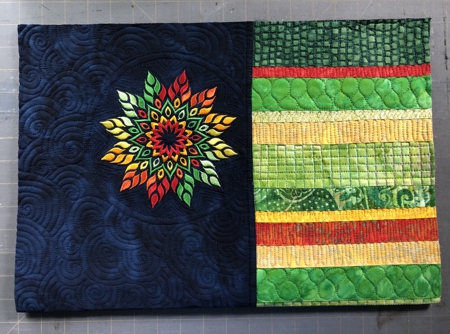
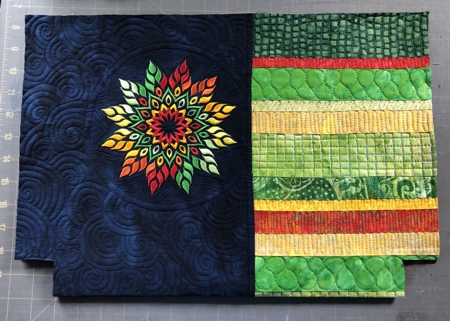
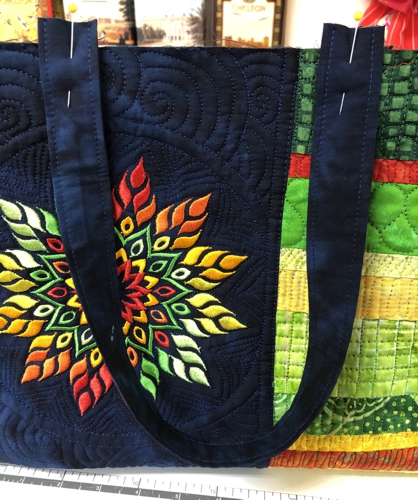
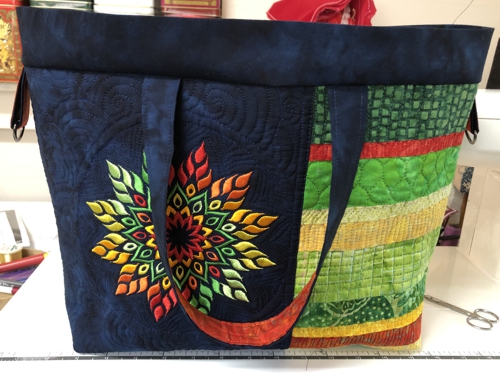
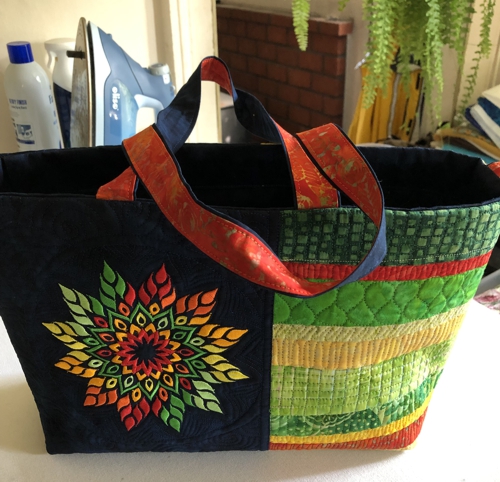
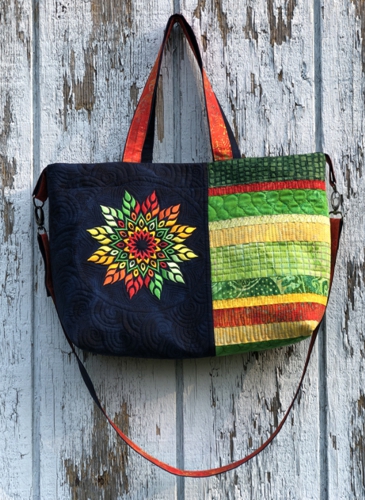
This roomy quilted bag features embroidery on the front panel, hand and shoulder handles, and an inner pocket. The design we used is Fall Star. This design in available in 3 sizes, but we used the size for the Mega hoop (6" x 6").
The finished size of the bag is about 15"W x 10"H x 4"D. |
|
You will need :
- embroidery threads, either polyester or rayon,
- 1/2 yard of navy blue fabric,
- scraps of red, green, orange fabrics for the pieced part of the bag,
- a piece of either red, or green, or orange fabric large enough to cut 2 strips 2" wide and 38"-40" long,
- about 1/2 yard of black fabric for the lining,
- medium-weight cut-away embroidery stabilizer,
- thin batting,
- iron-on sewing interfacing,
- quilter's ruler,
- rotary cutter,
- iron,
- #12 and a heavy duty #16-18 universal needle,
- quilting and sewing thread,
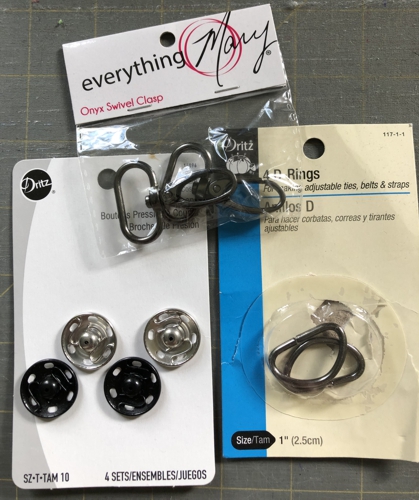
- 1/2" magnetic snap closure or sew-on snap closure,
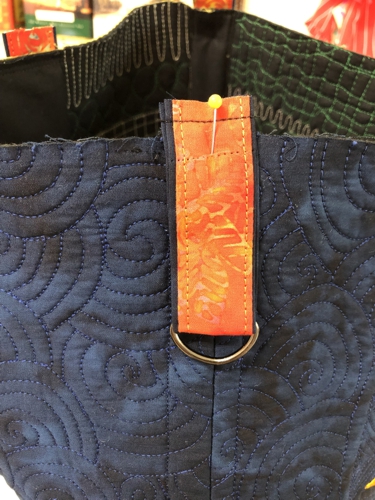
- 2 D-rings 1" wide,
- 2 swivels 1" wide.
|
|
Cutting:
|
Out of the navy blue fabric, cut
- a piece measuring 11" W x 26" H,
- 2 strips measuring 2" wide and the length of the width of the fabric, about 38" - 40" long, and
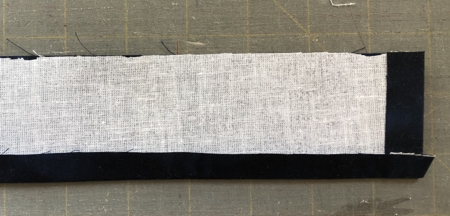
- 1 strip measuring 2 1/2" x 35".
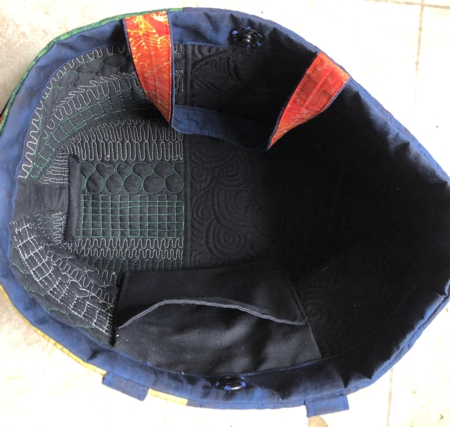
Out of the fabric for the lining, cut
- a piece measuring 19" x 26" and
- another piece measuring 14" x 14" for the pocket,
- 2 strips measuring 1 3/4" x 12",
- 2 strips measuring 2" x 6".
Out of thin batting a piece measuring 19" x 26".
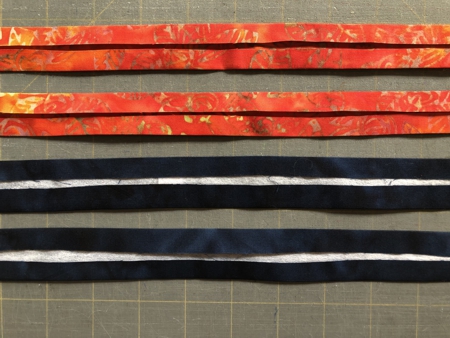
Out of colored fabric, cut 2 strips measuring 2" x 38"- 40".
Out of sewing interfacing, cut
- 2 strips measuring 2 " x 38-40"
- a strip measuring 2 1/2" x 35".
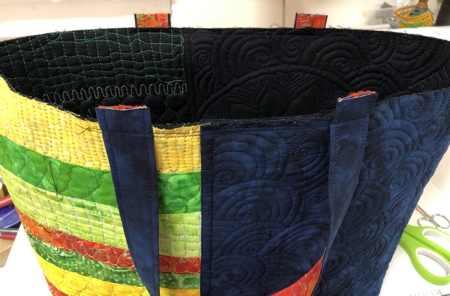
Cut the scraps into strips 9" long and different widths between 1 1/2" - 2 1/2".
|
Sewing the Top:
|
With seam allowance 1/4", sew the 9" long colored strips into a panel 9" wide and 26" long. Press the seams in one direction.
|
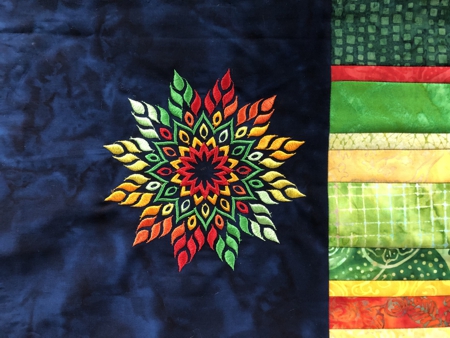
Sew the navy blue part and the multi-colored pieced part together, seam allowance 1/4". Press the seam to the blue side.
|
Embroidery:
|
| Mark the position of the embroidery on the blue part of the top. It shoud be close to the multi-colored part and about 2 1/2" - 3" from the upper edge. Stabilize the spot with medium-weight cut-away stabilizer. Hoop the fabric tightly. Upload the Fall Star file into your machine and embroider it. |
|
Press the stitch-out if needed and remove the excess stabilizer.
|
Quilting:
|
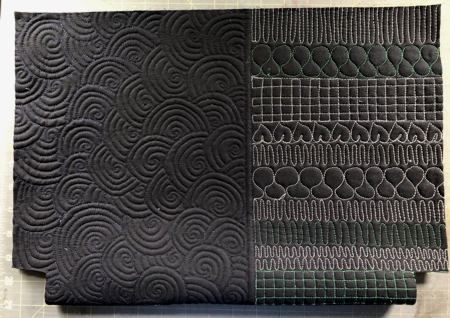
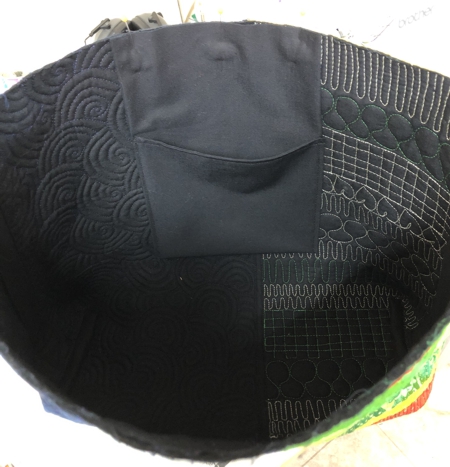
Place the lining on a flat surface (table) face down. Cover with batting. Spread your working piece over it.
Pin all layers together.
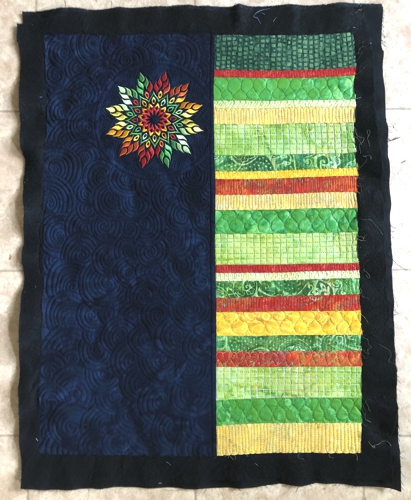
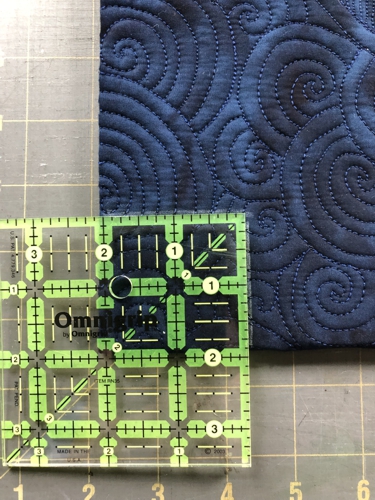
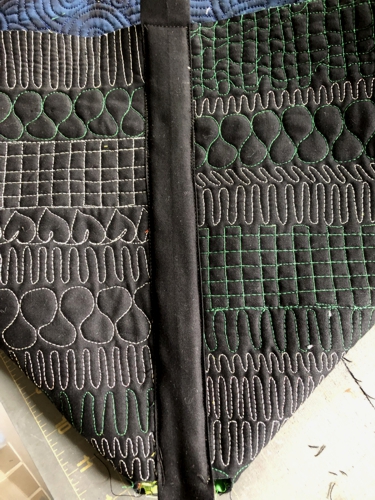
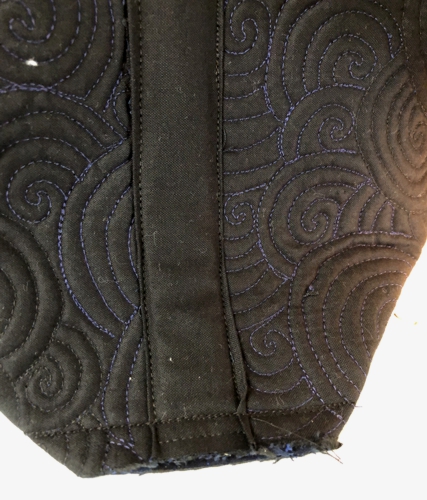
We quilted in a free-motion style all over the piece.
Press with heavy steam.
|
|
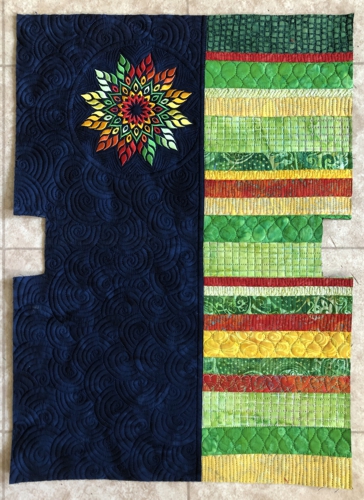
Trim the working piece to 18" wide and 25" long.
|
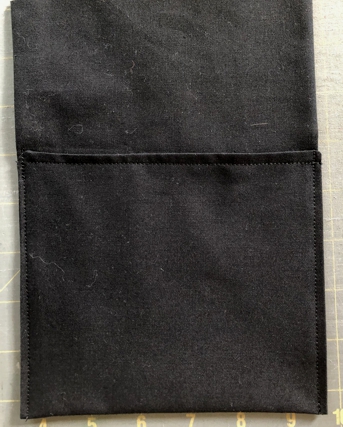
Pocket:
|
Fold the 14" x 14" square in half, face inside. Align the edges. Stitch one short and one long sides. Seam allowance 1/4".
Trim the corners and turn right side out. Press.
Topstitch along the closed side, seam allowance 1/8".
Turn the finished edge 4"-5" up. Press. Pin and topstitch along the folded sides.
|
|
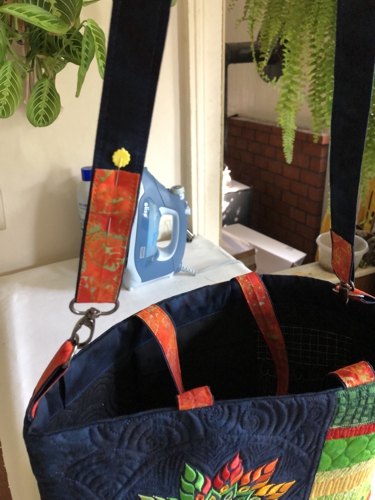
Handles:
|
Fold the blue 2" and colored 2" strips lengthwise in half, align the long edges and lightly press to mark the center of each strip.
Fold the long edges to the center and press.
Position the interfacing strips inside the blue strips. Press.
|
|
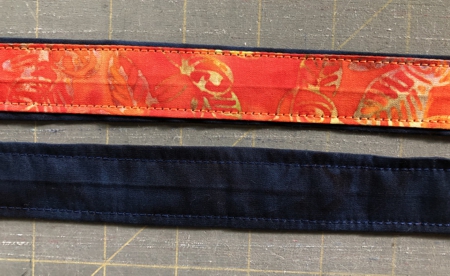
With back sides together, position the blue and colored strips together.
Pin. Topstitch along the edges. |
|
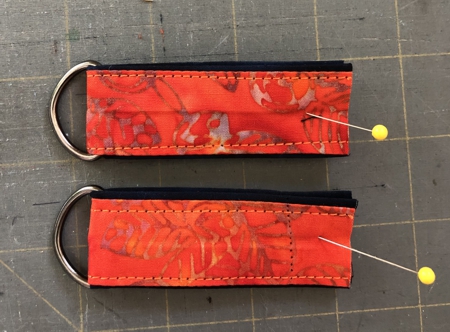
Cut a 6" strip from each of the long strips. You'll have two 6" long strips.
Insert the strips into D rings. Fold in half, align the short edges. Stitch the short sides closed.
|
|
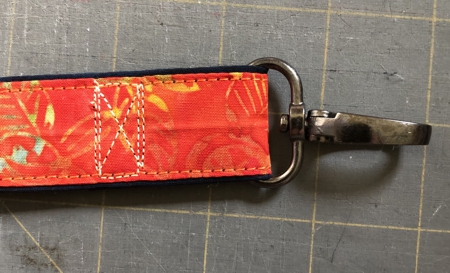
Insert an end of one of the long strips into a swivel's ring. Fold the end over the strip about 2". Pin.
|
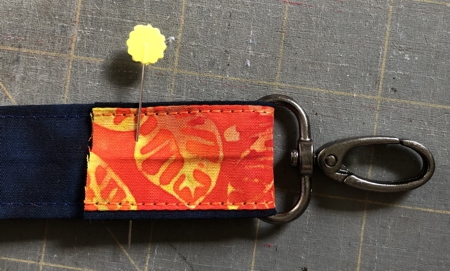
|
Stitch the end in place.
|
|
Do not attach the second swivel yet.
Cut the remaining long strip in half to get 2 short handles about 20"-21" long.
|
Assembly of the Bag:
|
Fold the working piece in half widthwise, align all edges.
|
|
Measure 2" squares in the bottom corners.
|
|
Cut out the corners.
|
|
|
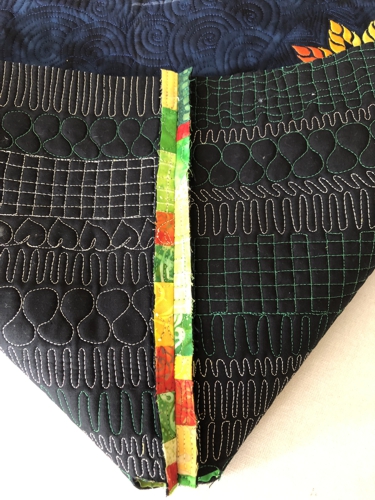
Fold the working piece in half, face inside. Align all edges. Pin one side together. Stitch. Seam allowance 1/2"
|
|
Press the seam open.
|
|
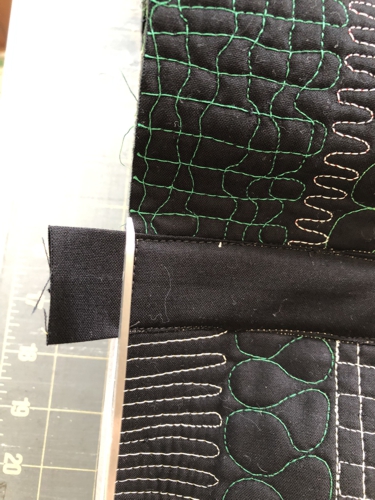
| Take the the 2 lining strips measuring 1 3/4" x 12", fold and press the long edges 1/4" to the wrong side. |
Pin one of the strips over the seam. Topstitch in place.
|
|
Cut away the protruding ends.
|
|
| Repeat for the second side. |
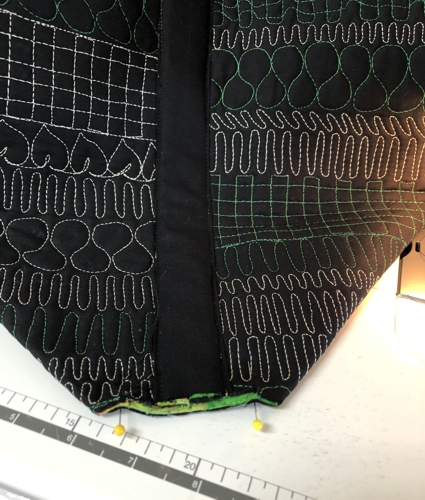
| Fold the bottom of the bag so that the bottom and the side seams align. Pin. |
|
| Stitch. Seam allowance 1/2". Stitch several parallel lines. |
|
Finish the raw edge with the 2" x 6" lining strip. Repeat for the other side.
|

|
Pin the pocket to the upper edge of the back panel. Stitch along the edge, seam allowance 1/4".
|
|
|
Pin the short handles to the front and back panels, equal distance from the sides of the bag. The ends of the handles should protrude 1/2" beyond the upper edge of the bag.
|
|
Stitch the handles to the bag. Seam allowance 1/4".
|
|
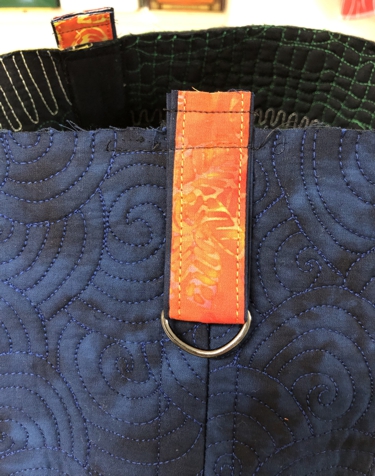
Pin the D-ring strips to the sides of the bag with the ends protruding 1/2" beoynd the upper edge of the bag.
|
|
Stitch with seam allowance 1/4".
|
|
| Press the iron-on interfacing strip measuring 2 1/2" x 35" over the navy blue strip measuring 2 1/2" x 35". |
Fold one short edge about 1/2" back and press. Fold one long edge 1/2" back and press.
|
|
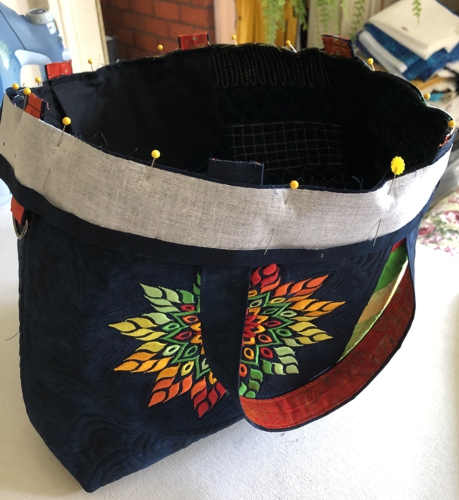
With the raw edge and right sides together, pin the strip to the upper edge of the bag. Overlap the short edges. The folded edge should be places under the unfolded one. If the strip is too long, trim it, but leave at least 1" for overlapping.
|
|
Stitch the strip in place.
|
|
Fold the strip inside the bag. Press. Pin the folded edge. Stitch in place, seam allowance 1/8".
|
|
Clasp the swivel on the long handle to one of the D-rings on the bag.
Insert the other end into the remaining swivel.
Put the bag over your shoulder and adjust the length of the long handle.
|
|
Cut the handle to the needed length, if needed. Topstitch the end in place.
|
Sew a snap to the upper edges of the bag by hand.
|
|
| Have fun! |
|
|
|
Back to Fall Star
|
Back to Projects Page
|


