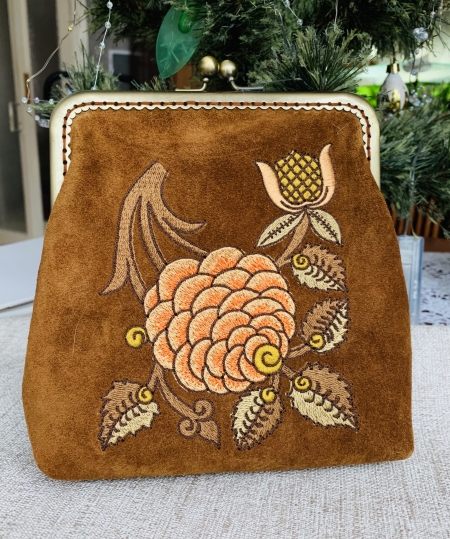
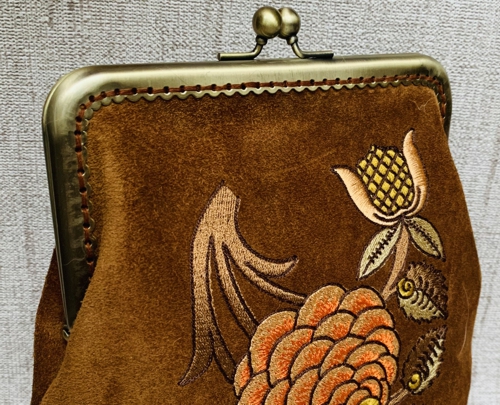
This small purse is easy to make with our downloadable template! We used one of the designs from the Zinnia Decorative Set.
The finished size of the purse is about 6"W x 8"H x 2" D.
|
|
You will need :
- embroidery threads either polyester or rayon -either follow our color card, or choose colors to your taste,
- 1 fat quarter of fabric for the outer bag (it can be denim, cotton, faux leather, suede, etc.)
- 1 fat quarter of light fabric for the lining,
- light- to medium-weight cut-away embroidery stabilizer,
- metal sew-on purse frame measuring about 6.1"x2.75", (affiliate links)
- quilter's ruler, scissors, iron,
- #12-14 sewing machine universal needle, the size depending on the fabric you use,
- sewing needles and threads for hand stitching.
- chalk and graph pencils.
|
Pattern:
|
Download and use our Free PDF Purse Template and print it out!
|
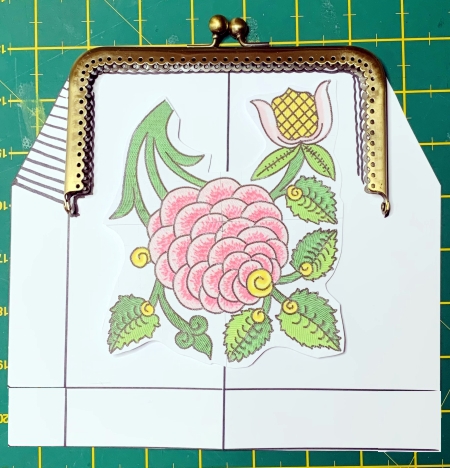
Here is the pattern with a print-out of the embroidery and purse frame overlaid:
|
|
Cutting:
|
Position the paper pattern on the fabric for the outer bag and trace it. However, don't cut it out until you've done the emboidery!
Using the same paper pattern trace and cut out the back panel and 2 panels of lining.
|
|
Embroidery:
|
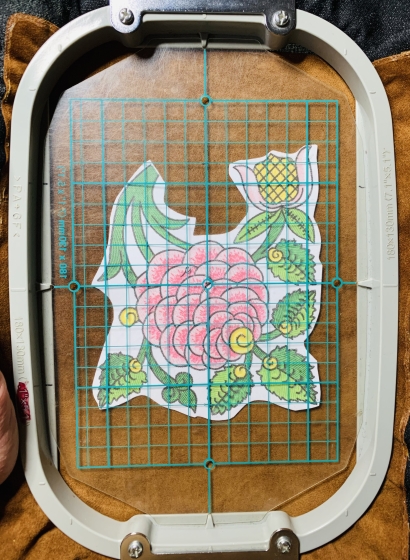
Mark the position of the embroidery on the front panel. If you have a printer and embroidery software, print-outs of the design can be helpful. If you do not, you can cut out a rectangle of the same size as the design to determine the position of the embroidery.
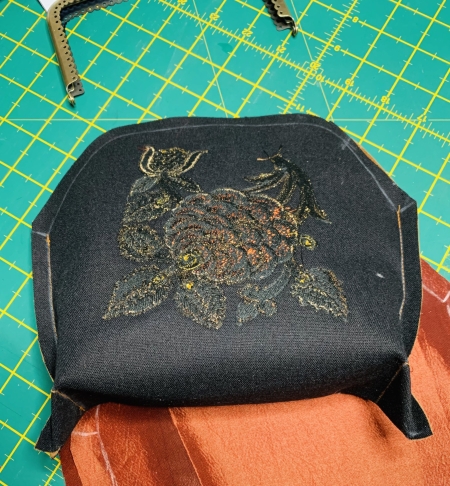
Stabilize the chosen area. Hoop the fabric tightly and embroider the design. |
|
Assembly:
|
Note: seam allowance is 3/8"
|
Right sides together, align all edges of the outer bag panels, sew the bottom. Open and press the seams.
Align the sides and sew them together from the lower point of the metal frame to the bottom. Open and press the seams.
|
|
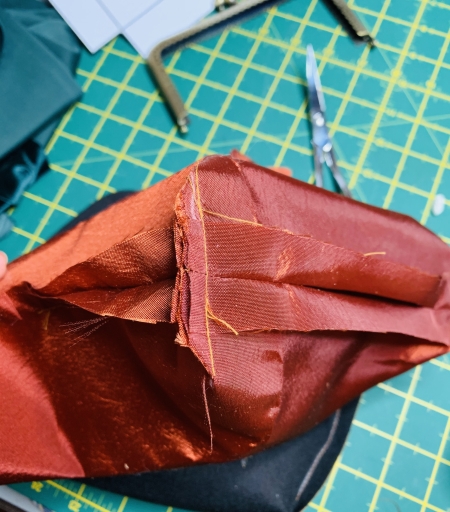
Make box corners. To make box corners, separate the front and back sides at the corners. Center the seam on the side with the bottom seam.
Measure 1" along the seam from the corner. Draw a line perpendicular to the seam across the corner and machine-stitch it several times.
|

|
| Do not cut off the ends. |
|
Position the lining panels face to face, align and pin all edges. At the bottom, stitch 1 1/2" from both sides, leaving the central part of the bottom open. Press the seam open.
Stitch the sides up to the lowest point of the metal frame. Open and press the seams.
Make the box corners on the lining. Cut away the ends.
|
|
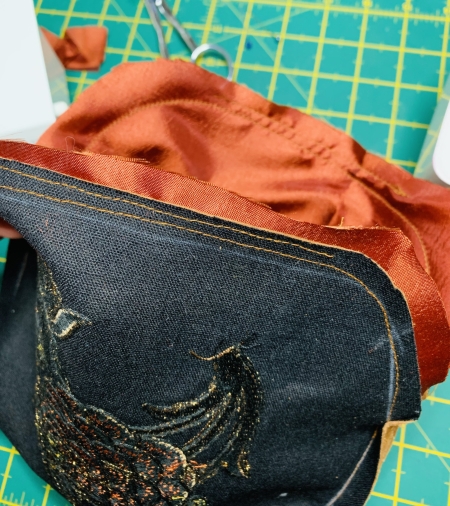
Insert the lining into the outer bag right side to right side. Align the side seams and upper edges, pin together. Topstitch the upper edges.
|
|
Though the opening in the lining turn the working piece right side out. Handstitch the lining bottom, tuck the lining inside.
Press the upper edges and topstitch them.
|
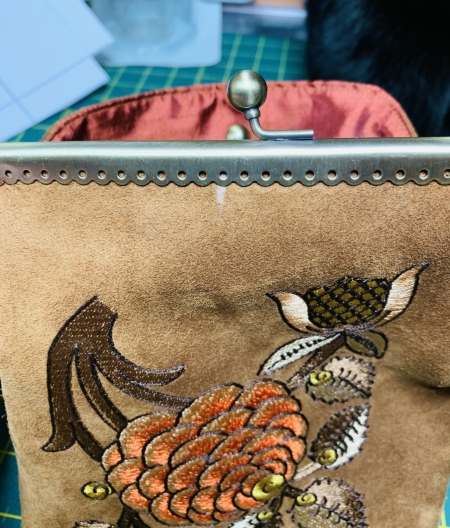
Working with one edge at a time, insert it into the frame.
|
|
| Using either invisible or matching color thread, sew the frame to the purse, starting from the center and going to the sides. |

|
|
If you are using a glue-on frame, follow the manufacturer's instructions.
|

|
| Have fun! |

|
|
|
Back to Zinnia Decorative Set
|
Back to Projects Page
|


