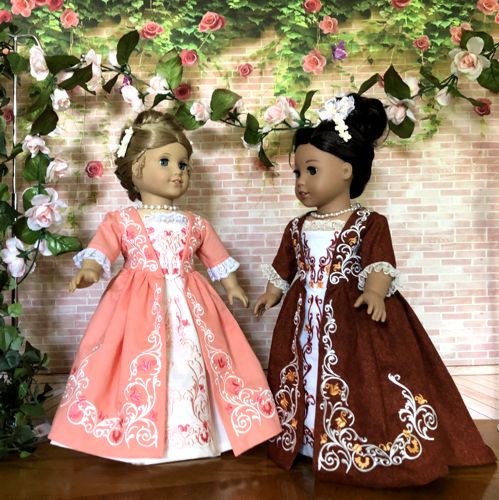
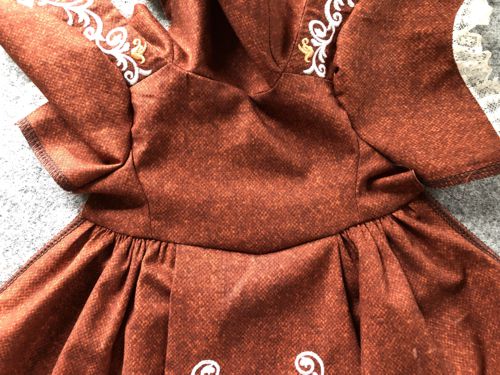
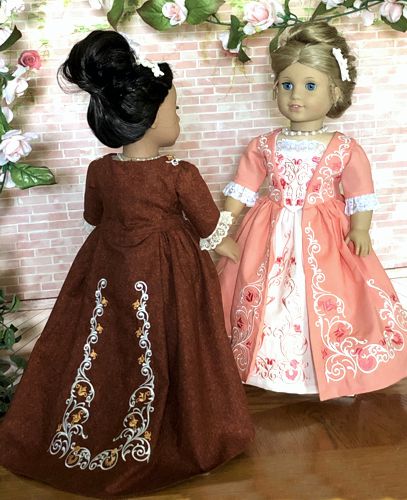
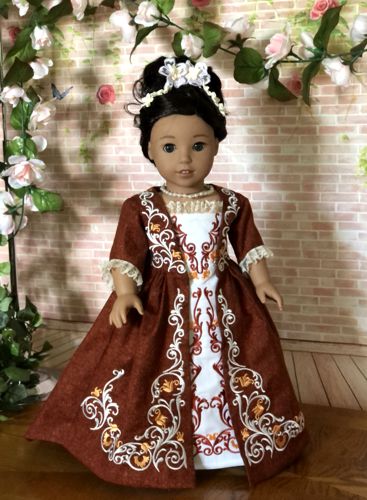
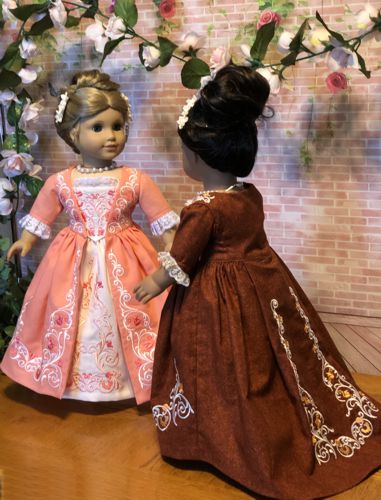
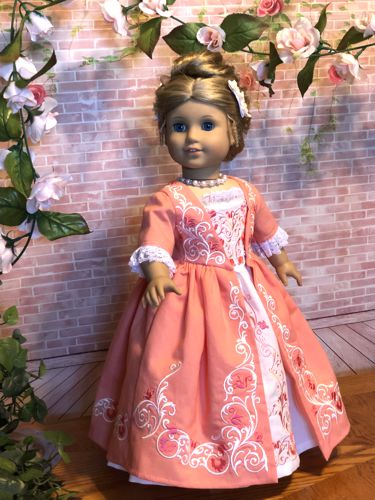
These are instructions on how to embroider and sew the Colonial Formal Dress for 18-inch dolls like American Girl, Our Generation and other 18-inch dolls with a similar body.
|
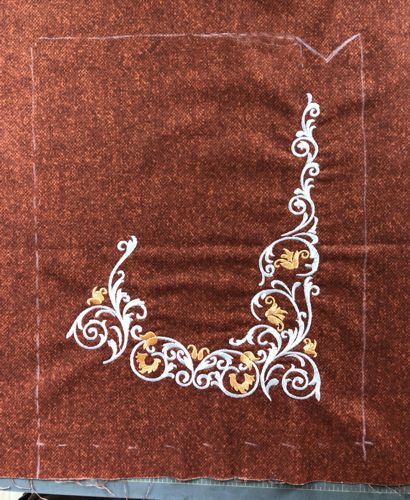
Click to enlarge
|
You will need :
- embroidery threads, either polyester or rayon, in your choice of colors;
- about 1 yard of solid colored fabric (cotton is preferred), in your choice of color, for the robe;
- about 1/2 yard of fabric in white, ivory, or a very pale pastel (cotton preferred), for the petticoat and stomacher (please note that for the petticoat you will need a piece measuring 11" x 40", that's why it's better to buy a yard);
- about a yard of 1" wide lace;
- light-weight cut-away embroidery stabilizer;
- a piece of one-wrap Velcro tape or 5 sew-on snaps;
- chalk pencil or removable fabric marker;
- quilter's ruler and rotary cutter;
- scissors;
- iron;
- sewing threads of matching colors;
- sewing pins;
- needle for hand stitching;
- embroidery and sewing machine;
- printer for the outfit patterns.
|
| Files: |
There are 10 embroidery files in the package:
- BodiceFront,
- BodiceFrontMirr,
- Dress1,
- Dress1Mirr,
- Dress2,
- Dress3,
- DressDecor1,
- DressDecor2,
- Stomacher and
- Stomacher2V
In these instructions we explain how we used them for the 18th century doll outfit. However, there are many other ways to use these beautiful designs.
There are 2 pdf files in the package: Instructions and Templates. Read instructions on the screen, print out the templates from the Templates file. |
| Sewing Instructions: |
| Note: seam allowance is 1/4" if otherwise not instructed. |
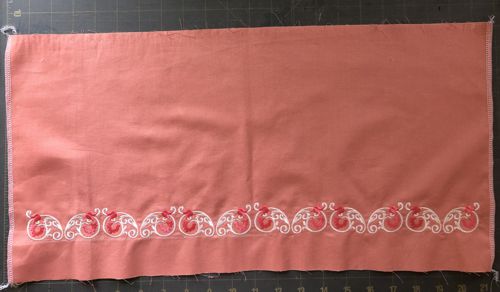
| Petticoat: |
| For the petticoat we used the file "Dress3". |

|
Prepare the fabric - press, and cut the strip 40" long and as wide as your hoop needs for hooping. Fold the fabric widthwise in half and lightly press the folded line to mark the central line. Alternatively, you can draw this line with a chalk pencil.
Stabilize and hoop the fabric so that the marked line coincides with the central line of the hoop. |
| Upload the file "Dress3" into the embroidery machine and embroider it. Cut away the excess stabilizer around the embroidery. |
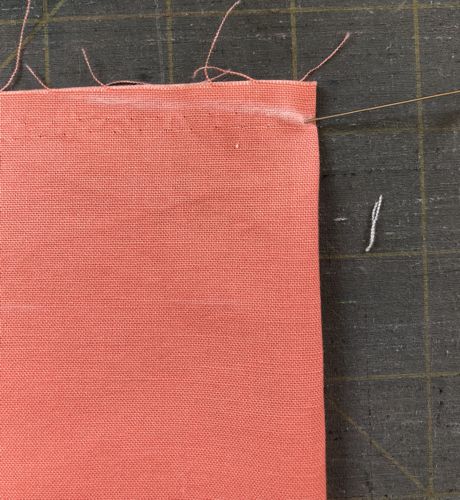
| Trim the strip to 11" wide. Finish the short raw edges - either using zig-zag or a serger. |
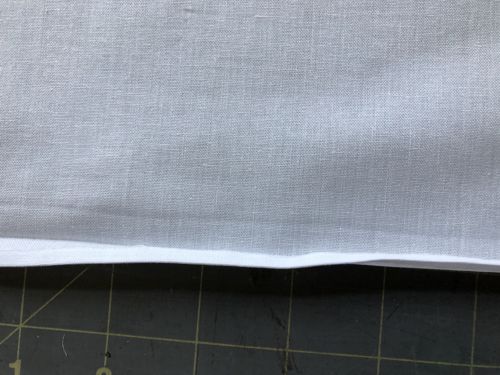
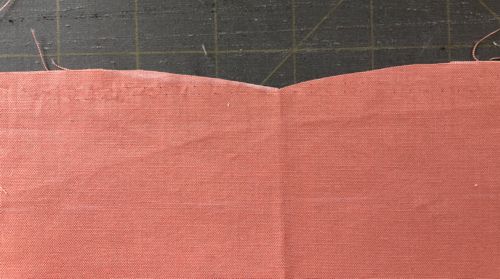
| Fold the lower long edge 1/4" back, press. Fold again 3/8" and press. |
|
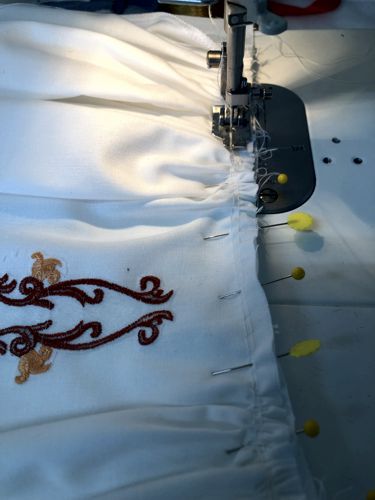
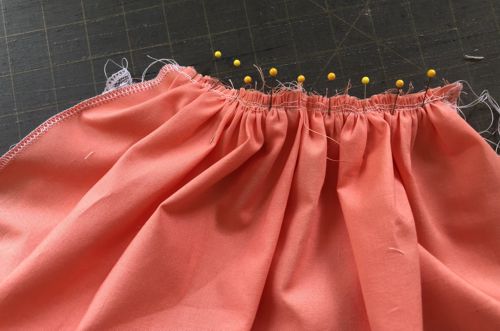
| Sew 2 rows of gathering stitches along the upper edge of the working piece, starting and finishing 1" from the short edges. |
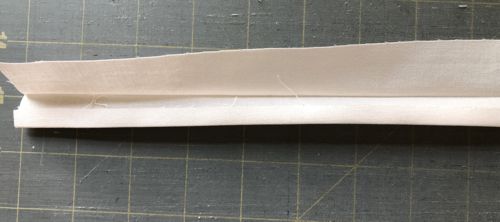
Out of the same fabric cut the waistband - a strip measuring 2" x 12 1/2".
Fold in half lengthwise, wrong side inwards, and press.
Fold one of the long edges 1/4" towards the folded line and press. |
|
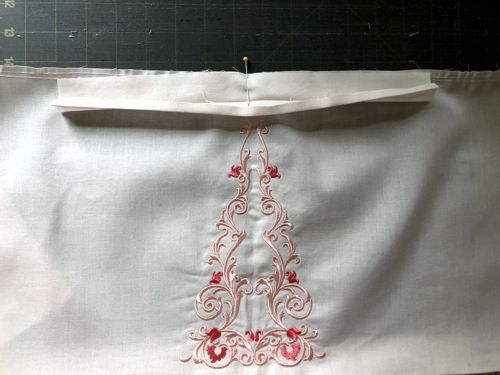
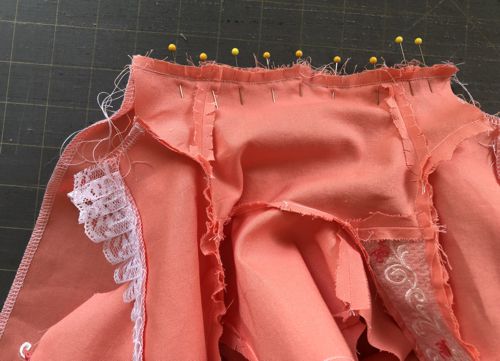
| With face sides together, match the center of the waistband's unfolded edge with the center of the skirt, pin. |
|
Fold and press the short sides 1/2" on the wrong side.
Pull the gathering threads on the skirt. Adjust the fullness evenly, leaving 1/4" on each side of the waistband. Pin. |

|
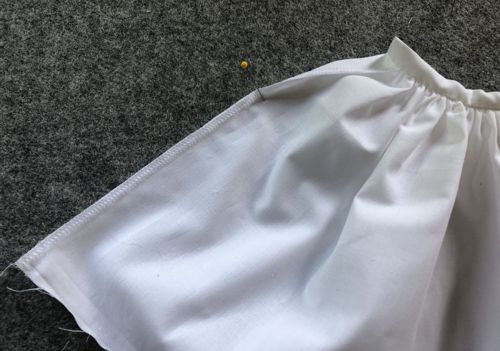
| Stitch the waistband to the skirt. Press the seam allowance toward the waistband. |
|
| Fold the waistband along the creased line, but with right sides inside. Stitch. Trim the seam to 1/8". Turn the waistband right side out. |
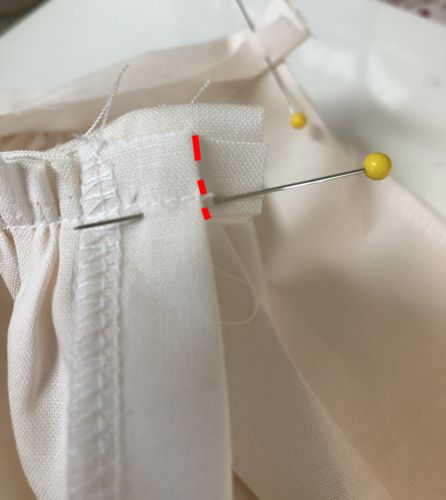
|
| Turn the waistband onto the seam allowance and handstitch in place |

|
| With right sides together, match the short edges. Pin together. Stitch from the hem up, stopping approximately 2" from the waistband. Press the seam open. |
|
| Finish the hem either by hand or topstitch on the sewing machine. |
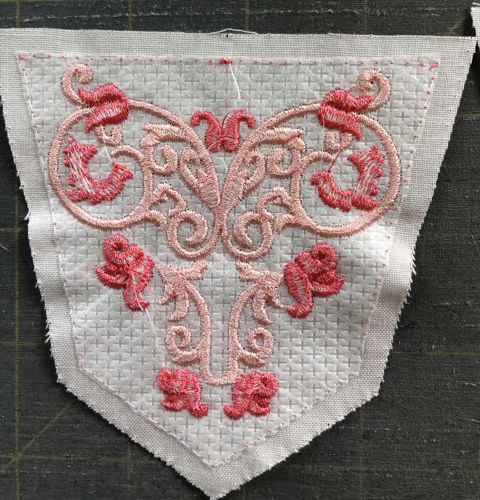
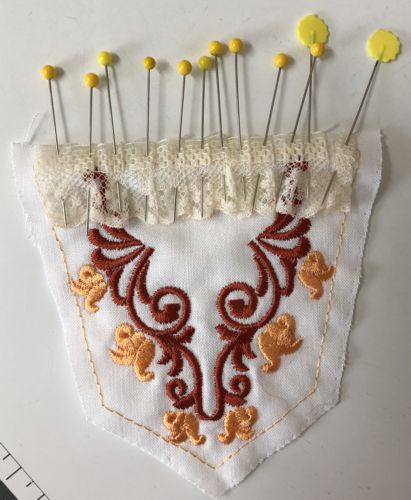
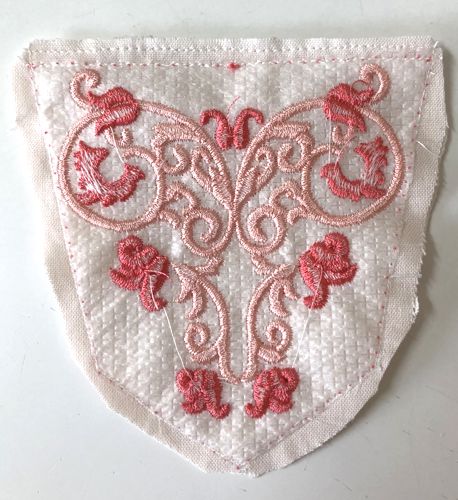
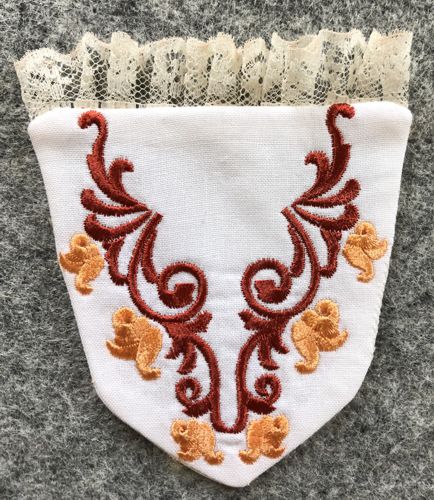
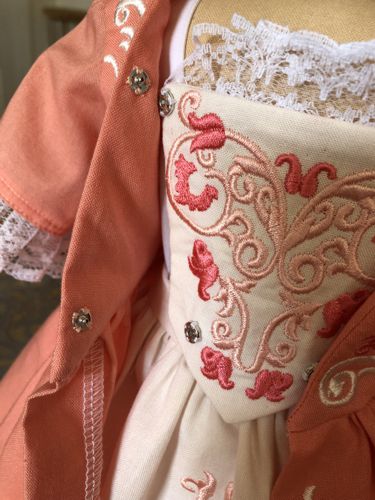
Stomacher
|
There are 2 versions of the stomacher. They are both worked the same way. Upload any of the files into the machine.
Stabilize and hoop the fabric with light-weight cut-away stabilizer and embroider the file.
|
Cut out the stitch-out along the outside running stitches. Using the stitch-out as a template, trace it on a piece of fabric to get the lining. Cut the lining out.
|
|
| Remove the outer running stitches and cut away the stabilizer up to the inner running stitches. |
|
Cut a 8"-long piece of lace. Gather or make pleats. Pin along the upper edge of the stomacher between the inner running stitches, face side inwards.
|
|
With right sides together, pin stomacher lining over stomacher. Stitch together using the inner running stitches as guide and leaving an opening at the side to turn.
|
Trim the corners.
|
|
Turn the right side out and press.
|
|
Robe
|
| The Bodice: |
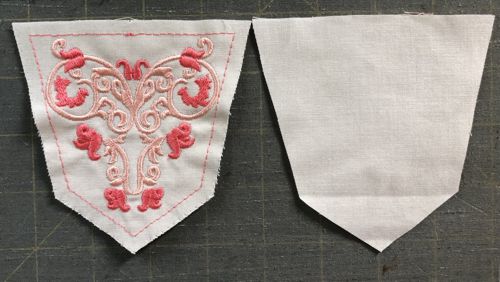
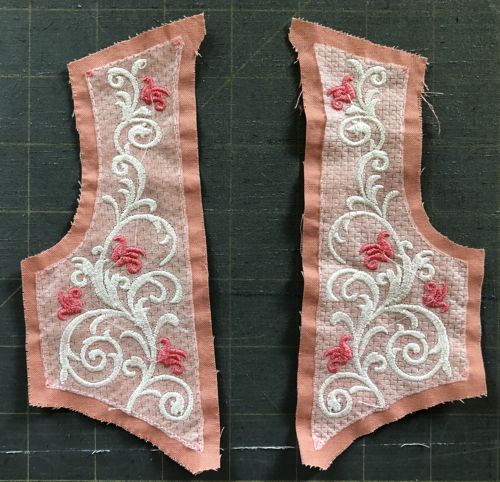
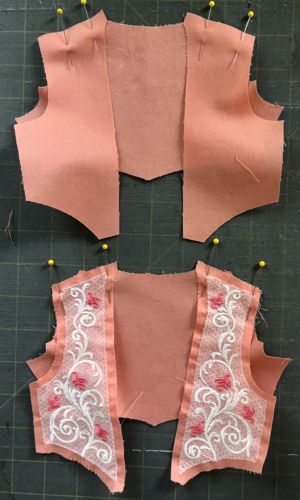
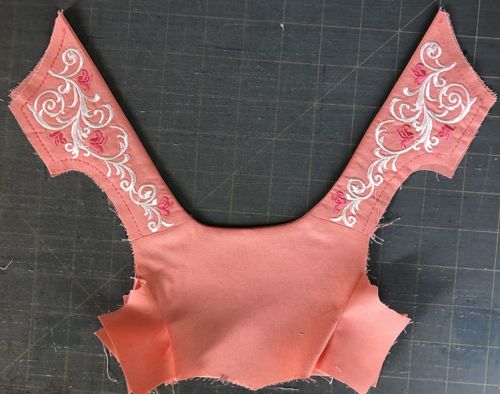
Upload the "BodiceFront" and the "BodiceFrontMirr" files into the machine. Stabilize the fabric and embroider the files one by one.
Cut the stitch-outs out along the outer running stitch. Rip the outer running stitch and cut away the stabilizer up to the inner running stitch.
|
|
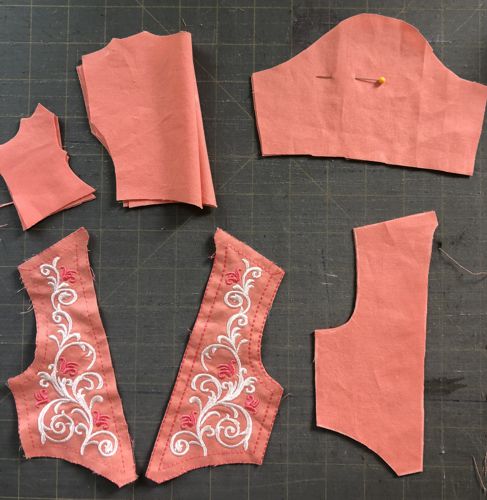
Using the stitch-out as a template, place it on a piece of fabric for the lining (we used the same fabric for the lining), trace it and cut out.
|
| Position the templates of the back and sleeves on the fabric. Trace. Cut out. |
| You have 2 front (embroidered) parts, 2 front lining parts, 1 back, 1 back lining, 2 back sides, 2 back side lining, 2 sleeves |
|
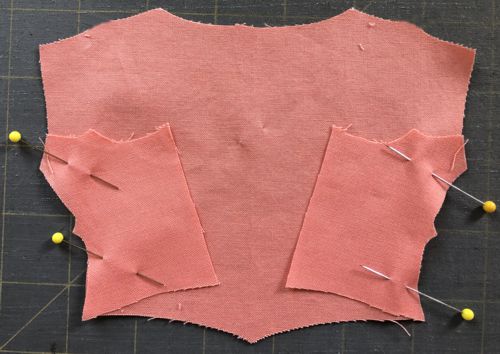
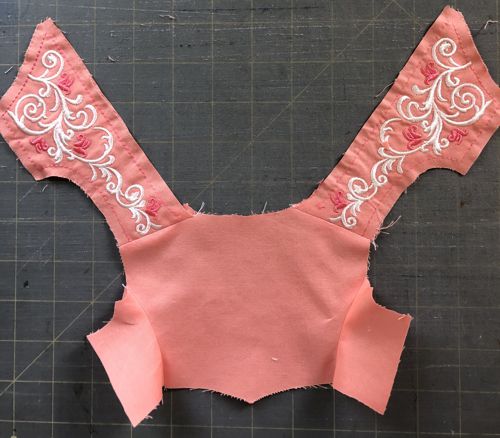
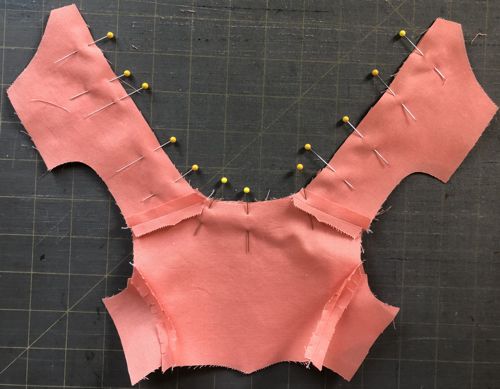
Pin the side back parts to the back matching the notches. Stitch. Repeat for the lining.
|
|
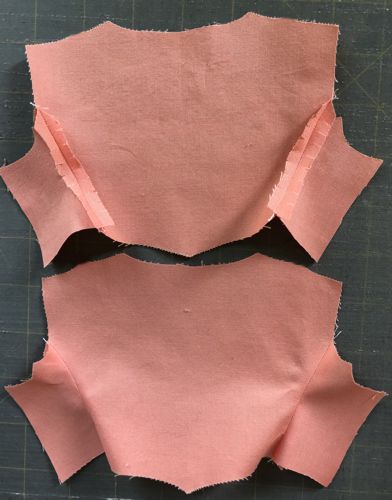
Clip the curves. Press the seams open.
|
|
Lay the back and front pieces face to face and sew them together at the shoulders. Press the seam open.
Repeat for the lining.
|
|
Press the seams open.
|
|
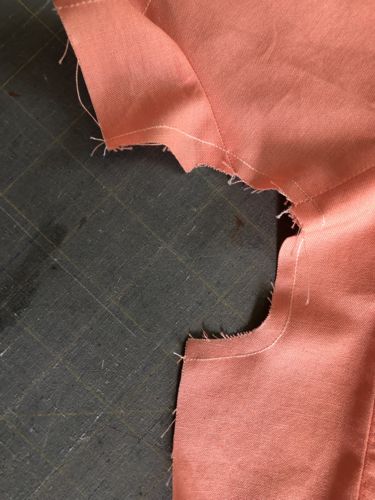
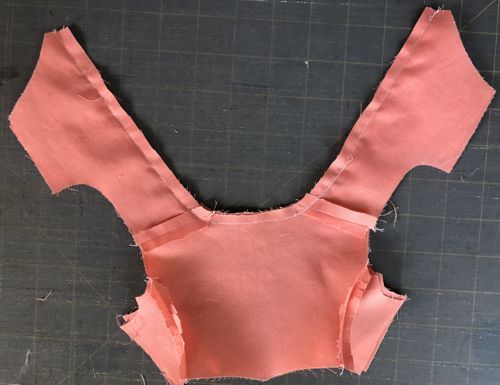
| Staystitch the armhole of the lining with seam allowance 1/4". |
|
| Staystitch the bottom edges of the lining with seam allowance a scant 1/4". |
|
With right sides together, pin the bodice and lining, matching the shoulder seams.
|
|
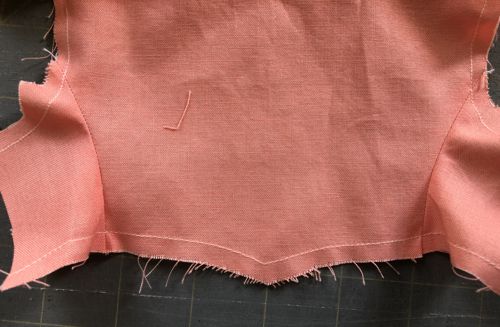
Stitch along the front and neckline with seam allowance 1/4". Clip the curves. Trim the seam to 1/8".
|
|
Turn the piece right side out. Press.
|
|
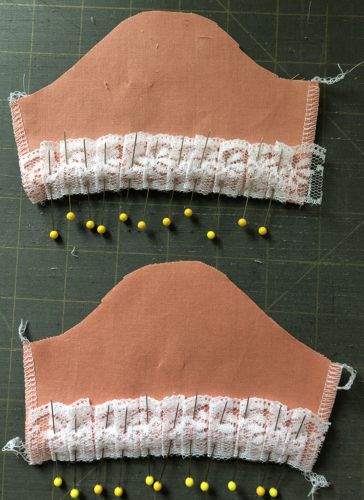
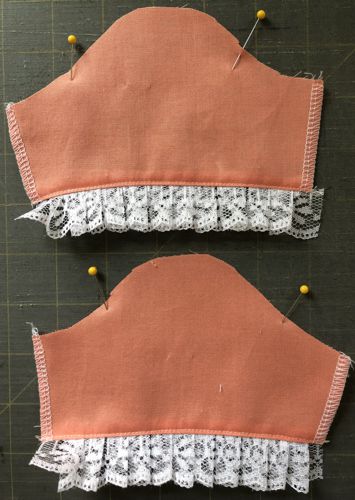
Zig-zag or serge the side and lower edges of the sleeves.
Cut 2 pieces of lace, 12" long each. Gather or pleat along the lower edge of the sleeve, right sides together.
Stitch along the lower edge, seam allowance 1/4".
|
|
| Fold the seam allowance to the wrong side. Press. Topstitch. |
|
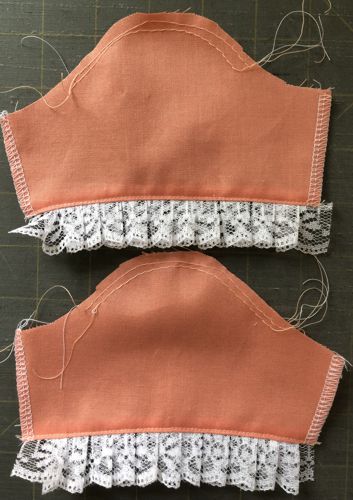
Sew 2 rows of gathering stitches on the sleeve cap.
|
|
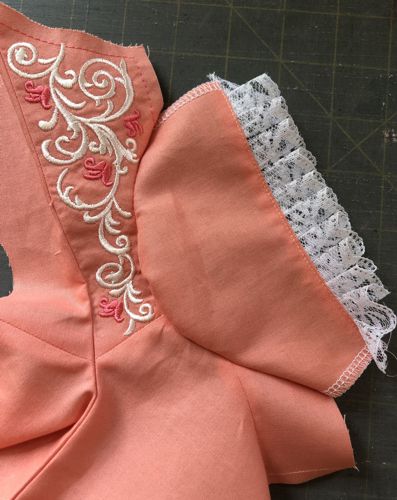
With right sides together pin the sleeve to the armhole. Evenly draw up the gathering stitches. Stitch.
|

|
Clip the curves and press seams to the bodice.
|
|
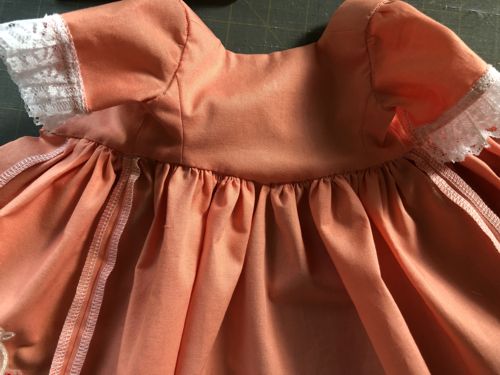
| Repeat for the other sleeve. |
|
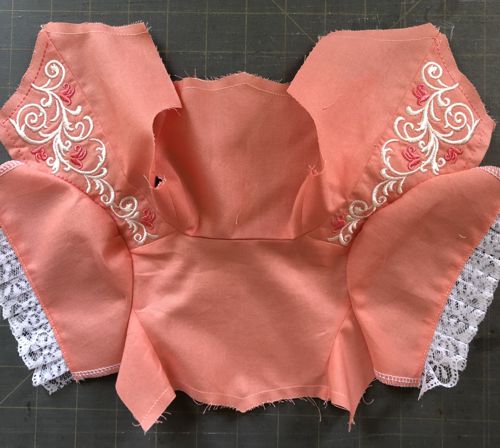
| Set the bodice aside for the time being. |
The Skirt of the Robe:
|
| The skirt consists of 2 front and one back parts. You can make the back part with the train and without it. We give a template for the skirt with the train and explain how to make the skirt without it. |
| The Robe Front Skirt: |
| Upload the files "Dress1" and "Dress1Mirr" into the machine. Stabilize the fabric with the light-weight cut-away stabilizer and embroider the files one at a time. Cut away the excess stabilizer around the embroidery. |
| Place the paper template over the stitch-out and trace it. Cut the part out. Repeat for the mirror part. |
|
Zig-zag or serge the side edges of the front parts.
Fold the the front edge to inside on fold line to form facing, press. Sew 2 rows of gathering stitches along the upper edge, starting at facing edge and finishing 1/4" from the side edge.
|
|
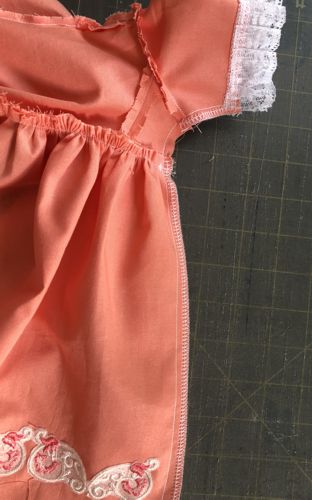
Pull the gathering threads. Right sides together, lining folded out of the way, pin the skirt front to the bodice front, matching the front and side edges.
|
|
The view from the bodice.
|
|
| Stitch. Clip the curve on the bodice. Press the seam to the bodice. |
|
| Repeat for the other front skirt. |
|
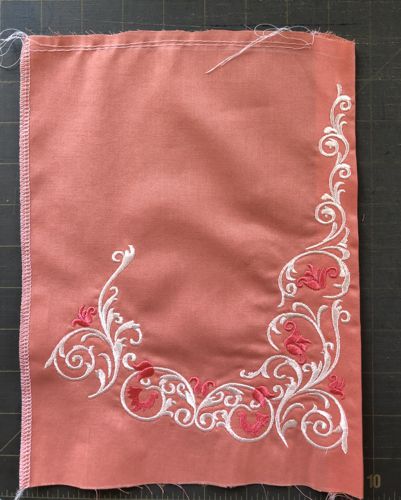
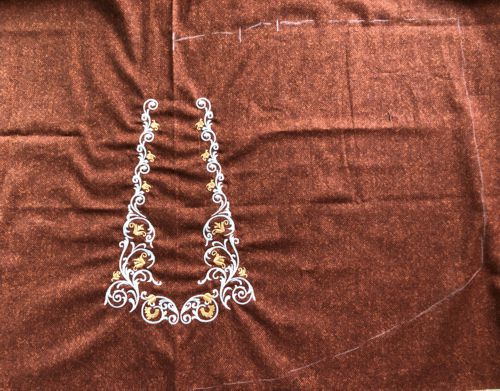
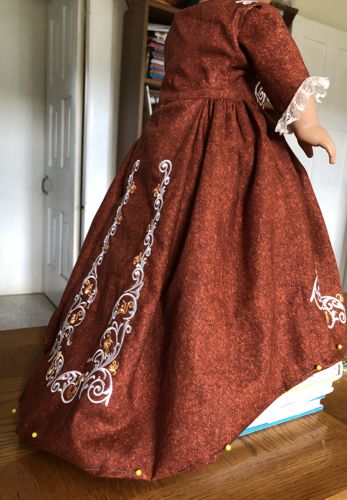
Back Part of the Skirt with Train.
|
For the skirt with train we used the file "Dress2". Upload the file "Dress2" into the machine. Hoop the stabilized piece of fabric and embroider the file in the center of the piece.
|
|
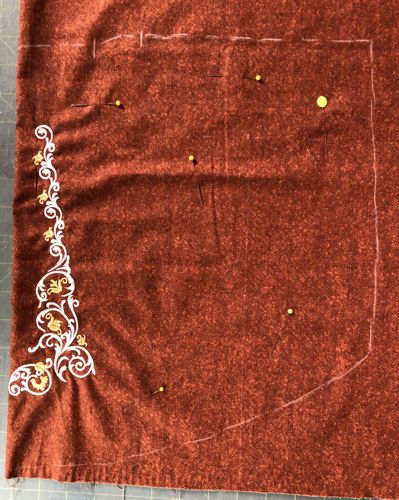
Fold the fabric in half widthwise, so that the fold goes through the center of the stitch-out.
Position the template of the back skirt over the stitch-out and trace it. Cut the back out. Zig-zag or serge the sides to the hem.
|
|
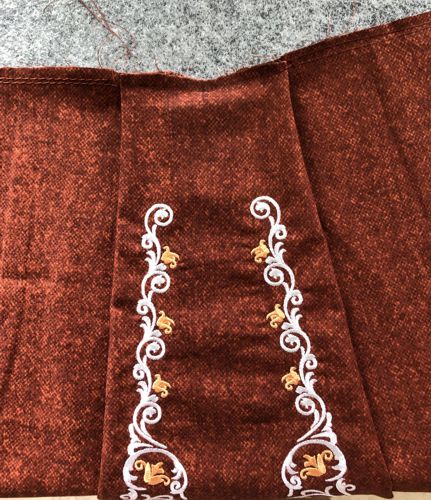
Fold the pleats over the stitch-out. Pin. Edge-stitch across the top edge of the pleat to hold in place.
|
|
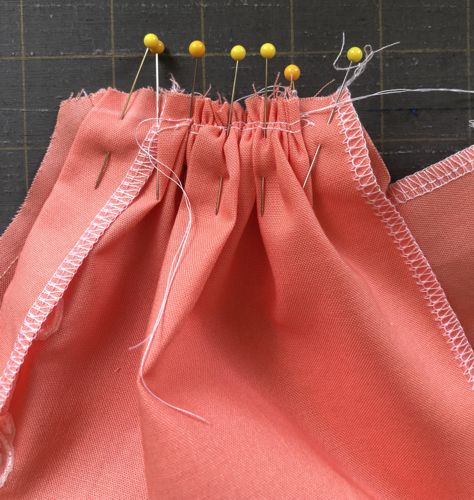
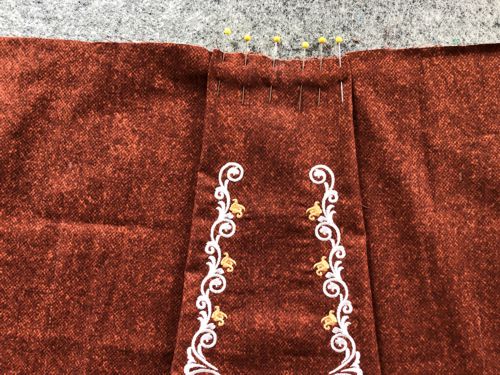
Make 2 rows on gathering stitches on both sides of the pleats till the side edges, stopping 1/4" from the side edges.
|
|
With face sides together, match the center of the bodice's back with the center of the skirt. Keep the bodice lining out of the way.
|

|
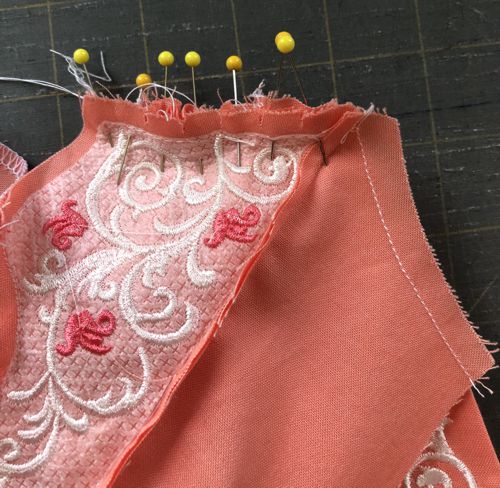
| Pin the center of the skirt to the bodice. Then, working with one side of the skirt's back at a time pull the gathering threads and pin the skirt to bodice at waistline, matching the side edges. |
|
| Stitch. Clip the curves on the bodice. |
|
| Press the seam allowance towards the bodice. |
|
|
Back Part of the Skirt without Train
|
You might prefer to make a skirt without a train. For such a skirt we used the file "DressDecor1".
With a chalk pencil draw a rectangle 11" wide and 22" long on a piece of fabric. Draw a straight line approximately 2" from one of the long sides. Embroider the file over this line 6 times.
Cut out the rectangle and zig-zag or serge the short sides. |
|
Fold the piece widthwise in half. Measure 1/4" from the top edge along the folded line. Mark with chalk pencil. Measure 1" from the fold along the top edge, mark. Connect the marks with a light curve.
|
|
Cut along the drawn line.
|
|
| Starting from the center, and finishing 1/4" from the short edge, sew 2 rows of gathering stitches along the upper edge of the working piece in both directions. |
| Attach the back part of the skirt to the bodice in the same way as described above. |
|
|
Finishing:
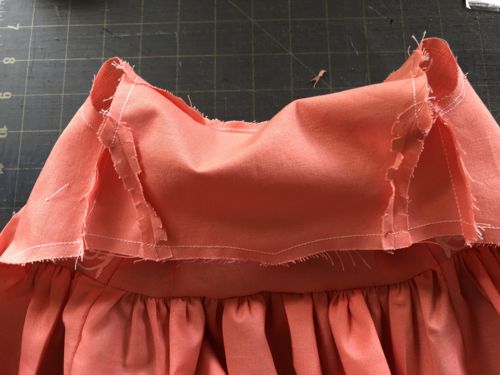
|
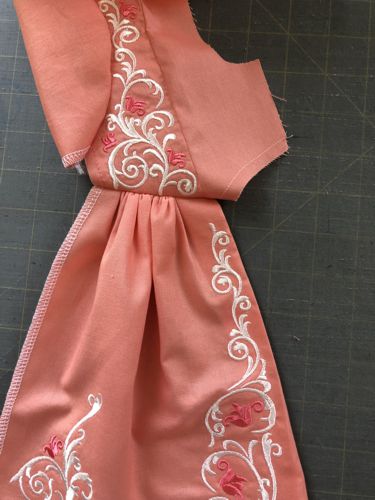
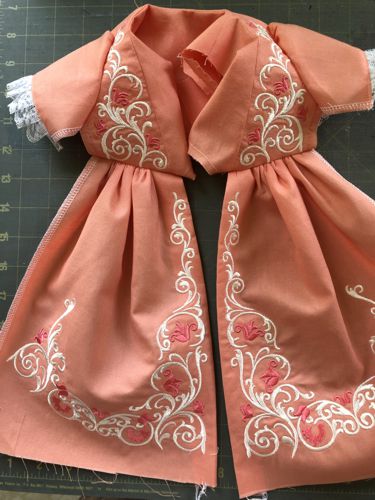
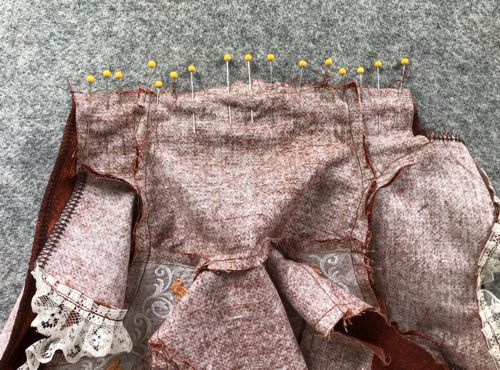
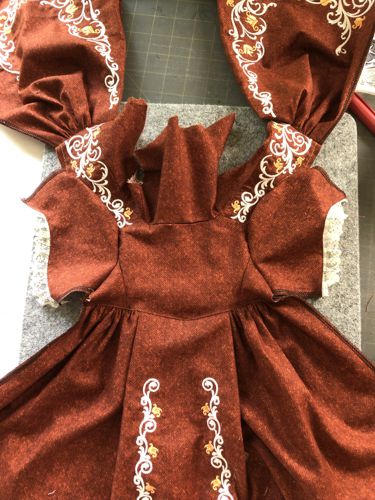
At this point your working piece should look like this:
|
|
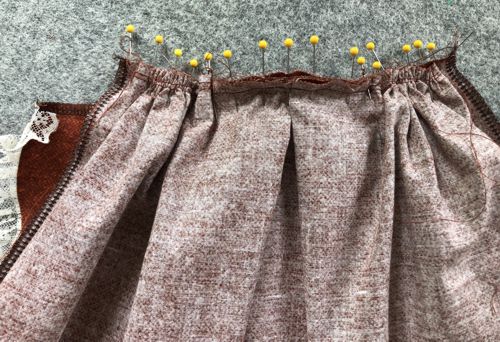
Keeping the lining out of way, right sides together, fold the robe. Match the sleeve underarm seams and waistline seams. Align and pin the edges.
|
|
Stitch from the sleeve hem to the skirt hem. Press the seam open. Repeat for the other side.
|
|
With right sides together, stitch the sides of the lining. Press the seams open. Clip curves.
|
|
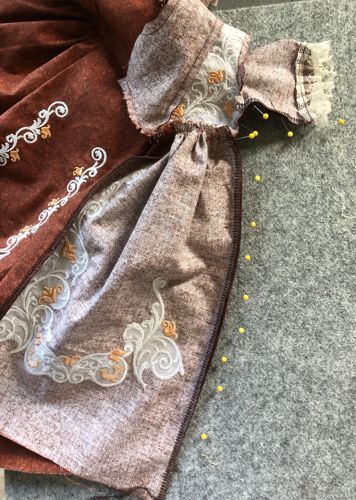
| Fold the lining onto the dress, draw the sleeves through the armholes of the lining. Clip the curves up to the stay stitches, taking care not to cut through the stitches. |
|
Fold the lining edge along the stay-stitching, pin in place.
|

|
Sew the lining in place by hand. Fold the lining armholes and stitch in place by hand.
|
|
Fold and press the hemline 1/8". Fold again a scant 1/4". Either topstitch or finish the hem by hand.
|
|
Put the dress on the doll and mark the position of the closure on the bodice and stomacher. Sew on the snaps.
|
|
| Have fun! |
|
|
|
Back to Blue Ornament Set
|
|
|
|
Back to Colonial Formal Dress for 18-inch dolls
|


