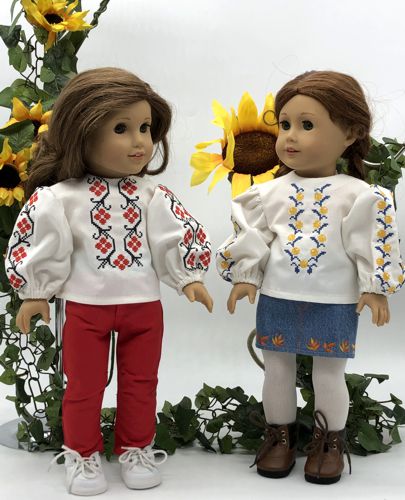
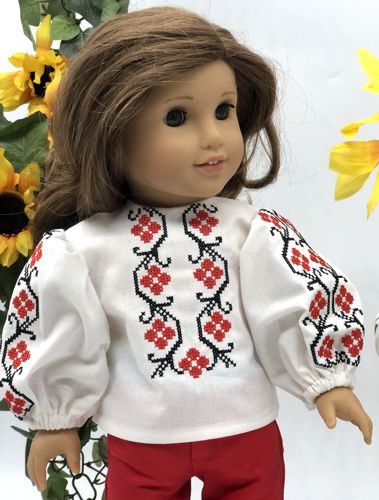
These are instructions on how to embroider and sew the folk blouses from the Folk Blouse Set.
The blouses are designed to fit 18-inch dolls with a soft body, such as American Girl, Our Generation, My Life As and similar dolls.
|
|
For each blouse you will need :
- embroidery thread, either polyester or rayon (you choose the color),
- about 1/2 yard of solid-colored light-weight fabric, such as light-weight cotton or linen, cotton-polyester blend, etc.,
- very light-weight mesh embroidery stabilizer,
- either sew-on snaps or ultra thin Velcro tape,
- 1/4" wide elastic, 2 pieces 3 1/2" long for each blouse,
- chalk or graph pencil,
- small rotary cutter or scissors,
- sewing pins,
- iron,
- #12 universal needle,
- fray check glue,
- printer and paper.
|
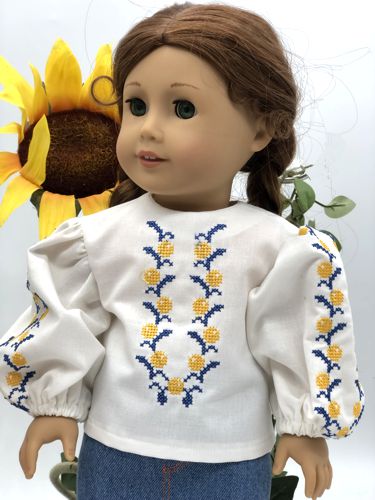
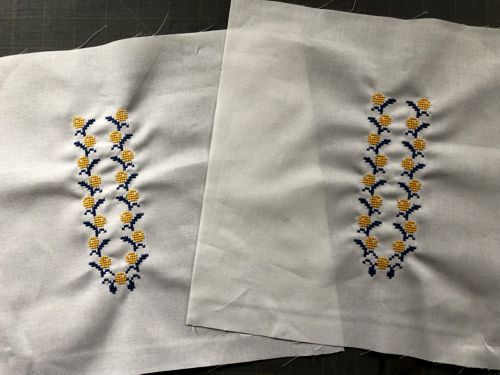
The left blouse is made of light-weight cotton with embroidered organza overlay. The right blouse is made of medium weight polyester silk with embroidery right on the fabric.
|
|
| Files: |
You will get a zip file which contains: a PDF file with instructions, a PDF file with patterns, 2 JPG files with information about the embroidery and 10 embroidery files in the format you need. The embroidery files are:
- BackL,
- BackR,
- Front1V1,
- Sleeve1V1,
- Front1V2,
- Sleeve1V2,
- ForFront1,
- ForSleeve1,
- ForFront2,
- ForSleeve2.
|
| First of all, open and read the file with instructions. To open and print a PDF file, you will need Adobe Reader or a similar program. Adobe Reader is free to download and install. |
If you have a 8" x 12" size hoop, you can use the files:
- BackL,
- BackR,
- Front1V1,
- Sleeve1V1,
- Front1V2,
- Sleeve1V2.
Note: Seam allowance of 1/4" is included. |
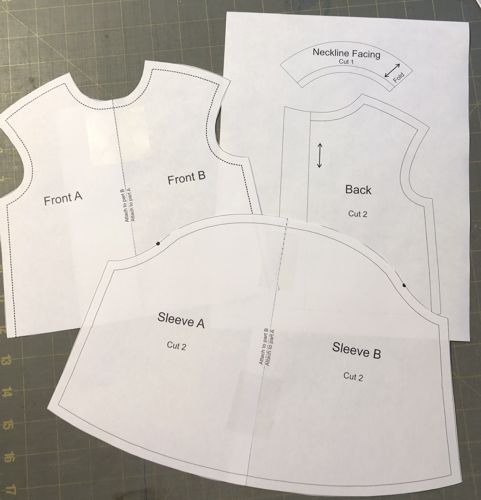
If you do not have a hoop of this size, open the PDF file with the patterns. Print out the templates and cut them out. Use the embroidery files with motifs only:
- ForFront1,
- ForSleeve1,
- ForFront2,
- ForSleeve2.
Note: Seam allowance of 1/4" is included in the templates.
|
|
Embroidery:
|
Stabilize the fabric with a layer of light-weight cut-away stabilizer. Hoop tightly.
For the owners of the large hoops: upload and embroider the files BackL, BackR, and either Front1V1 and Sleeve1V1, or Front1V2 and Sleeve1V2 one by one. The Sleeve file should be embroidered twice.
|

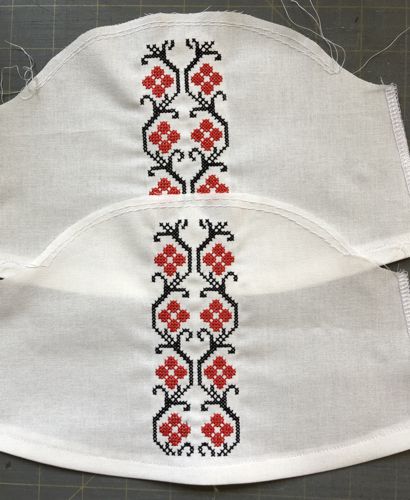
A stitch-out of one of the sleeve files.
|
| If you do not have a hoop large enough to accomodate the above files, upload either the files ForFront1 and ForSleeve1, or ForFront2 and ForSleeve2. Cut a 10" x 10" square of fabric for the front and 10" x 13" for the sleeves. Stabilize the fabric and embroider the files in the center of the pieces. |
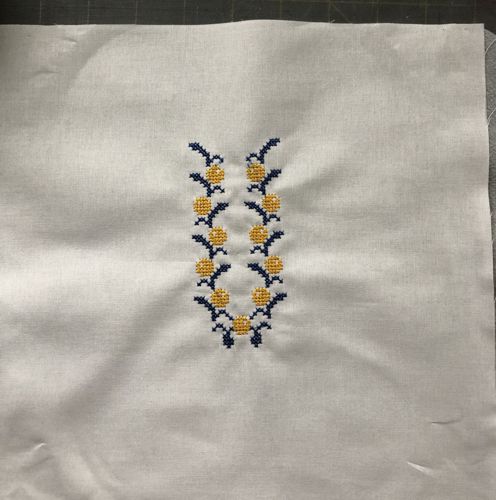
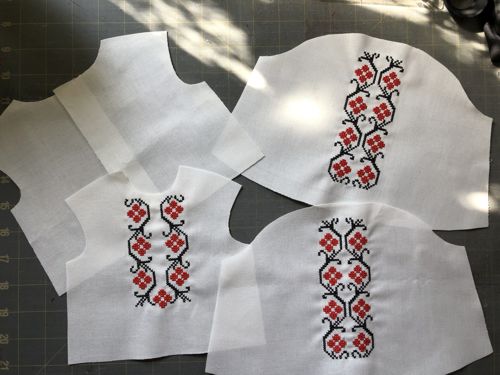
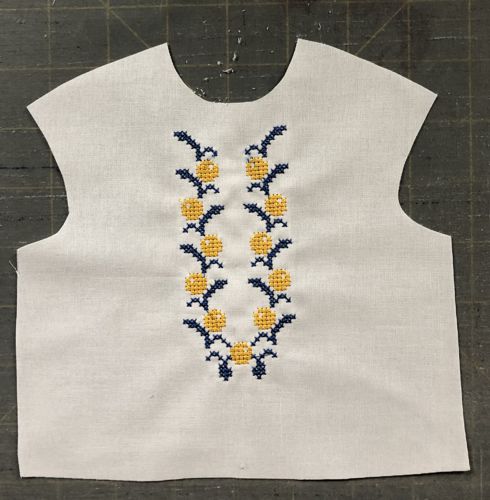
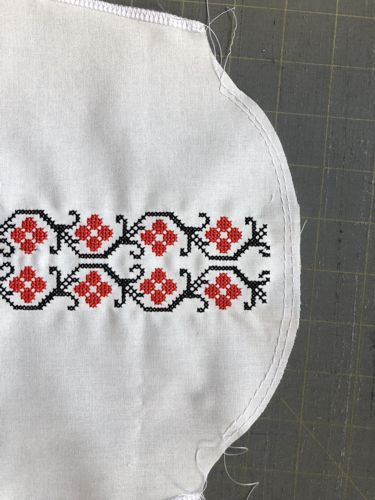
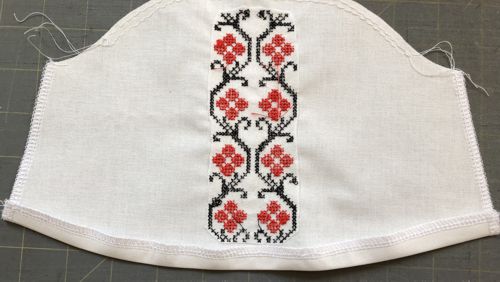
A stitch-out of the motif for the front |
Stitch-outs of the motifs for the sleeves
|
Cutting:
|
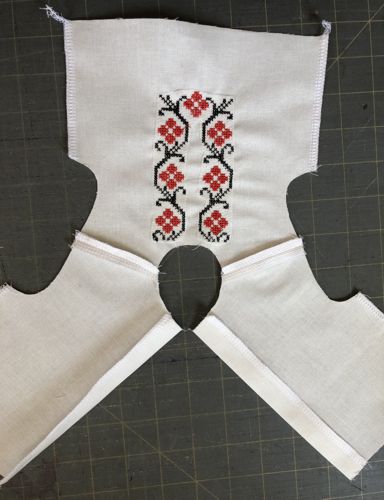
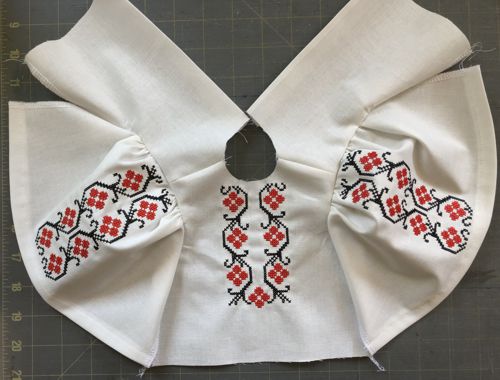
If you used the 8" x 12" size files, just cut the stitch-outs out. Cut away the stabilizer around the motifs, taking care not to cut through the stitches.
Use the paper template to cut out the neckline facing. |
|
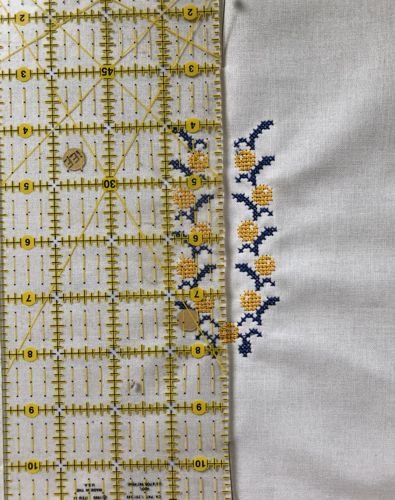
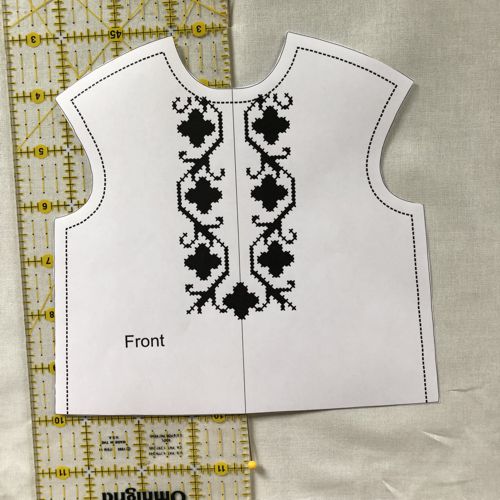
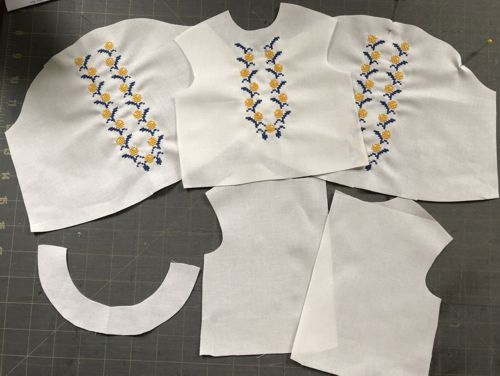
If you used only the files with the motifs, position the paper template of the front on the stitch-out. Trace and cut out. Use a ruler to align the embroidery and the stitch-out.
Position the ruler along the central vertical line of the embroidery.
|
|
| Cover with the paper template, align the central line on the template with the ruler's edge. Keep the template in place, remove the ruler. Trace the template. |
|
Cut out the front. In the same way, cut out the sleeves.
|
|
For the back, fold the fabric in half and cut out the back to get 2 mirror image parts.
Cut the neckline facing on a fold.
|
|
Assembly:
|
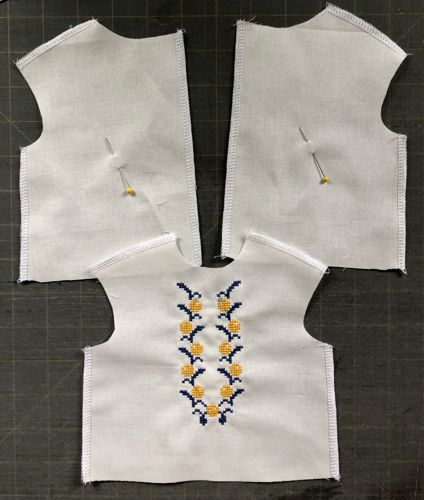
| With a zig-zag stitch or on a serger, finish the raw edges on the shoulders and sides of the front and backs. |
|
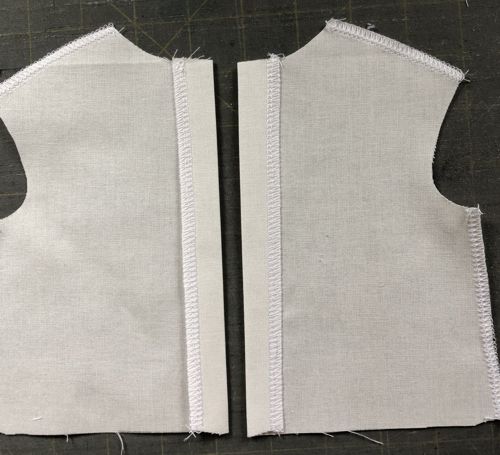
| Fold the opening sides of the back parts back and press. |
|
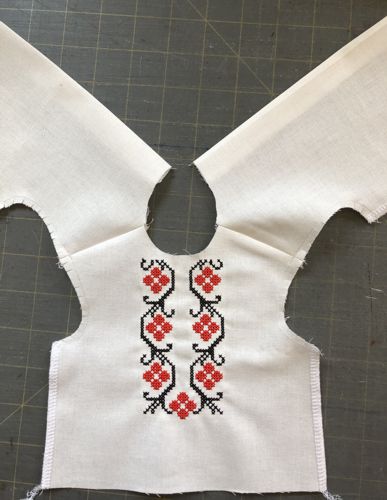
With right sides together, pin and sew the shoulder seams.
|

|
| Press them open. |
|
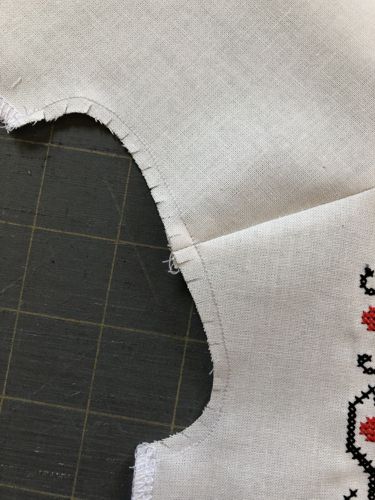
Staystitch along the armholes and clip the curves, being careful not to cut through the stitching.
|
|
|
Sleeves
|
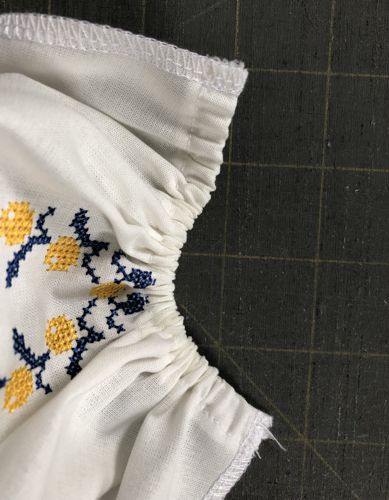
| Finish the raw edges on the sleeves' hems and sides. |
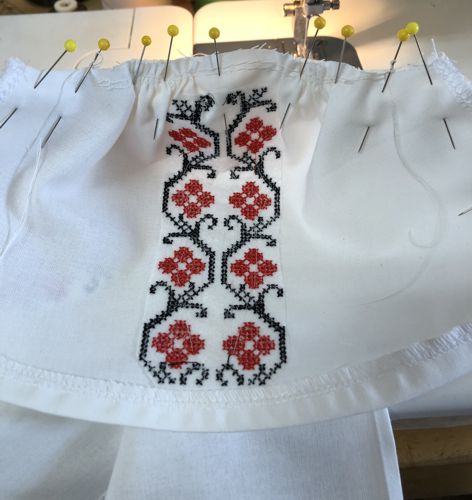
Sew 2 rows of gathering between the gathering dots on the sleeve cap at a scant 1/4".
|
|
| Fold back the hem about 1/2" and press. |
|
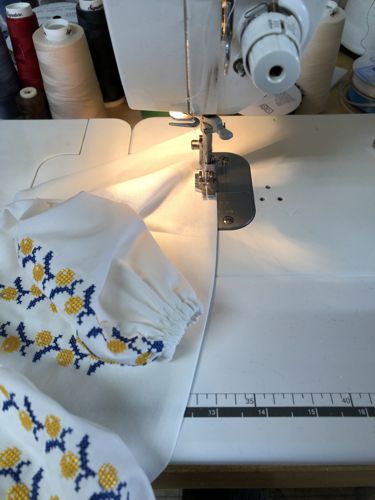
| Topstitch along the edge of the folded hem to form a casing for the elastic. |
|
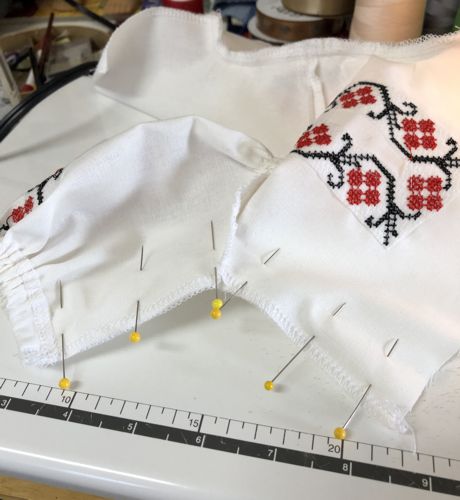
With right sides together, pin the sleeve to the bodice, matching the center of the sleeve with the shoulder seam. Pull the gathering threads of the sleeve cap and distribute the gathers evenly.
|
|
Stitch. Seam allowance is 1/4". Remove the gathering threads. Clip the curves on the sleeve. Finish the raw edge with either zig-zag stitch, or on serger.
Press the seam allowance to the shoulder. |
|
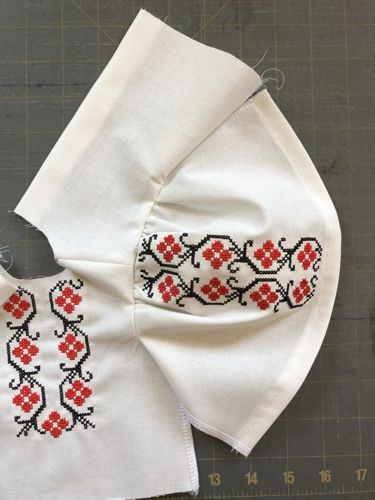
Repeat for the other sleeve. Both sleeves attached, right side view.
|
|
| Cut 1/4" wide elastic into two 3 1/2" pieces. Insert elastic into the casings on the sleeves. Stitch the ends of the elastic to the edges of the casing. |
|
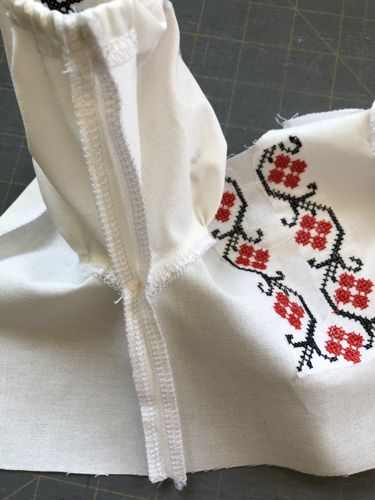
With right sides together, fold and pin from sleeve edge to side bottom. Stitch, seam allowance 1/4". Repeat on other side.
|
|
Press the seams open.
|
|
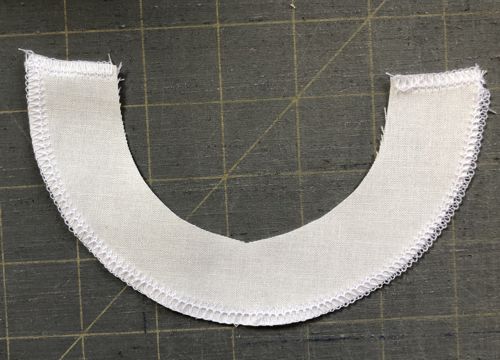
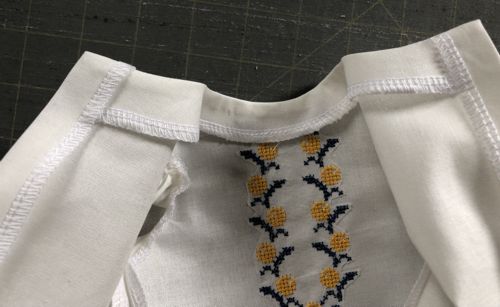
Finish the short sides and the long curve of the neckline facing.
|
|
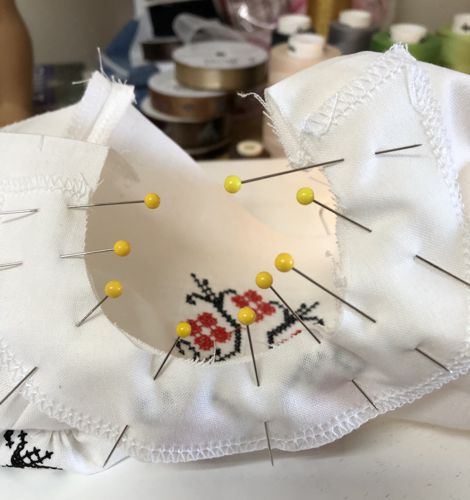
| With right sides together, align the blouses's front center and the facing's center. Pin along the edge. Note that the neckline facing does not extend to the end of the neckline. |
|
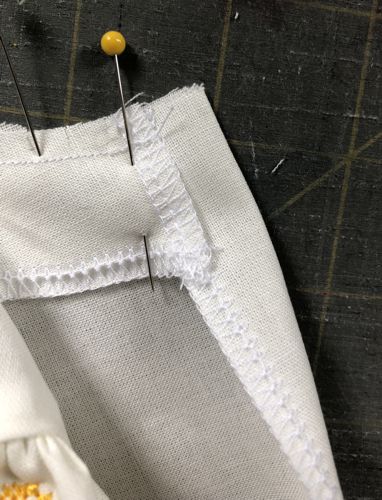
| Fold the back's facing onto the front, tuck under the neckline facing. |
|
| Stitch with seam allowance 1/4". Clip the curve and trim the seam to about 1/8". Cut the corners. |
|
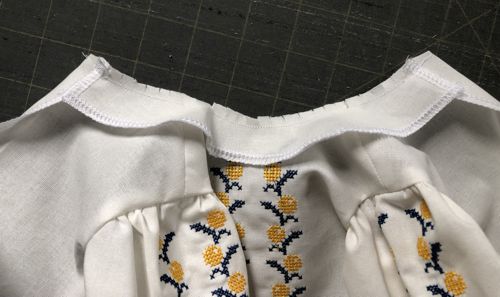
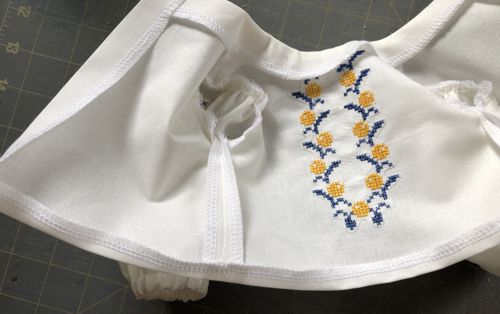
| Fold the facing back. Press. |
|
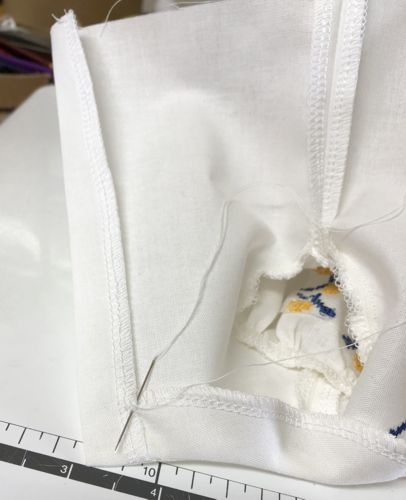
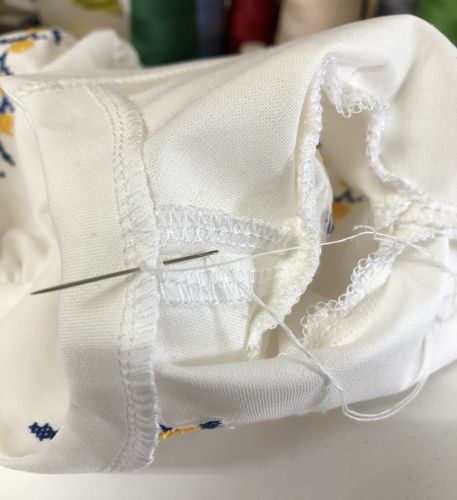
| Hand stitch the edge of the facing to the back facing. |
|
| Hand stitch the edge of the facing to the shoulder seam allowance. |
|
Finish the hem with zig-zag stitch or serger. Fold about 1/2" back. Press.
|
|
| Topstitch. |
|
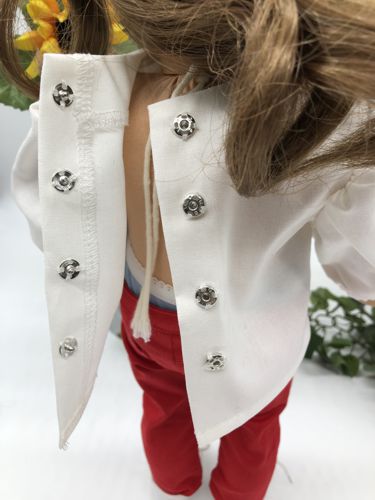
Put the blouse on a doll and mark the placement of the snaps. Sew on the snaps.
|
|
| Have fun! |

|
|
|
Back to Folk Blouse Set.
|
Back to Projects Page
|


