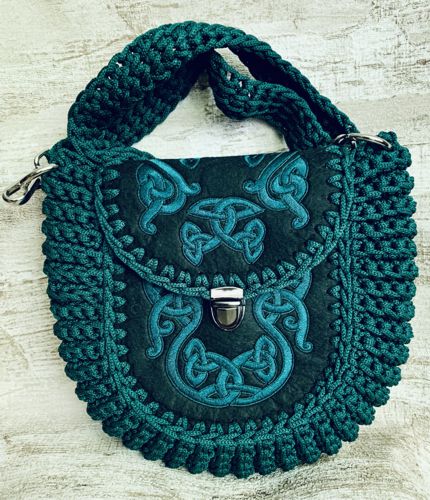
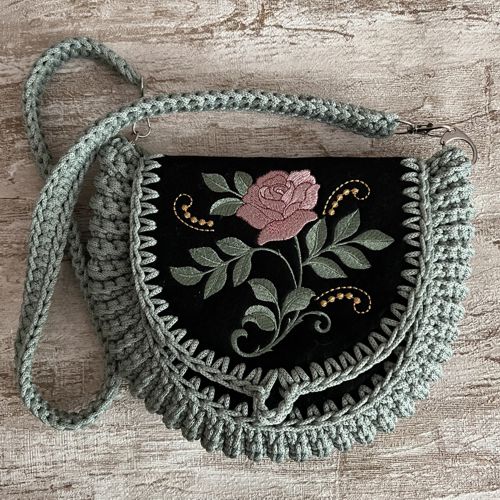
If you haven't heard, "Oreo" style bags are a popular style of bag that are made in a combination of crochet and fabric or leather. In our take on the style, we use embroidery designs from the "Oreo" Style Bag with Celtic Embroidery to make the fabric / leather portion of the bag quickly and easily.
This project combines crochet and machine embroidery. We are not including instructions on how to crochet the "Oreo" bag here. There are many video tutorials on YouTube. We provide some links towards the end of this tutorial.
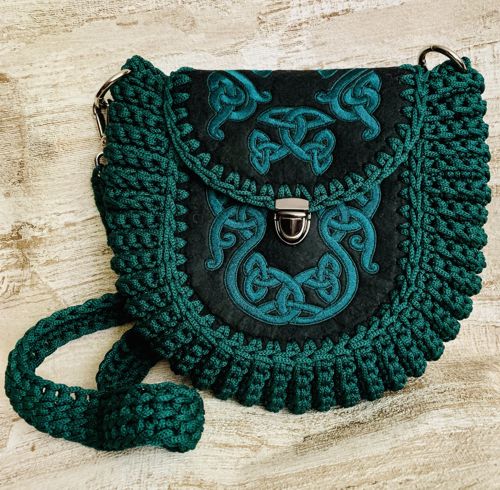
The finished size of the purse is about 9" H x 9 1/2" W x4" D (measurements are without the handle)
|
|
You will need :
- embroidery threads either polyester or rayon,
- faux/or real leather of any color,
- light-weight cut-away embroidery stabilizer,
- 3 mm cord, or any thick yarn recommended in video tutorials,
- 3 mm crochet hook, 2 stitch-markers,
- lock clasp for bags, (available on Amazon: here and here) (affiliate links)
- hole puncher for leather (affiliate link)
- 2 swivels (affiliate link)
- 2 O-rings for bag strap (affiliate link)
|
Embroidery:
|
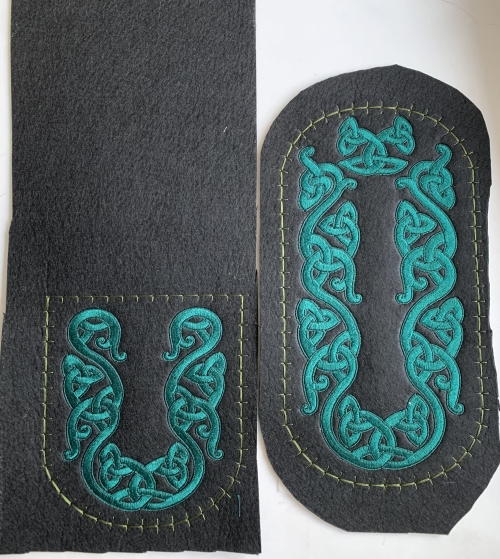
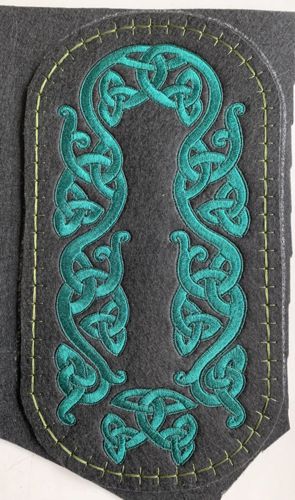
Upload the files into your embroidery machine. For the larger design, cut the fabric slightly bigger than the embroidery frame for easier hooping.
For the smaller design, cut the fabric slightly wider than the width embroidery frame and twice as long as the embroidery frame. You need to embroider the smaller design, on the lower half of the piece. The upper half of the piece will work as the lining.
Stabilize the pieces of faux leather. Hoop the fabric tightly and embroider the designs one by one.
Please note, that there's a large piece of fabric left over the front panel (smaller design). |
|
Assembly:
|
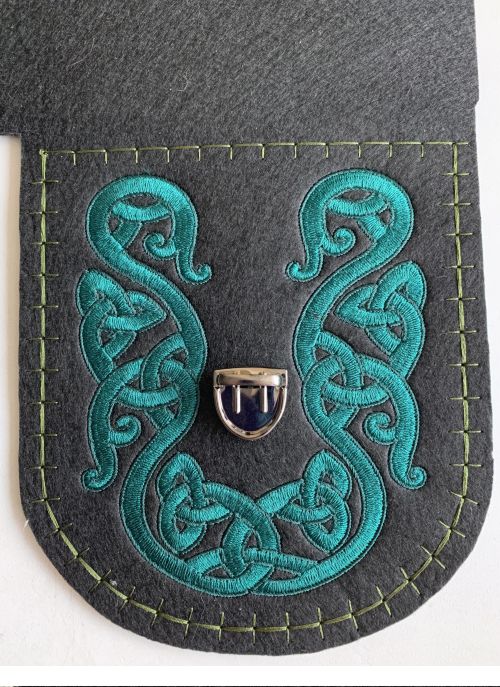
Cut out the front panel leaving about 1/8" margins along the rounded edges, do not cut fabric over the embroidery.
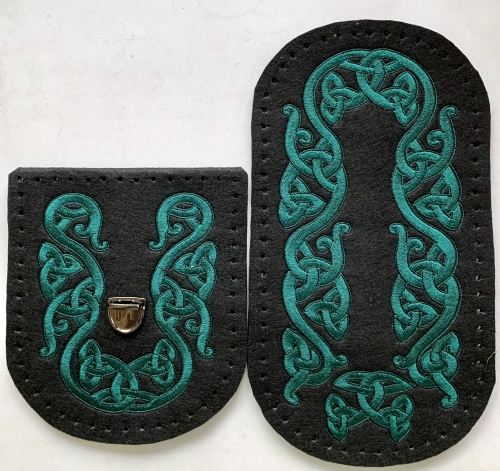
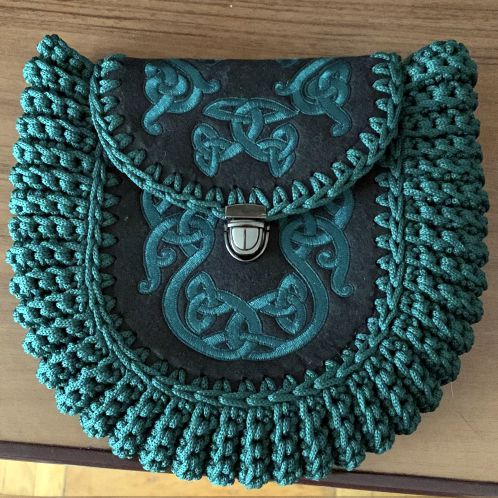
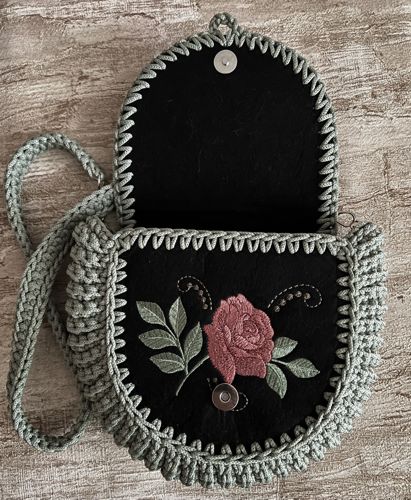
Insert the lower part of the lock clasp in the center of the stitch-out as shown on the picture below.
|
|
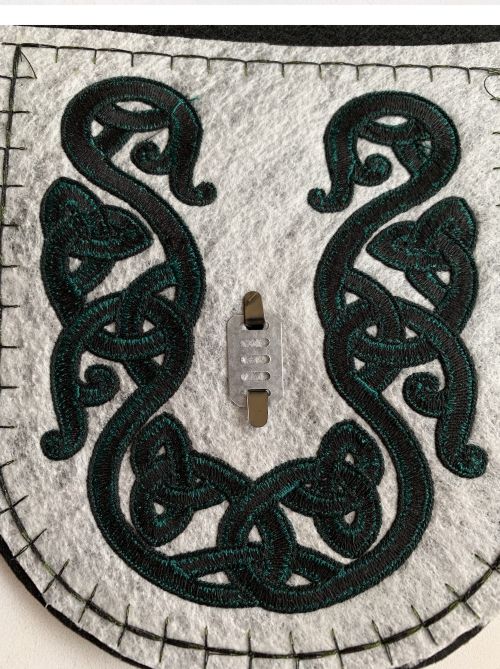
The wrong part of the front panel with the lock.
|
|
Fold the fabric on the front panel over the upper edge of the embroidery back, leaving a 1/4" margin. Press to crease. Trace the rounded edge of the front panel on the folded fabric. Cut along the traced line. Thus you get the front panel with the lining.
|
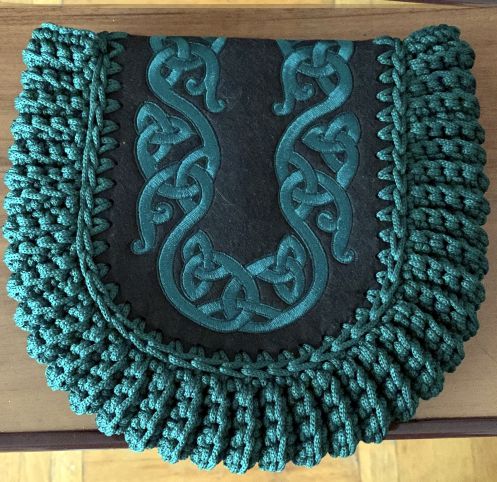
| Cut out the back-and-flap part, leaving 1/8" margins. To make the lining for this part, position the embroidered part on a piece of leather, trace it. Then cut out. |
|
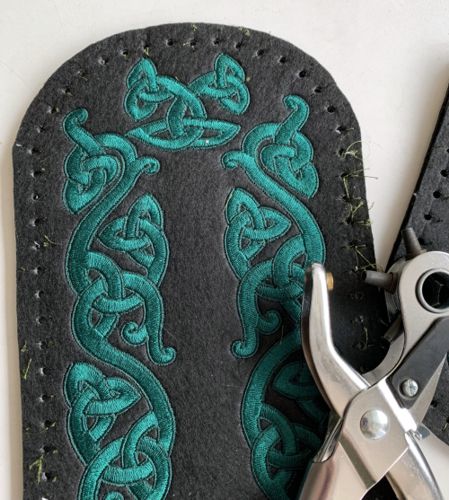
Holding the panel and lining together, punch holes along the edges in the places marked by running stitches.
|
|
These are 2 parts of the bag with punched edges: the front panel, and the back-and-flap panel.
|
|
Position the front panel on the lower half of the back-and-flap panel. Align the holes along the edges.
On the back-and-flap part, mark the position of the 2 holes which coincide with the 2 corner holes of the "front" panel. Check that the number of the holes between your markers along the lower part of the "back-flap" panel is the same as the number of holes on the front panel along the sides and curved bottom.
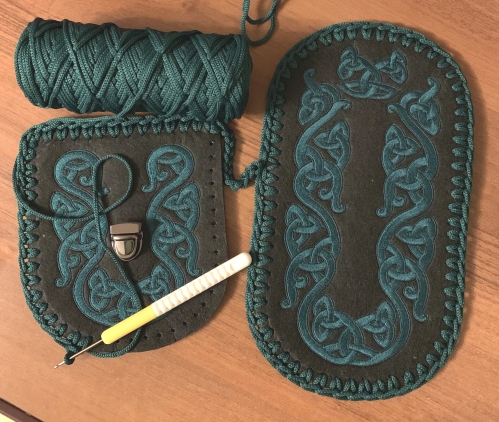
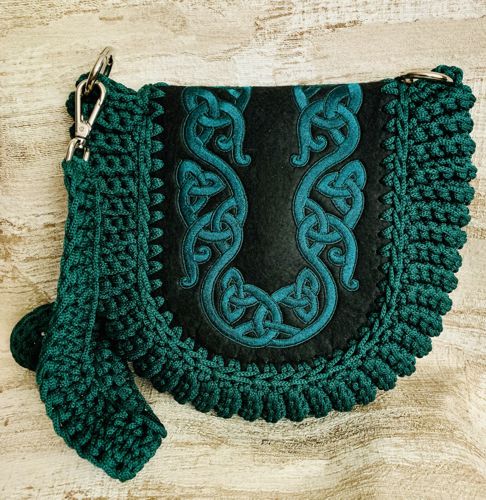
Holding the back-and-flap panel right side up, and starting from the left marker, make a row of single crochet around the panel.
When you reach the starting point, do not cut the cord/yarn, chain 12, then make a row of single crochet around the front panel, returning to the starting point. |
|
Finish crocheting using the video tutorials from YouTube (not affiliated with us):
https://www.youtube.com/watch?v=zGdtUEI8x-o
https://www.youtube.com/watch?v=HknraSPFFR4
|
|
| The finished size of the purse is about 9" H x 9 1/2" W x4" D (measurements are without the handle) |
|
| Have fun! |
|
|
|
Back to "Oreo" Style Bag with Celtic Embroidery
|
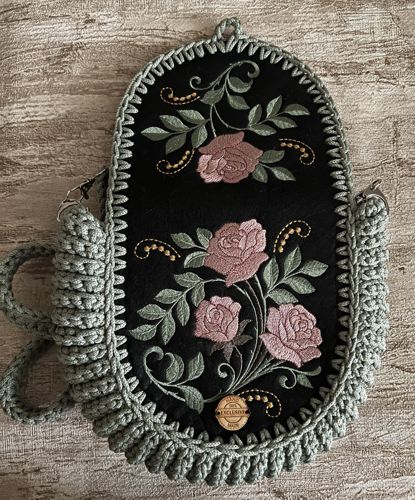
| The "Oreo"-Style bag with Camellia embroidery is made in the same way as described above. |
|
|
|
| Back to "Oreo"-Style bag with Camellia embroidery |
Back to Projects Page
|


