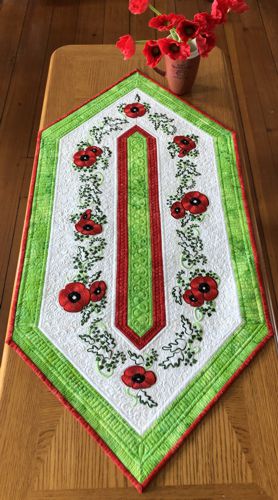
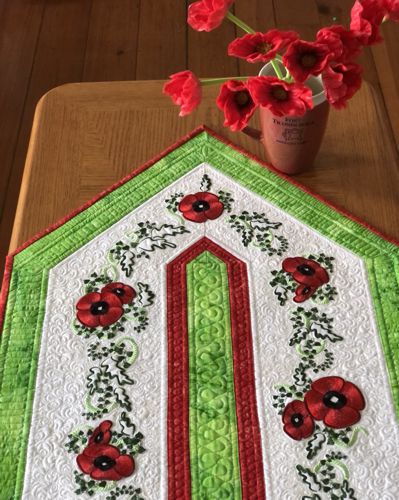
This Poppy-themed table runner features Spring colors, geometric lines, and designs from the Poppy Set.
The finished size of the tablerunner is about 19" x 40".
|
|
You will need :
- embroidery threads either polyester or rayon, follow our color card,
- 1/2 yard of light-colored (ivory, light cream, pale yellow) for the embroidered parts,
- about 1/2 yard of bright green fabric,
- about 1/2 yard of red fabric,
- light-weight cut-away embroidery stabilizer,
- fabric for the backing,
- batting,
- quilter's ruler,
- rotary cutter,
- iron,
- #12 universal needle,
- #12-#14 quilting needle.
|
Cutting:
|
Out of the light-colored fabric, cut
- 2 strips measuring 6 1/2" x 20 1/2", and
- 2 squares measuring 8 7/8" x 8 7/8".
Out of green fabric, cut
- 3 strips measuring 2 1/2" x 20 1/2",
- 4 strips measureing 2 1/2" x17"-18" and
- 4 squares measuring 1 1/2" each.
Out of red fabric, cut
- 2 strips measuring 1 1/2" x 20 1/2", and
- 4 squares measuring 2 1/2" x 2 1/2 each.
Use the remaining red fabric for the binding. |
|
Assembly:
|
| Note: seam allowance is 1/4", press the seam immediately after you make it. |
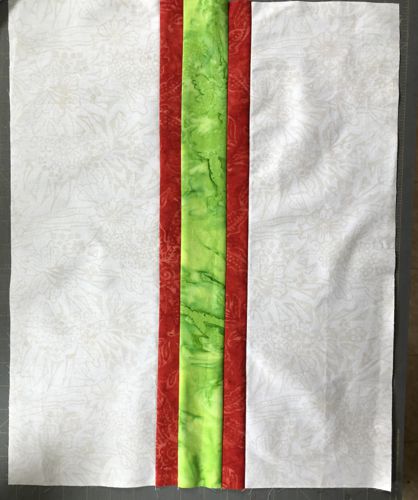
Sew the red 1 1/2" x 20 1/2" to the left and right edges of one of the green 2 1/2" x 20 1/2" strips. Then sew the cream 6 1/2" x 20 1/2" strips to the red strips.
|
|
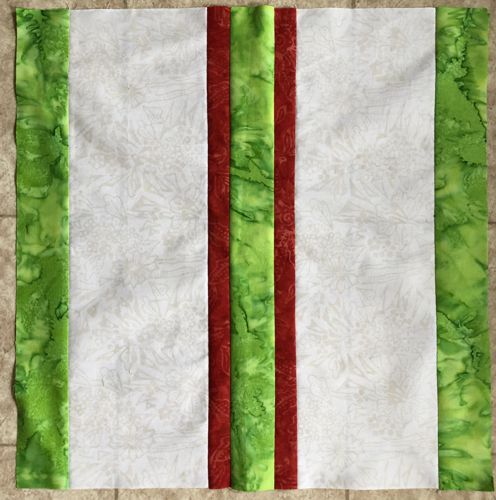
Sew the remaining green 2 1/2" x 20 1/2" strips to the cream strips. The central part is ready. Put it aside for the time being.
|
|
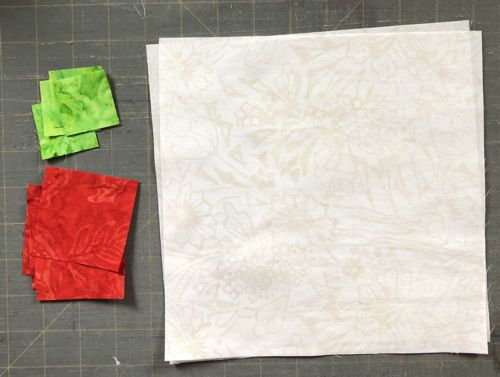
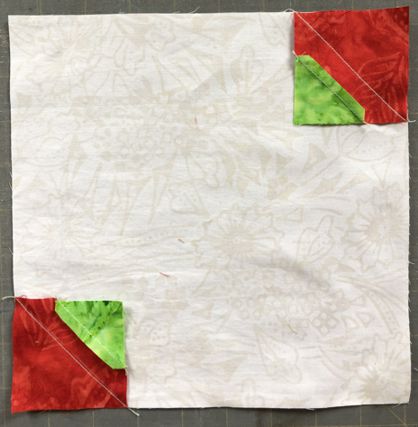
For the end parts, prepare the cream 8 7/8", red 2 1/2" and green 1 1/2" squares.
|
|
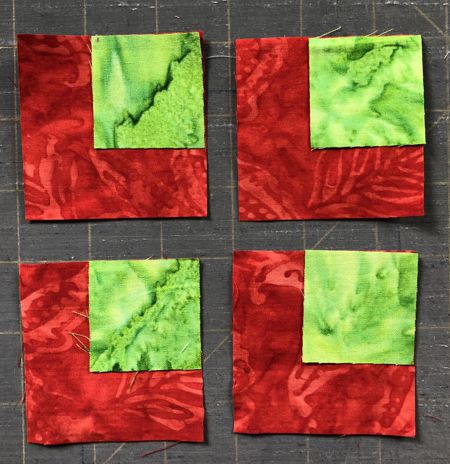
Position the green squares in the corner of the red squares. Align the edges.
|
|
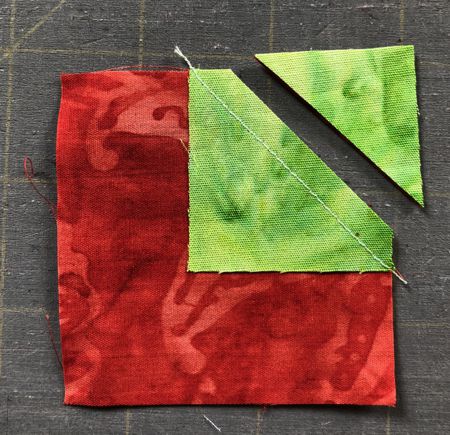
| Stitch on a diagonal - from one corner of the green square to the opposite corner. Cut the corner away with seam allowance scant 1/4". |
|
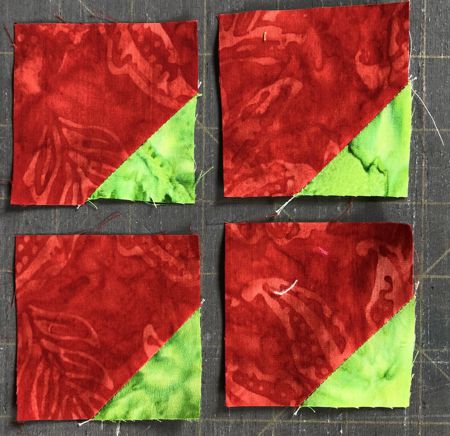
| Open and press the corner. |
|
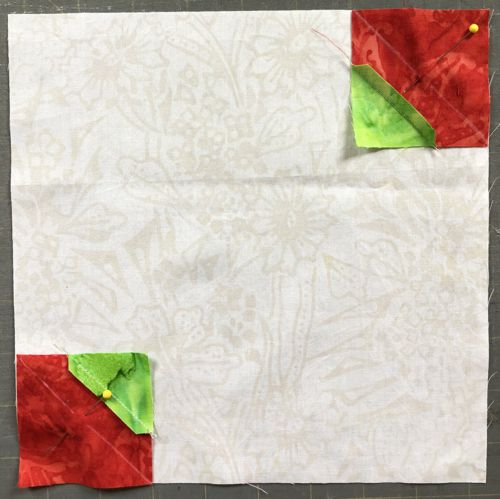
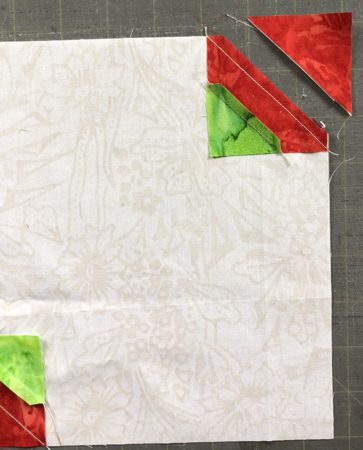
| Position the green-red squares in the opposite corners of the cream 8 7/8" squares. Align the edges. |
|
| Draw a diagonal from one corner to the opposite one on the red square. Stitch the diagonal. |
|
| Cut the corners away with scant 1/4" seam allowance. |
|
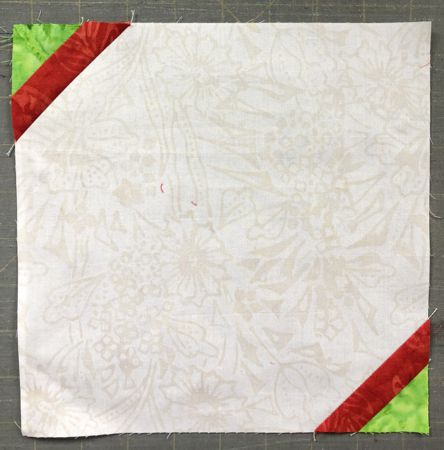
| Open and press the corners. |
|
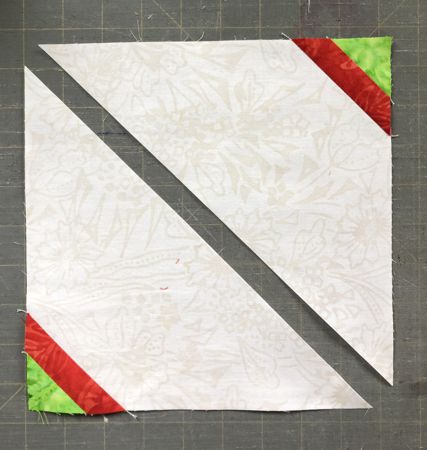
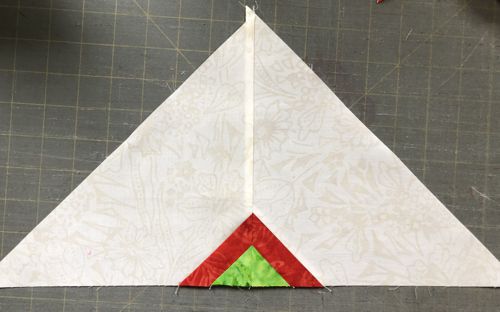
| Cut the cream square along the diagonal from one cream corner to the opposite one. |
|
| Turn the triangles you get so that the colored corners meet. Stitch them together. Check that green and red parts align. |
|
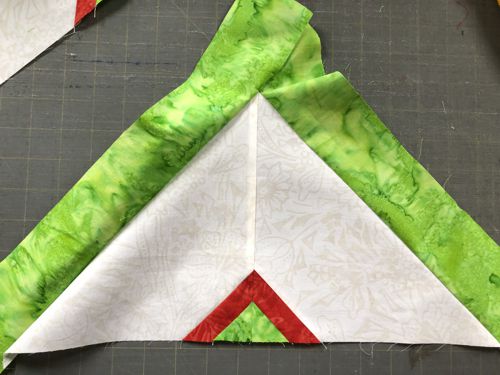
| Sew the green 2 1/2" x 17" strips to the long side of the triangle. On the bottom side of the triangle, each green strip should extend about 2 1/2", on the apex of the triangle green strips should extend about 3 1/2" - 4". Begin and stop stitching the strips 1/4" from the apex. |
|
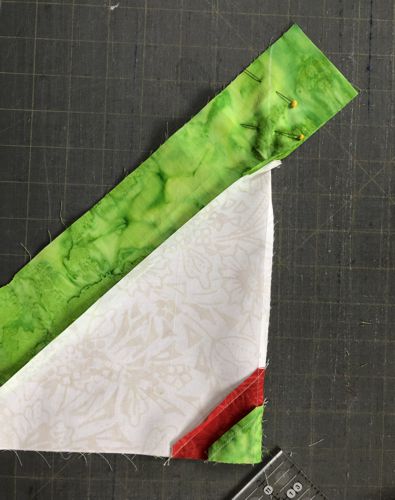
| Fold the triangle in half. Align all edges. Draw a line to extend the seam on the triangle. Baste. Open to check that you get a good mitered corner. Fold again and stitch. |
|
| Fold again and stitch. Cut the excess fabric, leaving seam allowance 3/8"-1/2". |

|
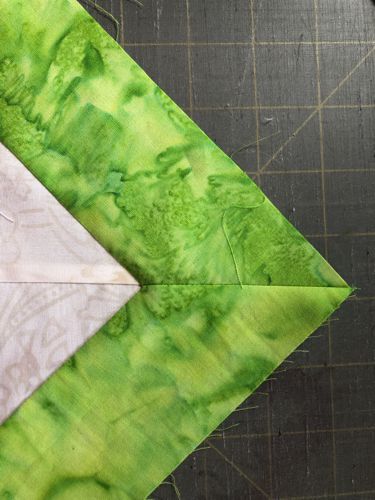
| Open the seam and press. |
|
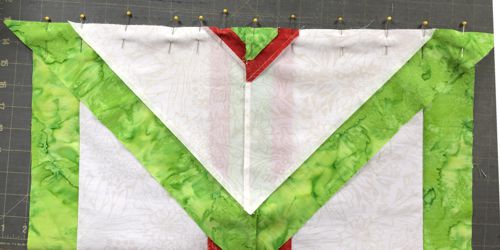
Mark the center on the central green strip on the main, rectangular, part of the tablerunner. Match the seam of the triangle with the mark on the center on the main part. Pin. Starting from this point and going to the left and right edges, pin the triangle to the main part. Baste. Open and check that the central green and red strips match. Adjust, if not.
Stitch the triangle to the main part. Repeat with the other side.
Note that the green ends of the triangle extend beyond the main part. You can deal with them later. For now just press the seam. |
|
Embroidery:
|
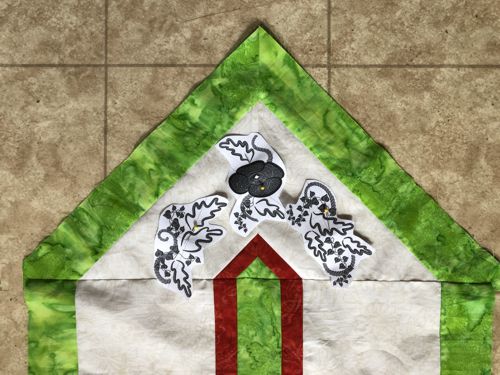
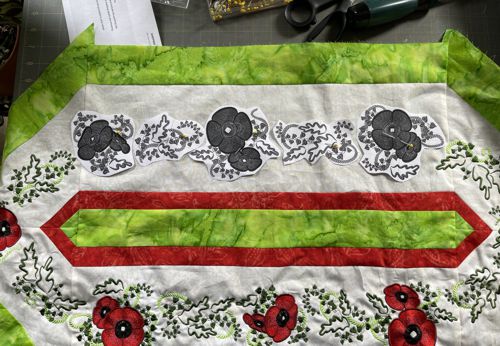
Mark the position of the embroidery on the cream part. If you have a printer and embroidery software, print-outs of the designs can be helpful. If you do not, you can cut out rectangles of the same size as the designs and arrange them on the fabric to determine the position of the embroidery.
Start from the corners.
|
|
| Stabilize the chosen area. Hoop the fabric tightly and embroider the designs one by one. |
|
Quilting and Finishing
|
Now place the backing on a flat surface (table) face down. Cover with batting. Spread your working piece over it.
Pin all layers together.
We quilted in a free-motion style all over the quilt. |

|
| Press with heavy steam. Square the quilt. Finish the raw edges with the binding. |
|
| Have fun! |
|
|
Back to Poppy Set
|
Back to Projects Page
|


