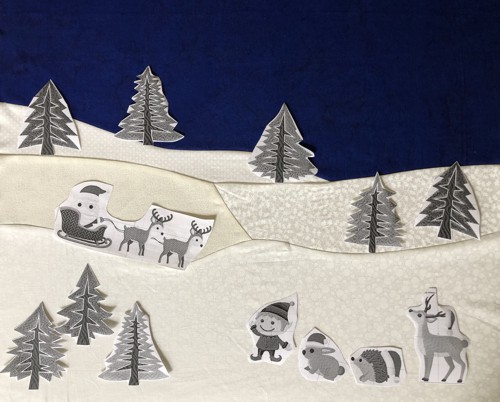
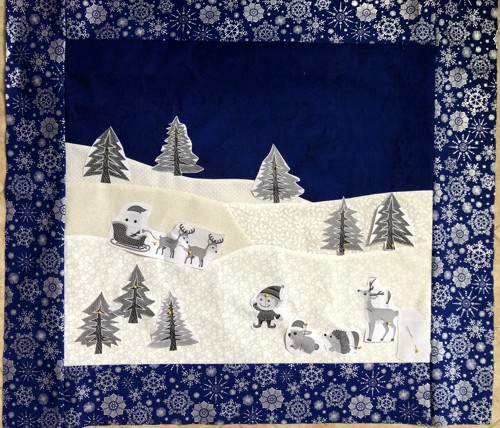
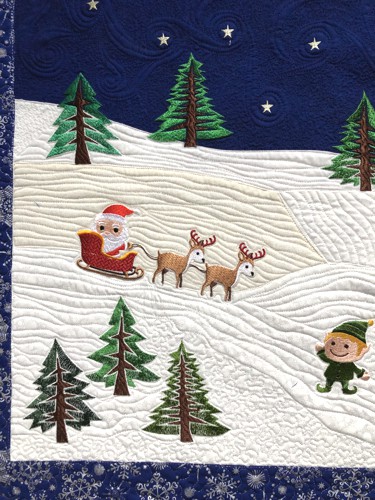
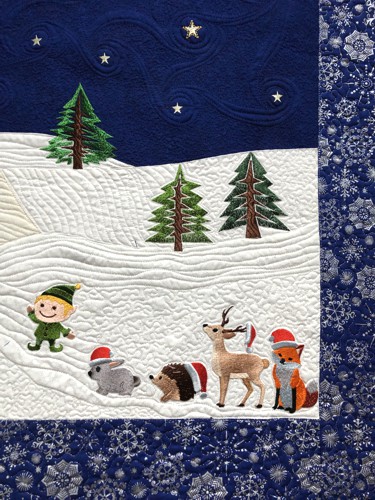
This cute quilt tells a Christmas story. We used many designs from different sets including Cute Santa, Cute Christmas Animal Set, Abstract Pine Tree Set, and Christmas Elf Set.
The finished size of the quilt is about 26" x 29". |

|
You will need :
- embroidery threads either polyester or rayon - either follow our color cards or choose colors to your taste,
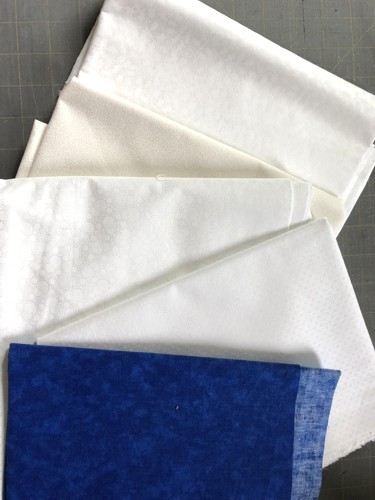
- 4 white fabrics of different shades, (small white over white patterns can produce the effect of slightly different colors),
- about 1/2 yard dark blue fabric for the night sky,
- winter-themed fabric for the borders (we used blue with silver snowflakes),
- light-weight cut-away embroidery stabilizer,
- fabric for the backing,
- batting,
- quilter's ruler,
- rotary cutter, or scissors,
- iron,
- #12 universal needle,
- #12-#14 quilting needle
- a piece of parchment and pencil (optional).
|
|
Cutting:
|
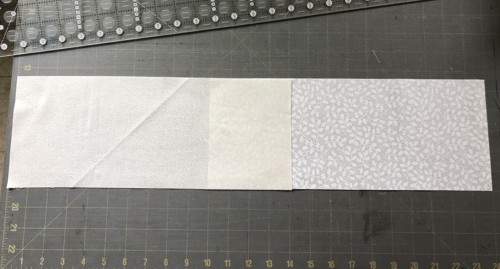
Out of the first white fabric, cut a strip measuring 8 1/2" x 23 1/2", mark it #1.
Out of the second and third white fabrics, cut 1 strip each measuring 5 1/2" x 14", mark them #2 and #3.
Out of fourth white fabric, cut 1 strip measuring 4 1/2" x 18 1/2", mark it #4.
Out of thr blue (sky) fabric, cut a strip measuring 11 1/2" x 24", mark it #5.
Use the remaining blue fabric for the binding.
The borders will be cut out later.
|
Assembly:
|
| Note: seam allowance is 1/4", press the seam immediately after you make it. |
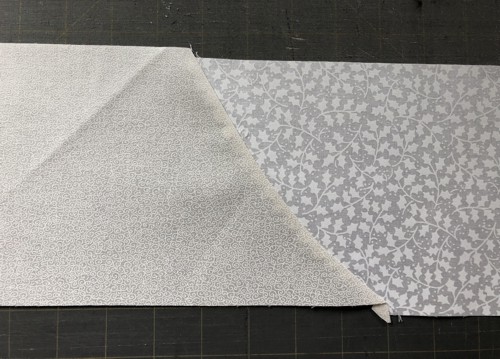
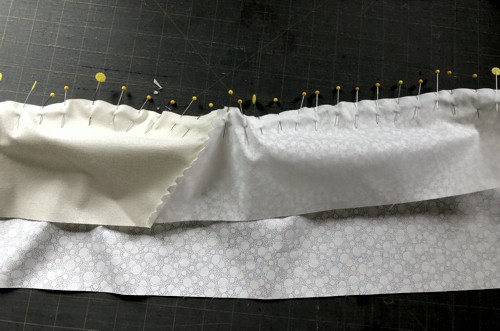
Working with the strips #2 and #3. Place them on the table, overlapping them by 4".
|
|
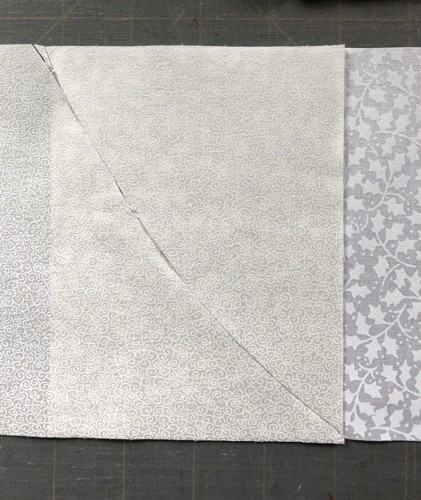
Cut a curve through the overlapped edges.
|
|
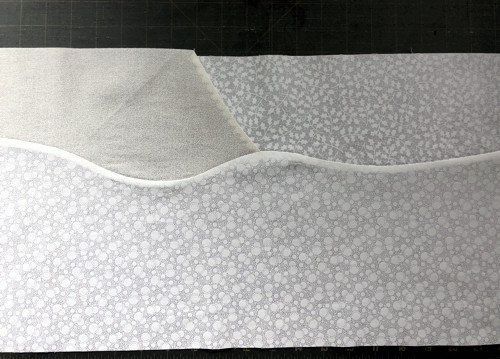
Set aside the cut-offs and continue to work with the longer pieces.
|

|
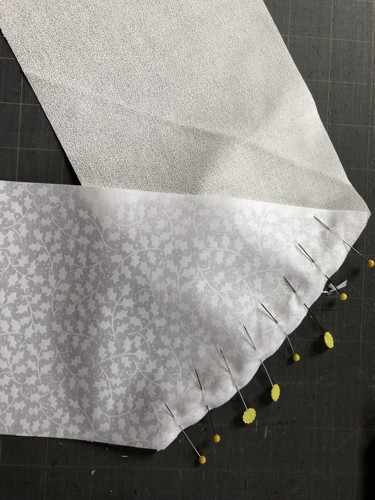
Pin both pieces along the curve.
|
|
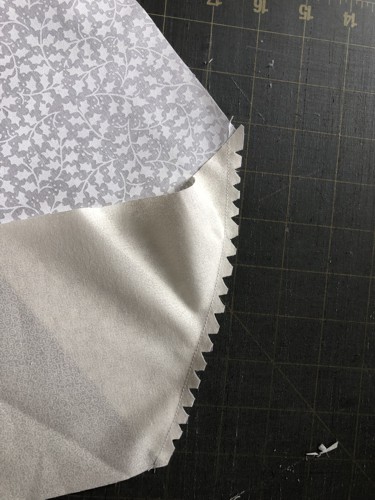
| Sew and notch the seam. |
|
| Press the seam. Do not worry if the edges of the strips are not in line with each other. We will trim everything later. |
|
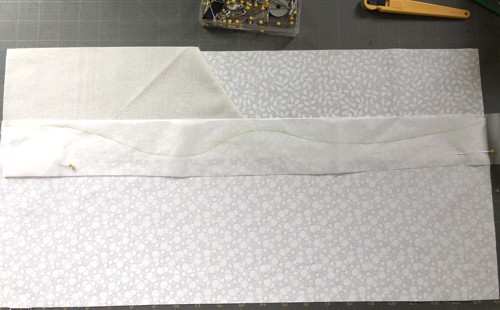
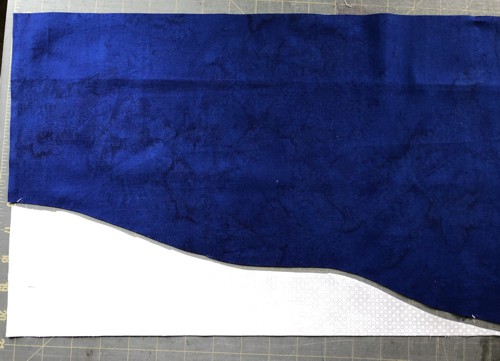
| Overlap the new strip with strip #1, as shown below. Overlap depth is 2". |

|
| Cut a wavy line through the overlap. If you are not sure about your ability to freehand this, take a strip of parchment paper 2" wide and draw a wavy line over it. Pin the parchment over the overlapped edges. Cut along the drawn line. |
|
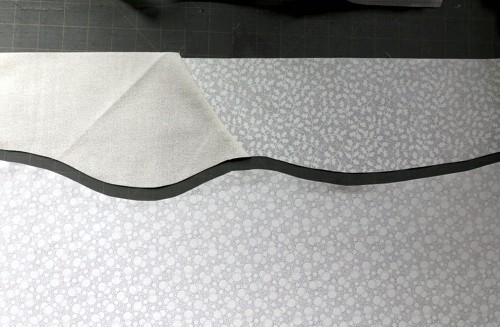
| Remove the parchment and small pieces of fabric, continue to work with the large parts. |
|
| Pin both parts together along the curve. |
|
| Stitch. Clip and notch the seam. Press. |
|
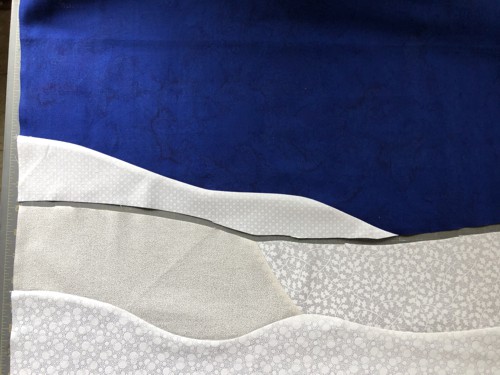
| In the same way, overlap and cut white strip #4 and blue strip #5. |
|
| Sew the strips together along the curves. |

|
| Overlap the lower and upper parts of the quilt top. Cut another curve. Sew it as described above. |
|
Press the working piece and trim it carefully. The opposite sides should be of the same length. Measure the working piece through the center: our top is 20" high and 22" wide. For the borders, we cut patterned fabric:
- 2 strips measuring 4 1/2" x 22" and
- 2 strips measuring 4 1/2" x 28"
|
| Sew the borders to the working piece. |
|
|
Embroidery:
|
Mark the position of the embroidery on the central part. If you have a printer and embroidery software, print-outs of the designs can be helpful. If you do not, you can cut out rectangles of the same size as the designs and arrange them on the fabric to determine the position of the embroidery.
Stabilize the chosen area. Hoop the fabric tightly and embroider the designs one by one.
|
|
|
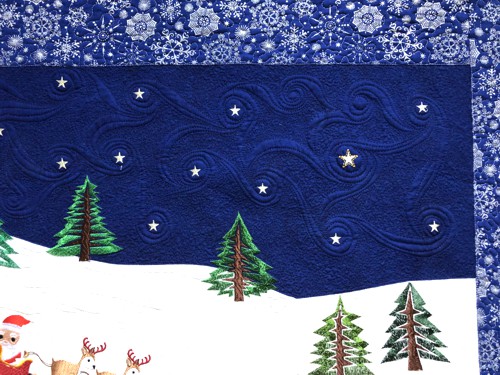
| Over the blue part of the quilt, we embroidered small stars. You can download this free pattern here. |
Quilting and Finishing
|
Now place the backing on a flat surface (table) face down. Cover with batting. Spread your working piece over it.
Pin all layers together.
We quilted in a free-motion style all over the quilt. |
|
Press with heavy steam. Square the quilt: the opposite sides should be of the same length and all corners 90 degrees.
Finish the raw edges with the binding. |
|
| Have fun! |
|
|
|
Back to Cute Santa, Cute Christmas Animal Set, Abstract Pine Tree Set, Christmas Elf Set.
|
Back to Projects Page
|


