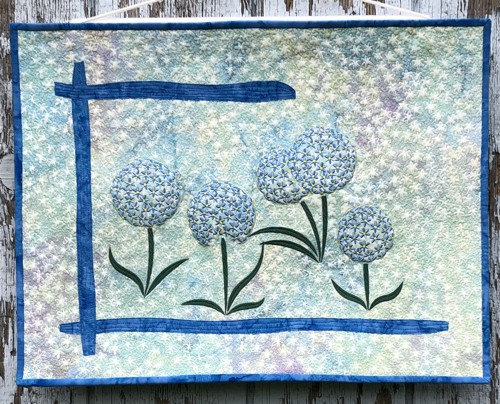
Embark on a captivating quilting journey with our Art Quilt with Allium Embroidery. Unleash your creativity with the fusion of quilting and embroidery in this enchanting project.
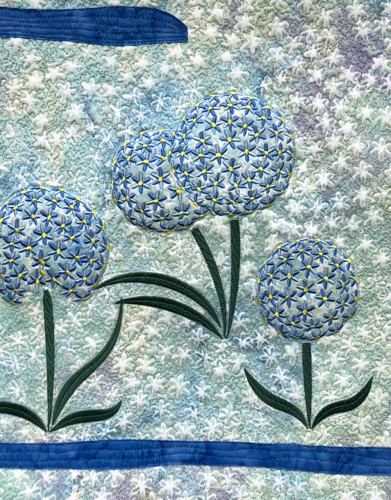
We used the designs from the Allium Set. Allium flowers can be a variety of colors, so you can select colors to your taste.
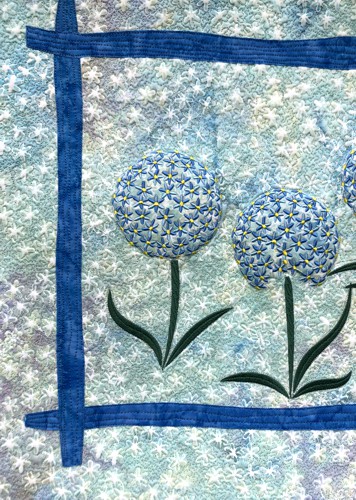
The finished size of the quilt is 23" x 17 1/2". |
|
You will need :
- embroidery threads either polyester or rayon - choose hues to your taste,
- a piece, measuring about 18"-19" x 24"-25", of fabric in pale hues (we recommend to use a batik) for the background;
- small amount of blue (or any other color matching the embroidery) fabrics for the border and binding;
- light-weight cut-away embroidery stabilizer;
- batting;
- Steam-A-Seam fusible net, or any similar product;
- quilter's ruler;
- rotary cutter;
- iron;
- #12 universal needle;
- quilting threads matching the colors of the fabrics you use;
- #12-#14 quilting needle.
|
|
Embroidery:
|
Upload the designs into the embroidery machine.
Select threads. It's a good idea to make a test stitch-out to check that you like your selection.
Mark the position of the embroidery on the fabric for the backround. If you have embroidery software, paper print outs might be helpful.
Stabilize the chosen area. Hoop the fabric tightly and embroider the designs one by one.
|
|
Quilting and Finishing
|
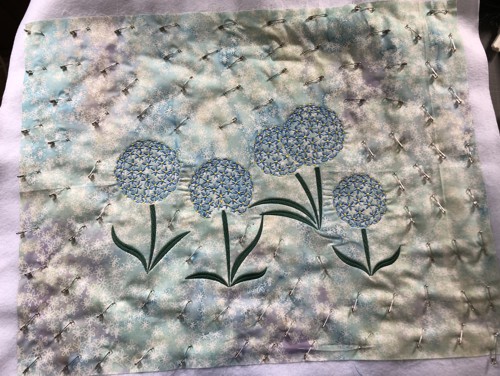
Now place the backing on a flat surface (table) face down. Cover with batting. Spread your working piece over it.
Pin all layers together.
|
|
We quilted in a free-motion style all over the working piece.
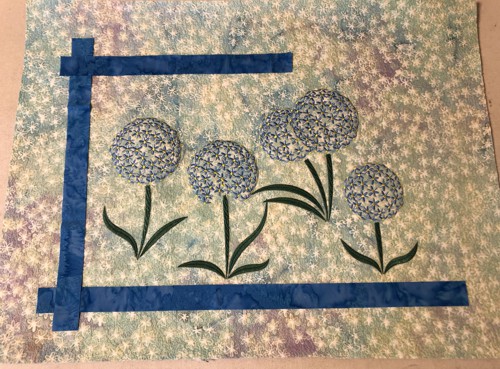
Press with heavy steam. Square the piece and trim to the size you want; our piece is 23" x 17 1/2".
Out of the fabric for the borders and binding, cut 1-2 strips 1" wide. Subcut them into strips approximately 19" and 14" long.
Play with these strips - position them around the embroidery as you like. You might like a full frame with 4 strips around the embroidery, or a partial frame with just 2 or 3 strips.
|
|
When you are satisfied with the composition, place the strips on the fusible net. Using a rotary cutter, cut the long sides to make soft curves. Return them to the top and fuse them in place following the instructions of the manufacturer.
Top-quilt over the strips with matching thread.
|
|
| Finish the raw edges with the binding. |
|
| Have fun! |
|
|
Back to Allium Set
|
Back to Projects Page
|


