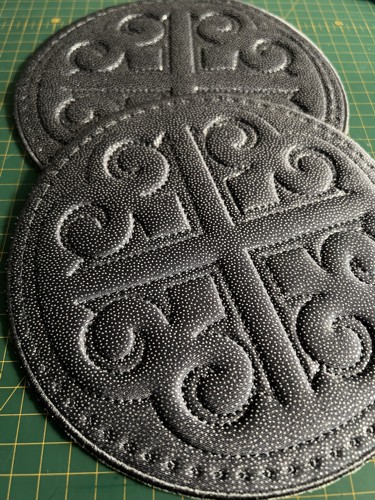
These are the instructions on how to embroider the design of the Trapunto Applique Motif #18026.
This design is universal - you can embroider it as regular one-color embroidery design, as applique, and as freestanding applique.
|
| In the zip file you will find an embroidery file in the ordered format, graphic files in cdr & svg formats (use either of them if needed), and instructions in pdf format. |
|
You will need :
- embroidery threads, either polyester or rayon, feel free to chose your own colors,
- base fabric,
- stretching fabric for the applique,
- Puffy Foam by Sulky,
- medium- to heavy-weight embroidery stabilizer (depending on the fabric and project),
- polyester felt (optional, for "puffier" look),
- applique scissors,
- fabric glue,
- sewing pins,
- printer and embroidery software (the later is optional).
|
|
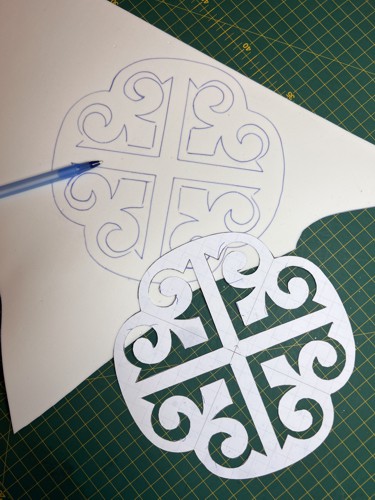
Step One: Either open the embroidery file in the embroidery software on your computer and make a print-out of the design; or open one of the graphic files in a graphic program and print it out.
Cut out the pattern, trace it onto the Puffy Foam and cut it out.
|
|
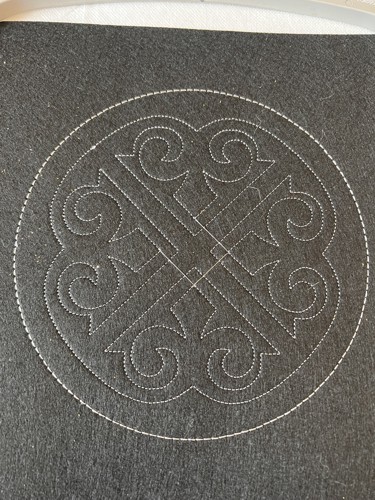
Step Two: Upload the design into the machine.
Hoop the base fabric stabilized with medium-to-heavy-weight stabilizer. Tighten the hoop.
Place a piece of polyester felt over the hoop (optional, recommended for a "puffier" look).
Start the machine. The first color will embroider the outline of the design and stop.
|
|
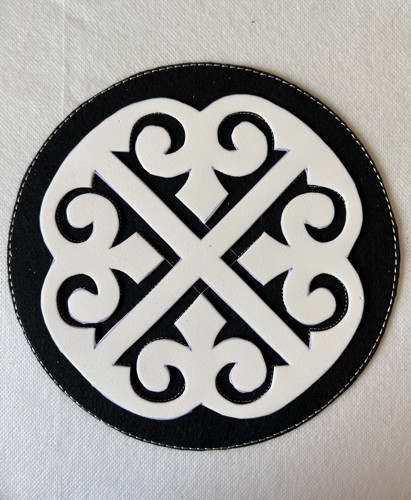
Step Three: Take the hoop from the machine and with the pair of sharp scissors cut away the felt, if you used it, around the outer circle outline. Take care not to cut through the stitches and through the base fabric.
Note: If you're making a freestanding circle, than cut the base fabric as well.
Glue the puffy foam pattern over the outline. |
|
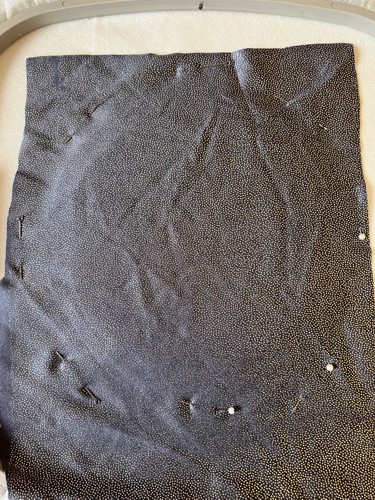
Step Four: Cover the circle with stretching fabric and pin it around lightly stretching the applique fabric.
|
|
Step Five: The next color embroiders the design over the stretched fabric. When it is done, cut away the excess applique fabric around the circle. (If you are making the freestanding circle, cut away the stabilizer around the circle.)
|

|
Have fun!
|
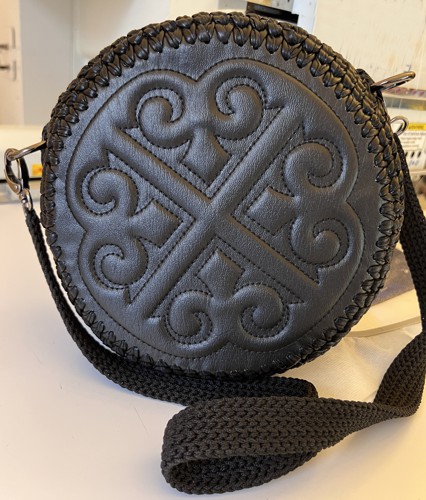
We used the stitch-outs of the design to make a round shoulder bag.
|
|
|
Back to Trapunto Applique Motif #18026
|
|


