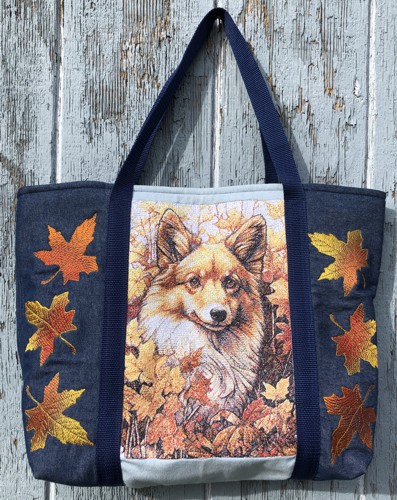
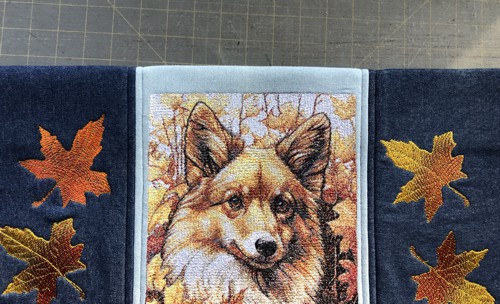
Welcome to our delightful sewing and machine embroidery tutorial, where we'll guide you through the creation of a charming Denim Tote Bag adorned with a whimsical Corgi Dog and Maple Leaves embroidery.
This roomy, soft tote bag makes a great gift!
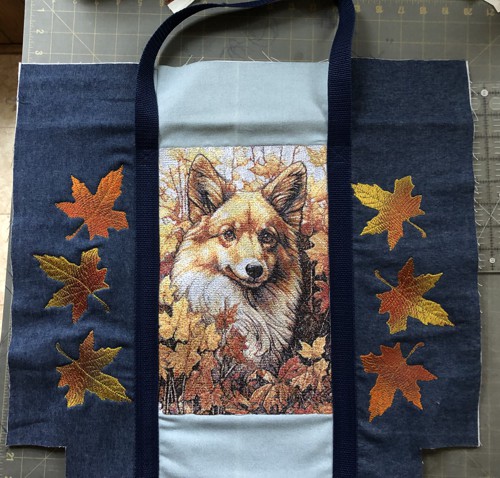
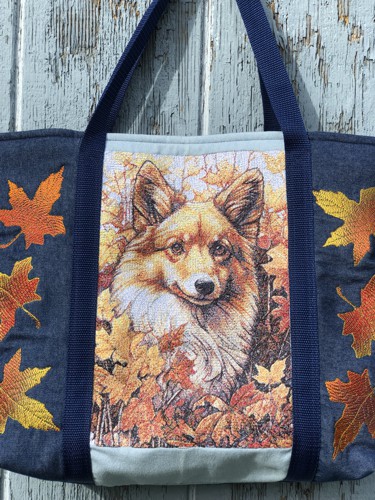
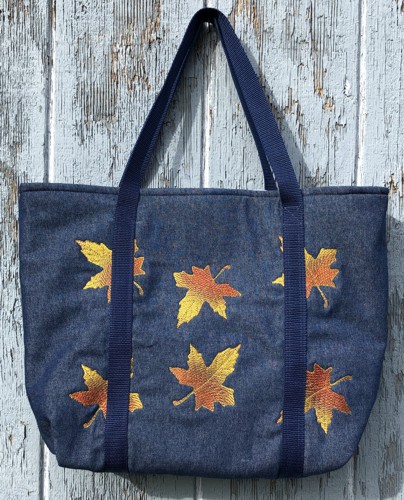
The design we used on the front panel is Autumn Corgi, while the side and back panels feature the maple leaf design from the Autumn Leaves Set.
The finished size of the bag is about 19"W x 13"H x 5"D. |
|
You will need :
- embroidery threads, according to our color cards;
- medium-weight denim fabric (we used 2 shades of light blue for the embroidery of the dog and dark blue for the rest of the bag);
- 3/4 yard of cotton fabric for the lining;
- instead of embroidery stabilizer we used polyester craft felt, you will need about a yard of it;
- 3 yards of polyuritane webbing 1" wide.
|
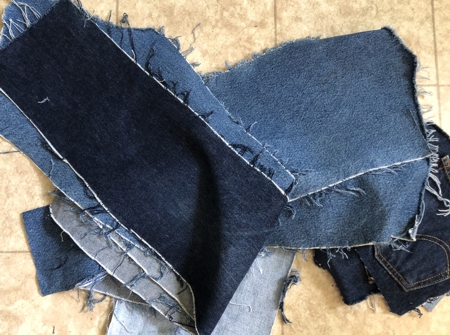
If you are a fan of upcycling, you can use old jeans for the project. Cut them near the seams, wash, air dry and press the pieces.
|
|
You will also need:
|
- quilter's ruler,
- rotary cutter and/or scissors,
- tailor's chalk pencil,
- iron,
- #12 universal needle, and sewing thread,
- #14-16 universal needle and extra strong sewing thread;
- magnetic snap closure or sew-on snap closure 1/2" large.
|
Embroidery:
|
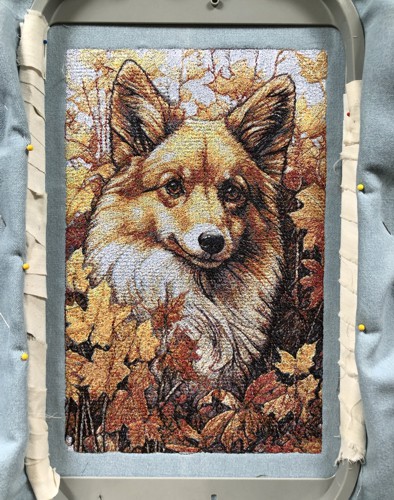
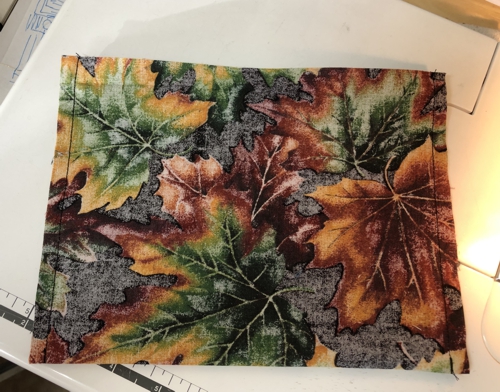
| Open the color card and select threads. You MUST follow the color card for this design. Stabilize a large piece (12" x 22") of light-colored denim fabric with polyester crafr felt. Hoop the fabric tightly. Upload the Autumn Corgi file into your machine and embroider it. |
|
Press the stitch-out and trim the piece to 10"W x 20"H leaving 4" margins over and under the embroidery and equal margins on the sides.
|
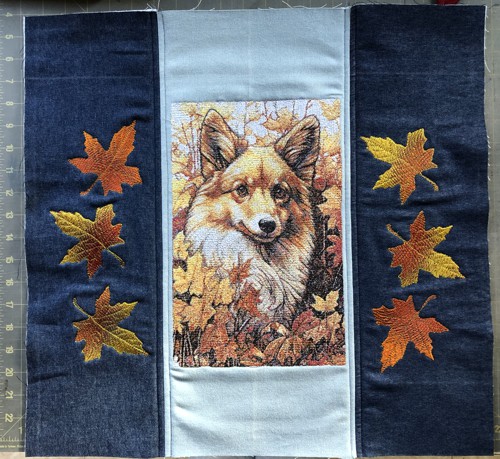
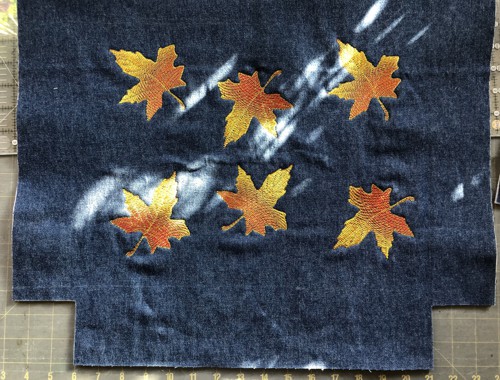
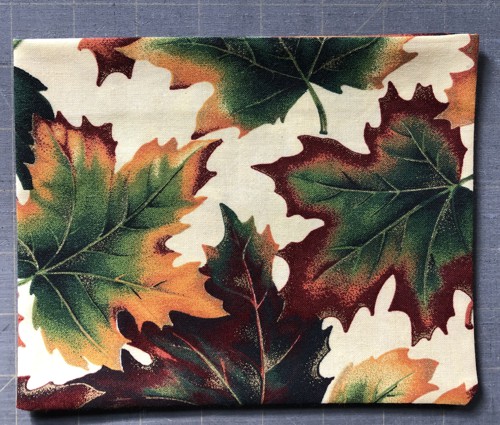
| On 2 pieces of darker denim fabric stabilized with polyester craft felt, embroider the maple leaves from the Autumn Leaves Set. Trim the pieces to 6 1/2"W x 20"H. |
On a large piece of dark denim fabric stabilized with polyester craft felt, embroider the maple leaves from the Autumn Leaves Set. Trim the piece to 21"W x 20"H .
If you upcycle materials, you may have to sew a few pieces together to get a 21" x 20" piece for the back panel. |
| Assembly: |
| Note: Seam allowances is 1/2". |
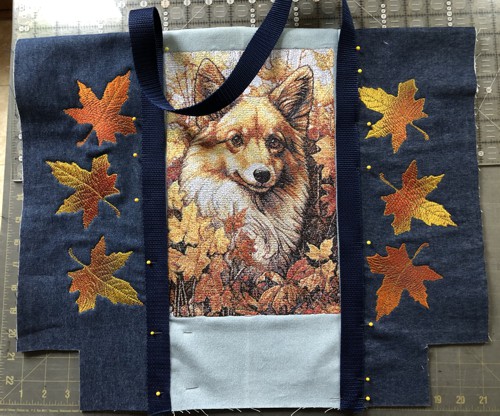
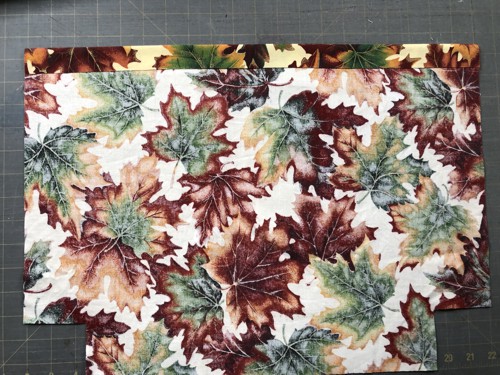
Sew the 6 1/2" x 20" strips to the sides of the central panel with Corgi embroidery. Open the seams, press, topstitch on both sides.
Check that the front and the back panels are of the same size. |
|
Fold the upper edge 3" back and press with steam.
|
|
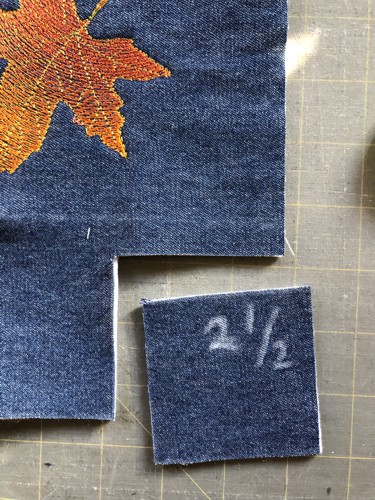
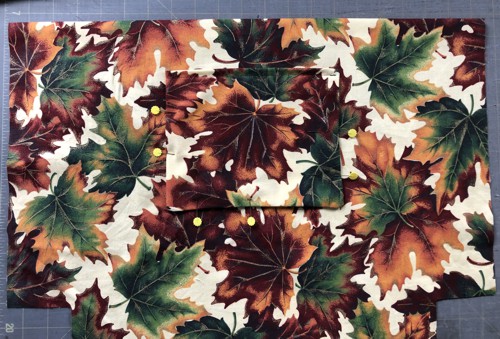
| On the lower edge of the panel, cut out 2 1/2" x 2 1/2" squares at the corners. |
|
Repeat for the back panel: fold the upper edge 3" back, press with steam, cut out 2 1/2" squares at the bottom coners.
|
|
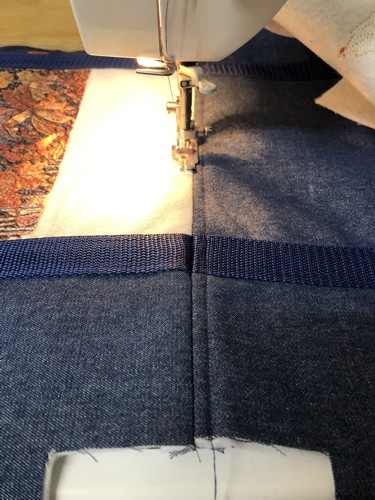
Cut the 3-yard piece of webbing in half. Position one piece along the side edges of the embroidery on the front panel. Pin.
|
|
| Top-stitch the handle in place, stopping the stitching near the upper edge of the corgi embroidery. |
|
Repeat for the back panel. Using the front panel as a guide, position and pin the other piece of webbing to the back panel. Topstitch, finishing 4" from the upper raw edge.
|
Position both panels face to face, align all edges. Pin and stitch together the bottom.
|

|
| Open and press the seam. Topstitch 1/4" on both sides of the seam. |
|
Fold the bag with right sides together, unfold the upper edges and align all edges. Stitch one of the sides, seam allowance 1/2".
Unfold and press the seam.
Topstitch 1/4" on each side of the seam.
Repeat for the second side.
|
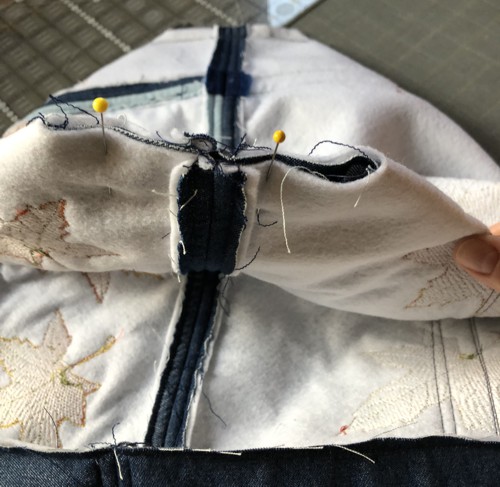
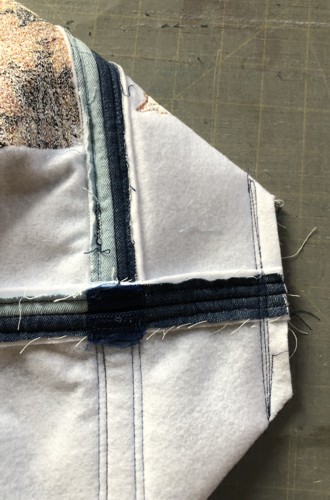
Fold the bottom of the bag so that the bottom and the side seams align. Pin.
|
|
Stitch. Seam allowance 1/2". Stitch several parallel lines.
|
|
Fold the upper edge 3" back along the pressed line, handles inside, and pin. Topstitch along the upper edge with seam allowance 1/4".
Do not turn the bag right side out yet.
|
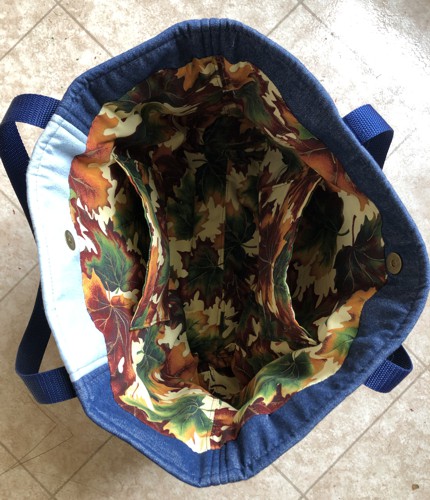
The Lining:
|
| Out of the fabric for the lining, cut 2 pieces measuring 15 1/2" x 21" and 1-2 pieces measuring 7" x 14" for the pocket/s. |
Fold the 7" x 14" piece/s widthwise in half, face inwards. Stitch along 2 sides, seam allowance 1/4". Turn right side out. Press.
Tuck the unfinished raw edge 1/2" inside. Press. Topstitch it closed.
|
|
If you are making 2 inner pockets, repeat for the remaining piece.
|
|
| On the lower edge of the panels, cut out 2 1/2" x 2 1/2" squares at the corners. |

|
Fold the upper edges of the lining panels 1" back and press.
|
|
Pin the pocket/s 2" from one of the folded edges and equal distance from the sides.
Topstitch the pocket/s in place.
|
|
Unfold the upper edges. Position the panels face inside, align the edges. Stitch first the bottom, then the sides together, seam allowance.
Fold the upper edges back. You can topstitch the folded edge in place, optional.
|
| To finish the bottom, repeat the procedure as described for the outer bag above: fold the lining so that the bottom and the side seams align. Pin. Stitch. |
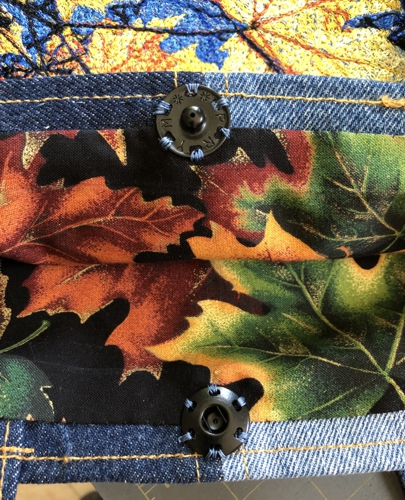
| If you use a magnetic snap, attach it now to the outer bag. If you use a sew-on snap, you can sew it on later |
With wrong sides together, insert the outer bag into the lining. Line up the side seams.
Pin the upper edge of the lining to the bag, overlapping the folded edge by about 1/2".
|

|
Stitch the lining to the bag by hand.
Sew on the snap, if you use this type.
|
|
|
| Have fun! |
|
|
|
Back to Autumn Corgi, or Autumn Leaves Set.
|
Back to Projects Page
|


