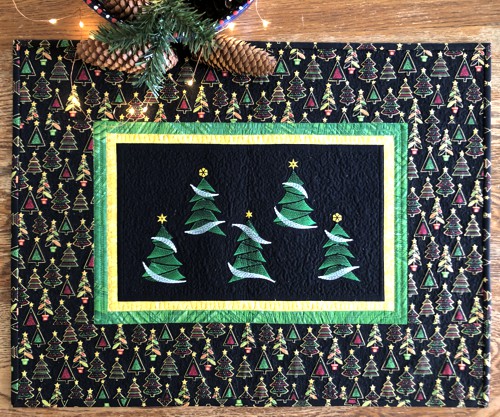
Introducing the Christmas Woods Wall Quilt. This small yet enchanting piece features an embroidery of Christmas trees surrounded by a festive border. Let your creativity shine as you bring the magic of the holiday season to life, one stitch at a time. Hang this masterpiece on your wall and immerse yourself in the joyous spirit of Christmas.
We used the designs from the Christmas Tree Set.
The finished size of the quilt is about 25" x 19". |
|
You will need :
- embroidery threads, either polyester or rayon - green, golden, white or, if you prefer, choose hues to your taste;
- a fat quarter of black fabric for the central part;
- small amount of green and yellow-golden fabrics for the narrow borders;
- about 3/4 yard of Christmas patterned fabric for the wide border and binding;
- fabric for the backing;
- light-weight cut-away embroidery stabilizer;
- batting;
- chalk pencil;
- quilter's ruler;
- rotary cutter;
- iron;
- #12 universal needle;
- quilting threads (the colors of the fabrics you use);
- #12-#14 quilting needle.
|
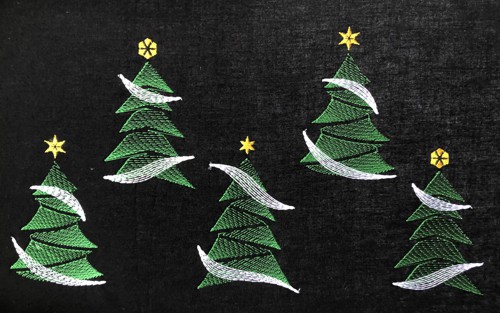
| Embroidery: |
With a chalk pencil, draw a rectangle measuring 15" x 9" on the black piece of fabric.
Select threads. Upload the embroidery files into the machine.
Mark the position of the embroidery in the drawn rectangle. We embroidered the files 5 times.
Stabilize the fabric, hoop it tightly and embroider the designs one by one.
Press the stitch-out, trim it to 15" x 9" rectangle. |
|
Cutting :
|
Out of yellow-golden fabric, cut
- 2 strips measuring 1" x 15" and
- 2 strips measuring 1" x 10".
Out of green fabric, cut
- 2 strips measuring 1 1/4" x 16" and
- 2 strips measuring 1 1/4" x 11 1/2"
Out of patterned fabric, cut
- 2 strips measuring 4 1/2" x 11 1/2" and
- 2 strips measuring 4 1/2" x 25 1/2" (or 25 3/4"?)
Use the remaining patterned fabric for the binding.
|
|
Assembly:
|
| Note: seam allowance is 1/4", press the seam immediately after you make it. |
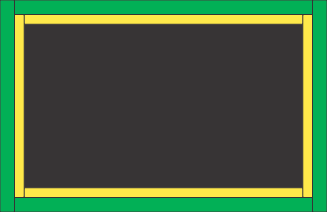
Sew the yellow 1" x 15" strips to the upper and lower edges of the central piece.
Sew the yellow 1" x 10" strips to the left and right edges of the central piece.
|

|
Sew the green 1 1/4" x 16" strips to the upper and lower edges of the working piece.
Sew the green 1 1/4" x 11 1/2" strips to the left and right edges of the working piece.
|
|
Sew the patterned border 4 1/2" x 11 1/2" strips to the left and right edges of the working piece.
Sew the patterned border 4 1/2" x 25 1/2" strips to the upper and lower edges of the working piece.
The top is ready.
|

|
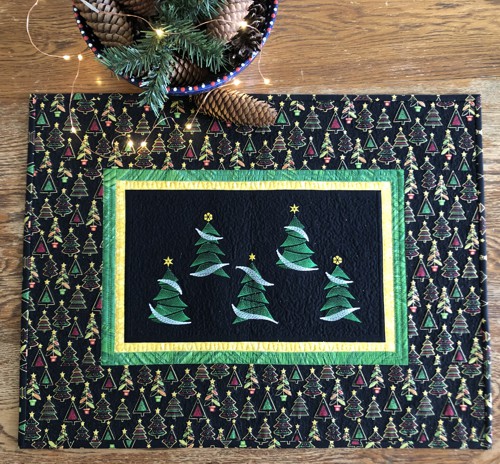
Quilting and Finishing
|
Now place the backing on a flat surface (table) face down. Cover with batting. Spread your working piece over it.
Pin all layers together.
We quilted in a free-motion style, first around the embroidery, then all over the top. |

|
Press with heavy steam. Square the piece and trim it to 25" x 19".
Finish the raw edges with the binding. |
|
| Have fun! |
|
Back to Christmas Tree Set.
|
Back to Projects Page
|


