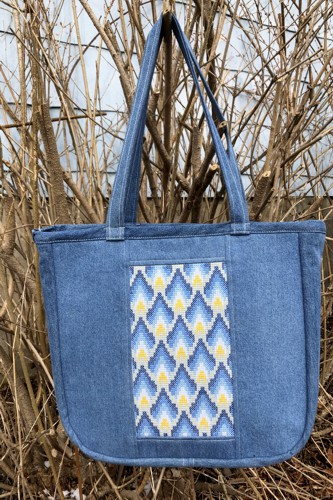
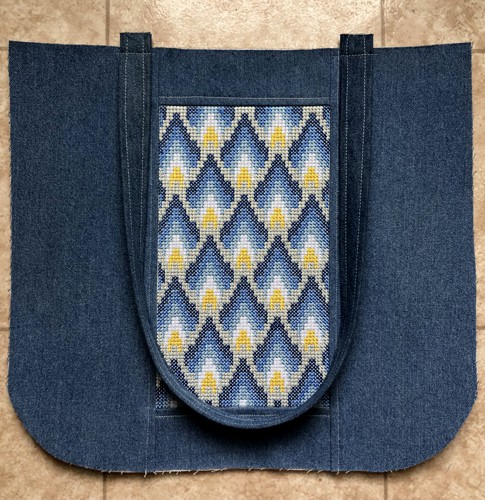
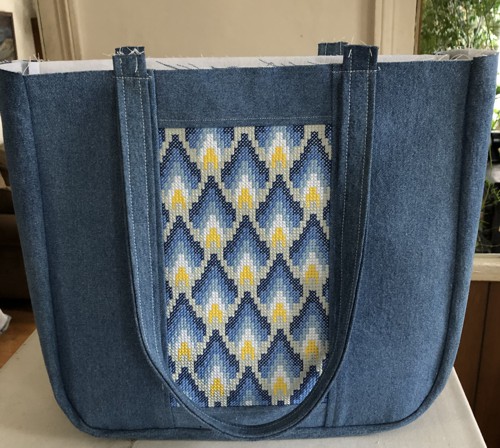
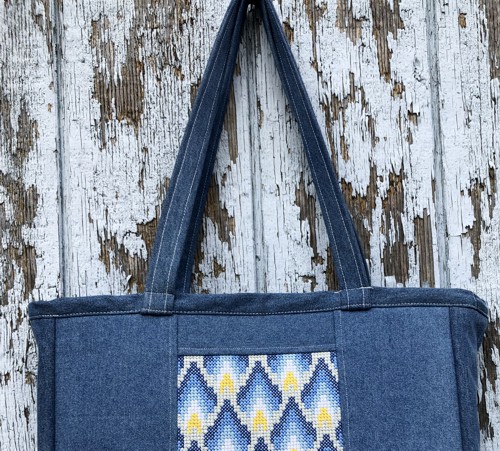
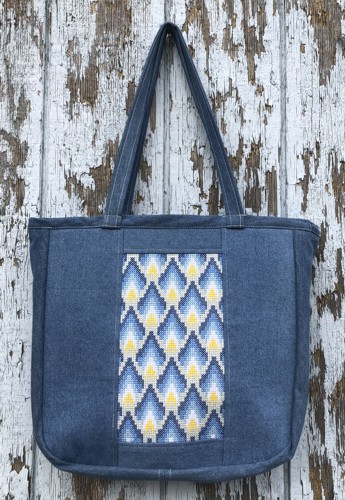
The roomy tote bag with embroidery on the front and back panels is made of denim fabric. You can either buy new fabric or upcycle a pair of old jeans.
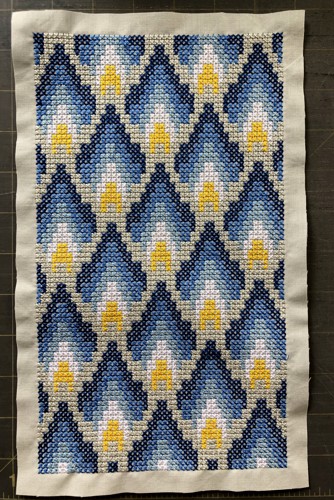
The design used is Decorative Panel for a Bag in the cross-stitch technique.
The finished size of the tote is about 15"H x 14"W x 5"D. |
|
You will need :
- embroidery threads either polyester or rayon for embroidery (you can either follow our colors card or choose your own colors);
- fabric for embroidery (please note that the background fabric is a part of the design);
- medium-weight cut-away embroidery stabilizer;
- about 1 yard of denim fabric, or old jeans (depending on the size of the jeans and the condition of the fabric, you may need 2 or 3 pairs);
- about 3/4 yard of cotton fabric for the lining,
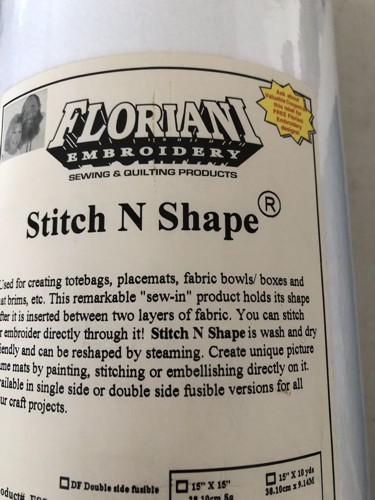
- medium-to heavy weight iron-on sewing interfacing or embroidery stabilizer, such as Pellon 71F Peltex One-Sided Fusible Interfacing, or any similar products (we used Stitch N Shape stabilizer by Floriani);
- a 6" x 43" piece of thin craft felt;
- sew-on 3/4" size snap,
- scissors, safety pins;
- chalk pencil, graph pencil;
- iron;
- #12 embroidery needle;
- #14 and #18 (heavy-duty) universal needles;
- sewing pins;
- sewing threads - regular #40 and heavy duty (we used thread for upholstery).
|
|
| Embroidery: |
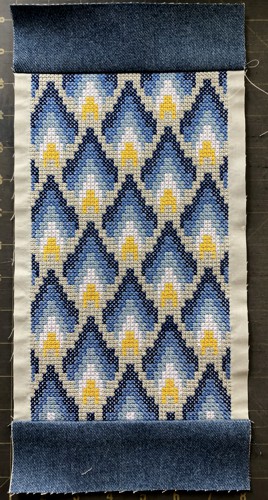
| Prepare the fabric. We made the embroidery of the Decorative Panel for a Bag design on pale sage fabric. You can select your own colors, but beware that the background fabric is visible through the cross-stitch. |
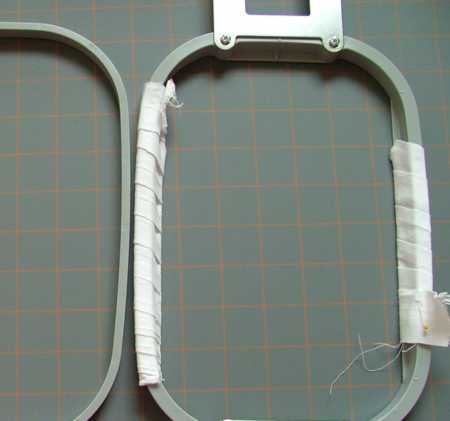
| It's very impotant, when you embroider large and dense designs, to hoop the stabilized fabric really tightly. We recommend to wrap the long sides of the inner frame with strips of muslin. After you hoop the stabilized fabric, you can also pin the edges of the fabric to the muslin strips, it will help to hold the fabric in place. |
|
Stabilize the fabric and hoop it tightly. We recommend to pin the edges of the fabric to the muslin strips on the hoop.
|
|
Skip the first color. The first color is for those who are making a crochet bag, it shows where to punch the base material.
Embroider the design from the second to the last colors.
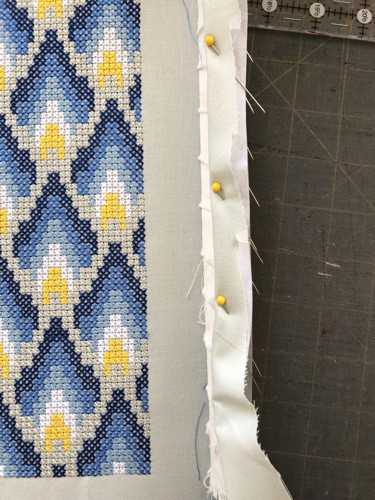
Remove the excess stabilizer as close to the stitches as possible. Take care not to cut through the stitches. Trim the stitch out, leaving a 1/2" margin. The piece will measure 7" x 11 1/2". |
|
| If you want the embroidery on the back panel as well, embroider the design one more time. |
Cutting the Bag Parts:
|
Out of denim fabric, cut
- 4 strips measuring 2 1/2"" x 7" (for the front and back panels);
- 4 strips measuring 5 1/2" x 14 1/2" (for the front and back panels);
- 1 strip measuring 5 1/2"-6" wide and about 43"- 44" long (for the bottom and sides);
- 1 strip measuring 2 1/2" wide and about 45" long (for the upper trim);
- 2 strips measuring 3" wide and about 28" long (for the handles).
The lining will be cut later.
|
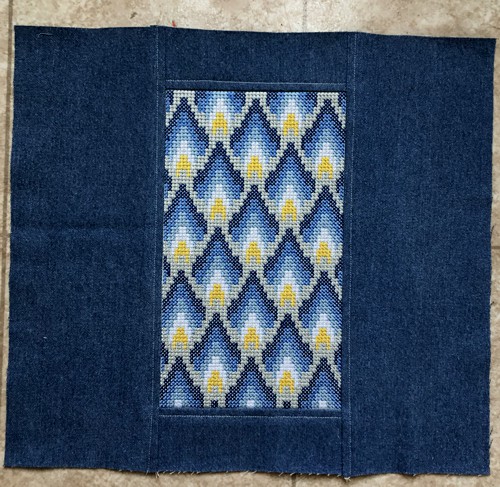
| Sewing the Front and Back Panels: |
| The front and back panels are sewn identically. |
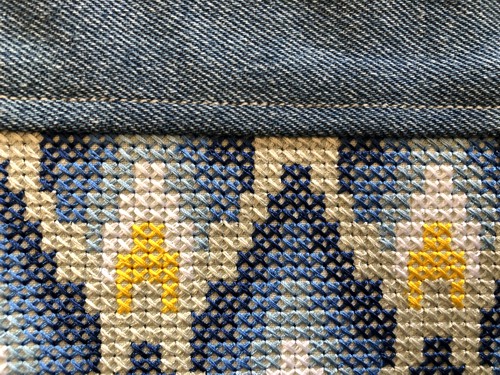
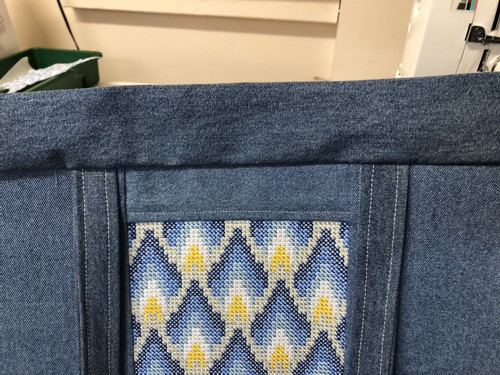
Sew the 2 1/2" x 7" strips to the upper and lower edges of the stitch-outs.
Press the seams away from the embroidery. |
|
| Top-stitch over the fabric 1/4" from the embroidery. |
|
Sew the 5 1/2" x 14 1/2" strips to the left and right edges of the stitch-outs.
Press the seams away from the embroidery.
Topstitch over the fabric 1/4" from the embroidery. |
|
| Position the panels with the wrong sides over the fusible side of the interfacing/stabilizer. Following the manufacturer's instructions, fuse the panels to the interfacing with hot iron. |
Cut away the excess interfacing around the panels.
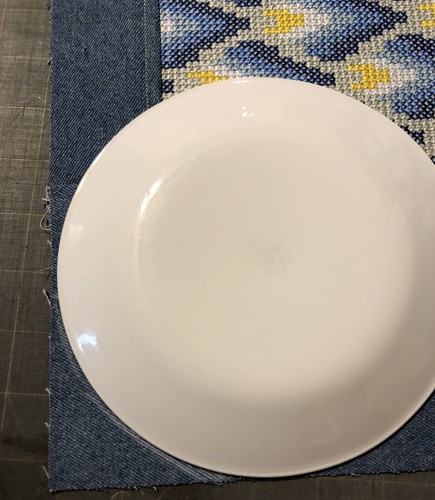
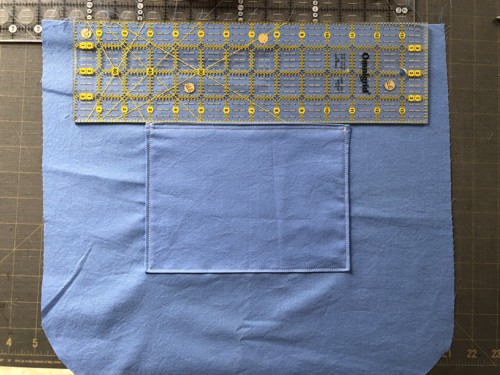
Round the lower corners. In each lower corner measure 3" in each direction. Connect the marks with a curve, you can use a plate for this, trace the rounded corners with the chalk pencil. |
|
| Cut them out. |
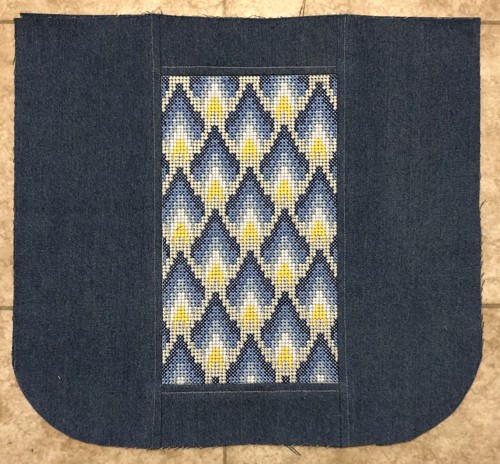
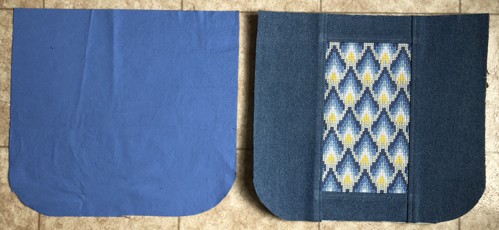
The view of the front/back panel from the front |
The view of the front/back panel from the back |
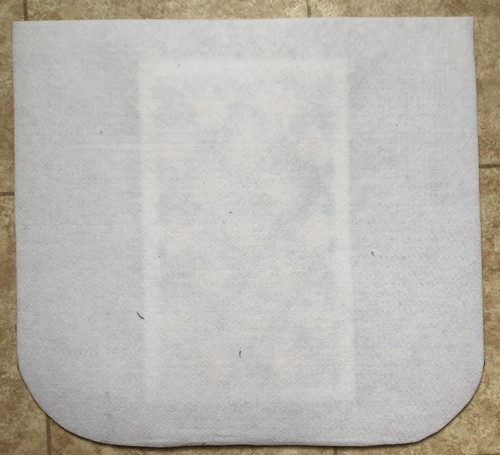
| Use one of the panels as a template, trace it over the fabric for the lining and cut out 2 lining panels: |
|
| The Handles: |
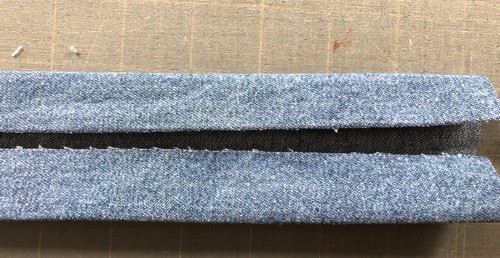
Fold the 3" x 28" strips lengthwise in half, wrong side inside, and press.
Fold the long edges to the creased line and press. |
|
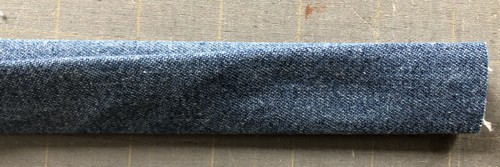
| Fold along the first creased line and press again. |
|
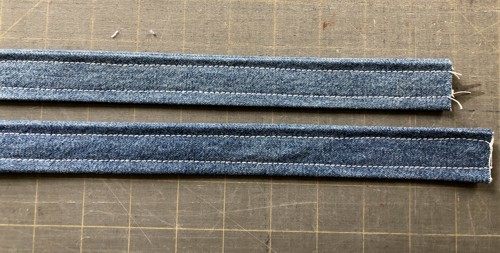
| Topstitch along the long edges. |
|
| Pin each handle to the panel as shown on the picture below: the short ends of the handle protruding above the upper edge of the panel for about 1/2". |
|
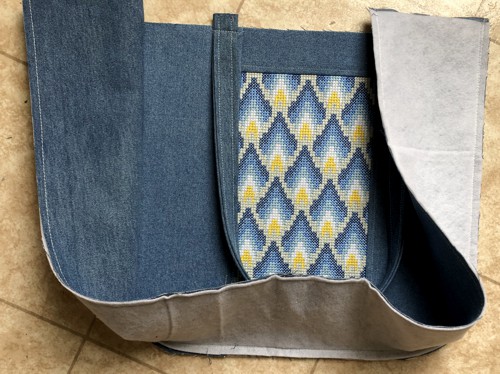
| The Side - Bottom Part: |
| Position the 6" x 43" denim strip over the felt strip of the same size. Press with your hands so that the fabric clings to the felt. Machine-baste along the edges of the denim fabric. Trim the excessive felt, if needed. |
Assembly (Part 1):
|
| Note: For the outer bag we used a #18 sewing needle, upholstery thread, and seam allowance 1/2". |
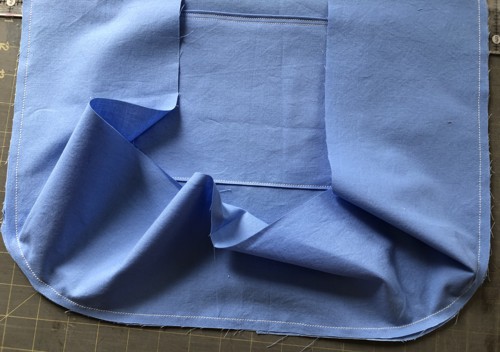
With right sides together, pin the side-bottom strip along the side-bottom edges of the front panel. The short sides of the strip might protrude beyond the upper edge of the front panel.
|
|
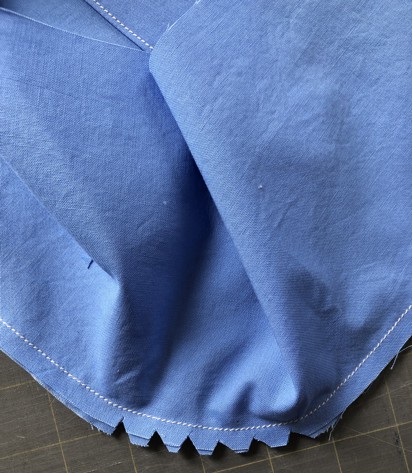
Stitch both parts together. Cut away the protruding ends of the side-bottom panel.
|
|
Notch the curves. In the same way attach the back panel.
Press all seams to the side-bottom panel. Turn the working piece right side out. |
|
The Lining:
|
Out of fabric for the lining, using the paper template, cut
- front and back panels,
- 1 strip measuring 5 1/2" x 42" and
- 1-2 rectangles measuring 9" x 14" for the pocket/s.
|
| Note: for the lining, use regular sewing thread, #12 sewing needle, seam allowance 3/8". |
Fold the piece for each pocket in half widthwise right side inwards. Stitch along 2 side edges. Press seams. Trim corners.
Turn right side out. Press. Tuck the raw edges 1/2" in. Press. Topstitch. |
|
| Position the pocket on the lining panel, about 4" from the upper edge and on equal distance from the side edges, pin, topstitch in place. |
|
| Then sew the side strip and the front panel in the same way, as described above for the outer bag: pin the parts together, stitch together, cut away the protruding short edges of the strip. |
|
| Notch the curves. Attach the other panel. |
|
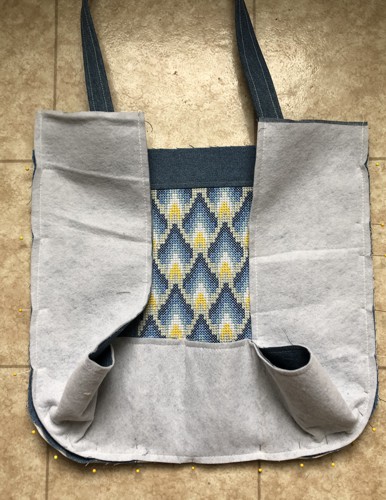
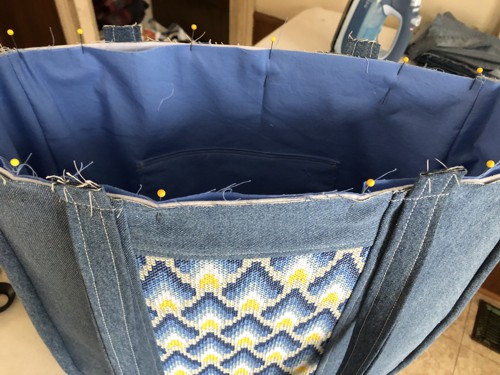
Insert the lining into the bag, wrong sides together. Align the seams and the upper raw edges - the raw edge of the lining with the raw edge of the bag.
Pin, then machine-baste together, seam allowance 1/4". |
|
| Assembly (Part 2): |
Measure the circumference of the upper edge. Add 1".
Use the 2 1/2" x 45" long strip, adjust it if necessary.
Fold one of the long edges of the strip 1/4" back and press. |
| Fold one of the short edges 3/4" inside, press, then stitch in place. |
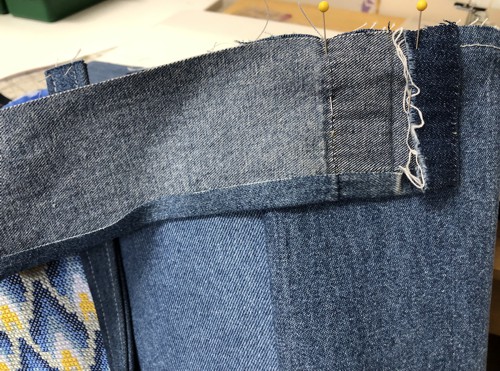
| Starting with the finished short edge, pin the strip with its raw edges along the upper edge of the bag. Start in the middle of the side panel. |
|
| The other short edge would overlap the finished short edge. |

|
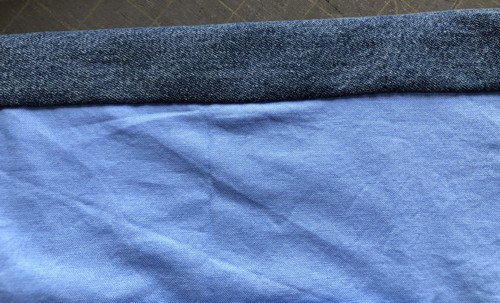
| Stitch the strip to the bag, seam allowance 3/8". Press the seam. Fold the strip up and press again. |
|
| Fold the strip inside. Press. Hand-stitch the strip to the lining with hem stitch. |
|
| Fold the handles up. Topstitch 1/8" along the lower edge of the upper trim. Then topstitch the handles to the upper edge. |
|
Sew the sew-on snap to the inside of the bag.
|

|
| The tote bag is done. |
|
| Have fun! |
|
|
Back to Decorative Panel for a Bag
|
Back to Projects Page
|


