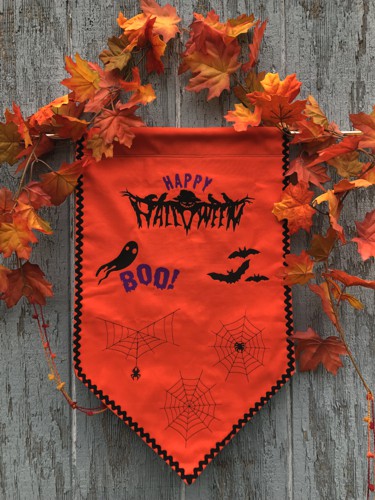
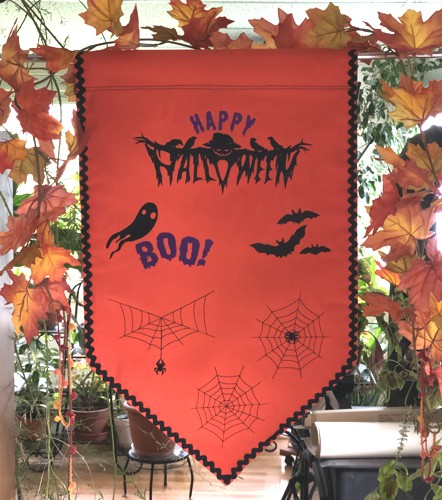
Welcome to our Halloween Banner with Embroidery tutorial! Whether you're a seasoned stitcher or just getting started, this guide will walk you through creating a cute Halloween banner that's sure to add a touch of handcrafted magic to your celebrations. Let's dive in and bring this eerie design to life!
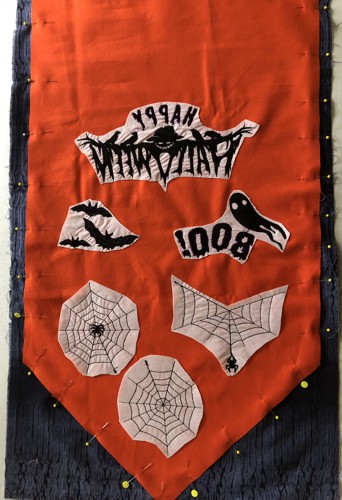
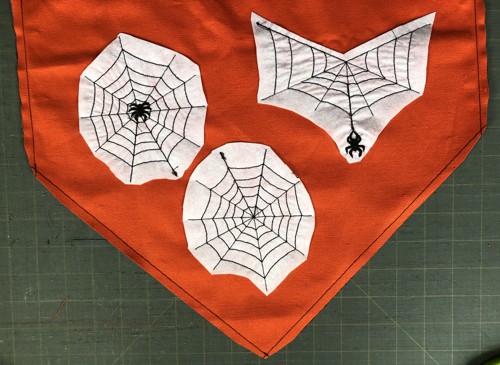
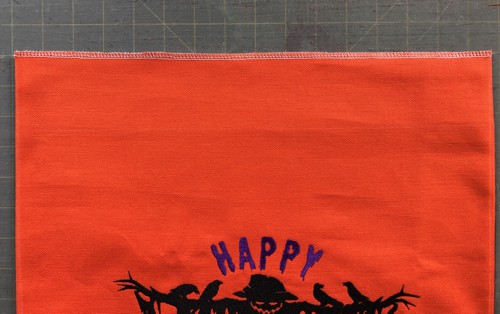
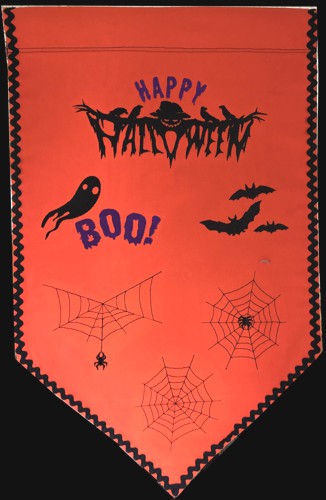
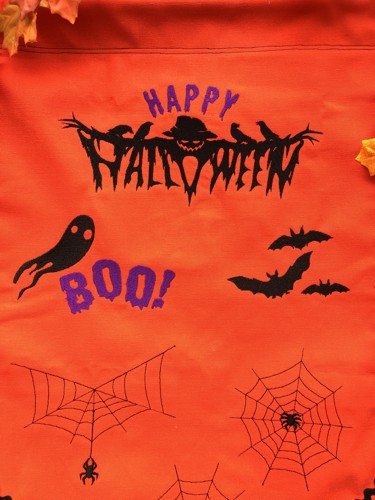
We used the designs from the Happy Halloween Set, Halloween Cobweb Set and one of the designs from the Halloween Bat Set.
The finished size of the banner is about 15 1/2" x 24".
|
|
You will need :
- embroidery threads either polyester or rayon,
- 1/2 yard of orange fabric, we used duck cloth;
- 1/2 yard of fabric for the lining / backing;
- light-weight cut-away embroidery stabilizer;
- quilter's ruler;
- white chalk pencil;
- rotary cutter;
- iron;
- #12 universal needle;
- sewing threads;
- wide rick-rack tape ineither black or purple colors (optional).
|
| Embroidery: |
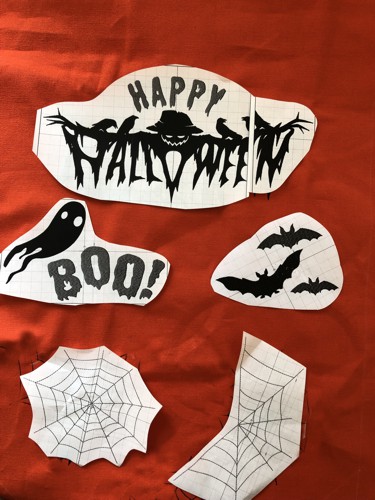
Choose designs from the Happy Halloween Set, Halloween Cobweb Set, Halloween Bat Set.
With the chalk pencil and quilter's ruler draw a rectangle measuring about 16" x 26" on the orange fabric. Make one of the short sides of the rectangle triangular.
If you have a printer and embroidery software, print-outs of the designs can be helpful. If you do not, you can cut out rectangles of the same size as the designs and arrange them on the fabric within the drawn pentagon to determine the position of the embroidery. The upper design should be about 5"-6" from the upper edge.
|
|
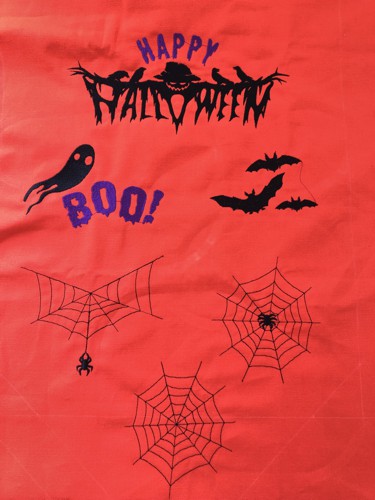
Upload the selected files to the embroidery machine.
Embroider the designs one by one. Cut away the excess stabilizer. |
|
| Cutting and Sewing the Banner: |
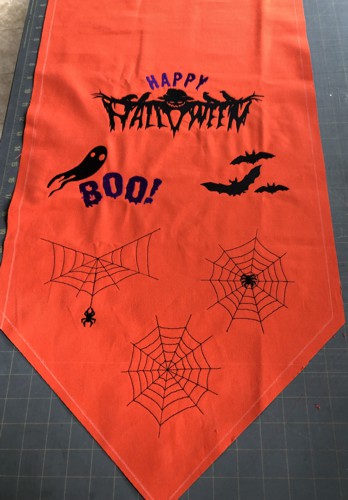
| Cut out the banner. |
|
| Place the backing/lining on a flat surface (table) face down. Spread the working piece over it, face down. Pin the edges together. |
|
Stitch along the side and lower edges, leaving the upper edge open. Seam allowance 1/4". Trim the corners.
|
|
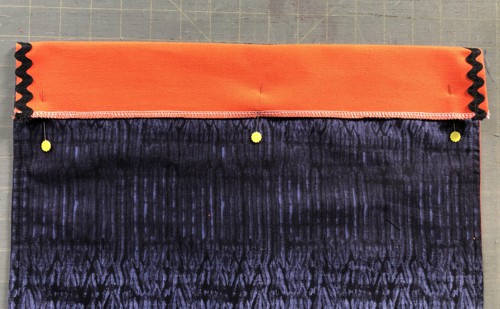
| Turn right side out and press. Zig-zag or serge the upper open edge. |
|
| Top-stitch the wide black, or purple, ric-rac along the edges. |
|
| Fold the upper edge 2" back, press, pin. Topstitch in place to make a hanging sleeve. |
|
| Insert a rod in the sleeve and hang the banner. |
|
| Have fun! |
|
|
Back to Happy Halloween Set , Halloween Cobweb Set and Halloween Bat Set.
|
Back to Projects Page
|


