|
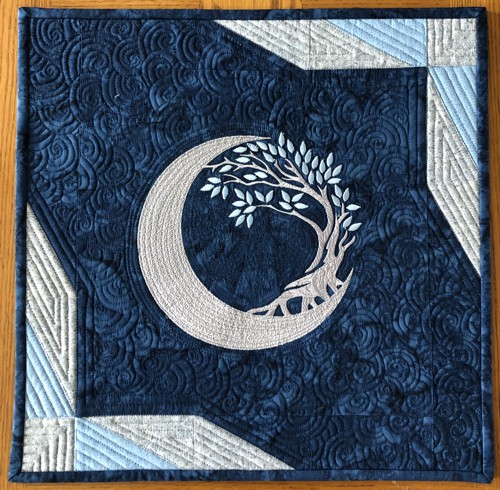
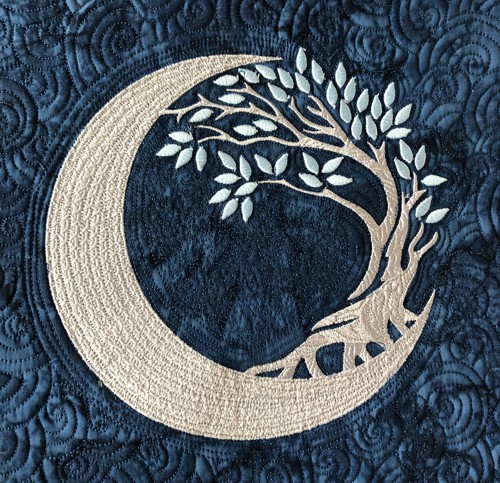
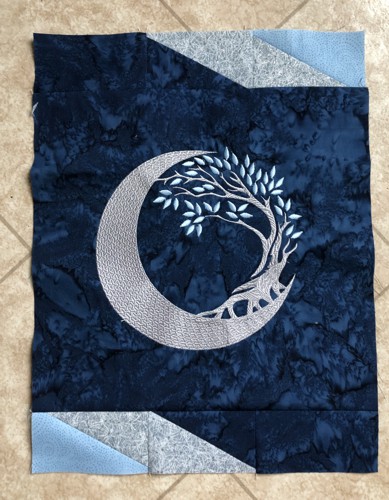
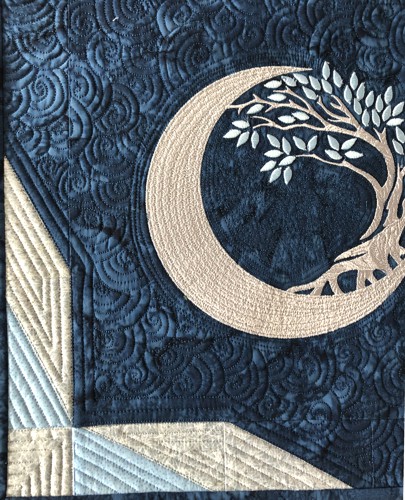
Welcome to our free project! This project was designed to showcase the beautiful machine embroidery design of a Crescent Moon Tree. The design is embroidered in silver, on a dark blue background. The quilt is further enhanced with a silver and blue pieced border, adding a touch of elegance and sophistication to the overall design.
Whether you're looking to add a touch of whimsy to your home decor or to create a special gift for someone you love, this Wall Quilt with Moon and Tree Embroidery project is sure to impress. So gather your materials, and let's get started on creating a beautiful piece of art that will be cherished for years to come! For this small modern looking wall quilt we used the Crescent Moon Tree embroidery design.
The finished size of the quilt is 15 3/4" square. |
|
You will need :
- embroidery threads either polyester or rayon - we used silver gray and pale blue colors,
- 1/2 of dark blue fabric (we used batik);
- small amount of silver and light blue fabrics for the borders;
- medium-weight cut-away embroidery stabilizer;
- batting;
- quilter's ruler;
- rotary cutter;
- graph pencil;
- iron;
- #12 universal needle;
- quilting threads, the colors of the fabrics you use (we used dark blue, light blue and silver metalic);
- #12-#14 quilting needle.
|
| Embroidery: |
Select threads. Upload the file into your machine. Stabilize a piece of dark blue fabric with medium-weight cut-away stabilizer. Hoop the fabric tightly and embroider the design.
Trim the fabric around the stitch-out to a 12 1/2" x 12 1/2" square. |
|
Cutting :
|
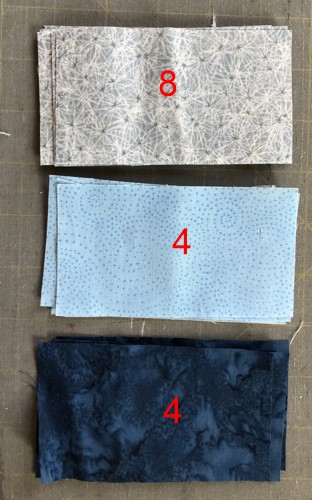
Out of dark blue fabric, cut
- 2 strips measuring 2 1/2" x 6 1/2",
- 6 strips measuring 2 1/2" x 4 1/2".
Use the remaining fabric for the binding.
Out of silver fabric, cut
- 8 strips measuring 2 1/2" x 4 1/2" and
- 2 squares measuring 2 1/2" x 2 1/2".
Out of light blue fabric, cut 4 strips measuring 2 1/2" x 4 1/2".
|
|
Assembly:
|
| Note: seam allowance is 1/4", press every seam immediately after you make it. |
Prepare the 8 silver,4 light blue and 4 dark blue 2 1/2" x 4 1/2" strips.
|
|
Unit 1:
|
| You will need 2 of this unit. |
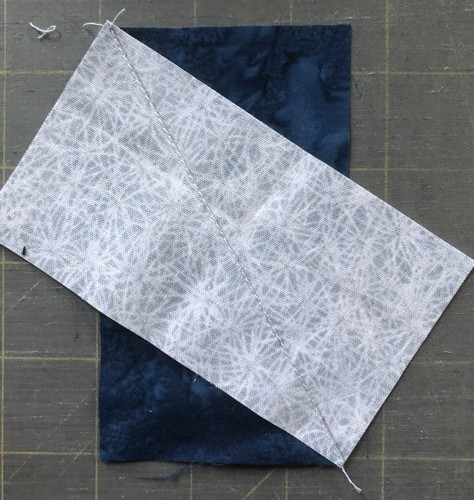
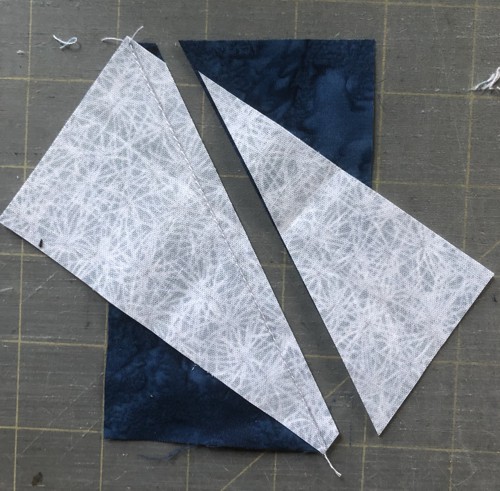
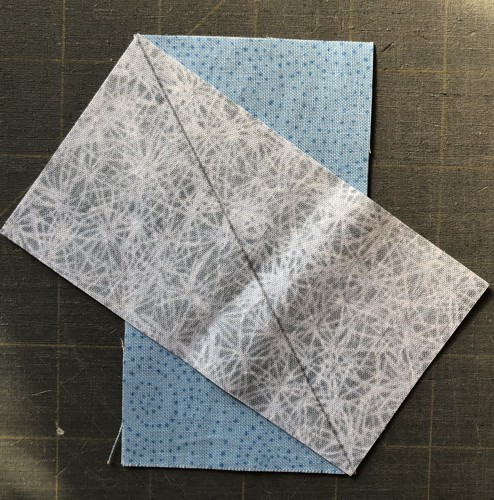
| Position a dark blue and a silver strips face to face as shown on the picture: the right upper corner of the silver strip is aligned with the left upper corner of the blue strip; the left lower corner of the silver strip is aligned with the right lower corner of the blue strip. Draw a diagonal over the silver strip. |

|
| Stitch along the diagonal. |
|
| Cut along the diagonal leaving 1/4" seam allowance. |
|
| Unit 2: |
| Unit 2 is made in the same way as Unit 1, but using light blue and silver strips. Make 2 of them. |
|
|
| Units 3 and 4: |
| Units 3 and 4 are made in the same way as Units 1 and 2, but in mirror image. Unit 3 uses dark blue and silver strips, unit 4 uses light blue and silver strips. Make 2 of each. |

|
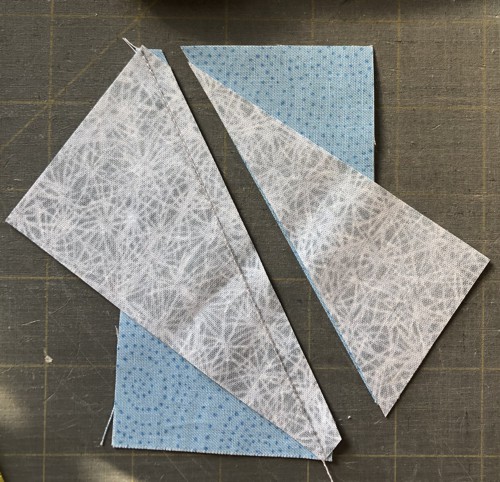
| Stitch along the diagonal. Cut with seam allowance 1/4". |

|
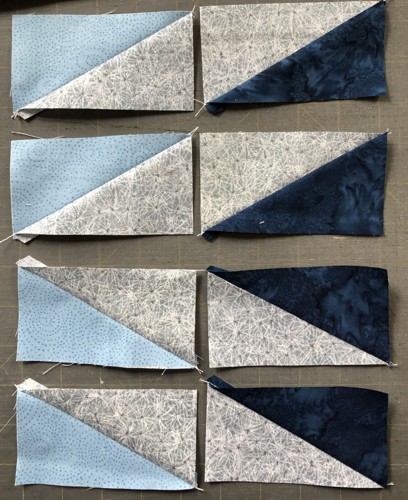
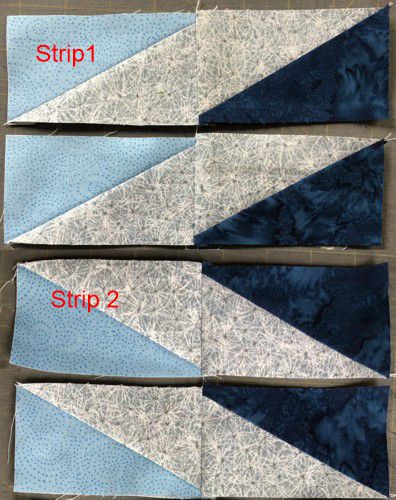
| Open and press the units. On the picture below are units 1 and 3. Units 2 and 4 look the same, but with light blue triangles. |

|
| Lay out the units in pairs as shown on the picture below: Unit 2 and Unit 1; Unit 4 and Unit 3. |
|
| Sew the pairs into 4 strips: |
|
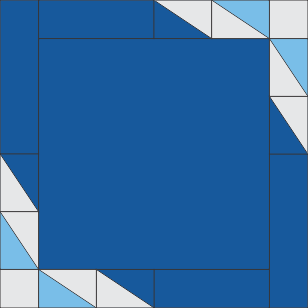
| Sew the dark blue strips measuring 2 1/2" x 4 1/2" to the dark blue ends of strips #2. |
| Sew the new strips to the upper and lower edges of the quilt: |
|
| Sew the dark blue strips measuring 2 1/2" x 6 1/2" to the dark blue ends of strips #1. |

|
Sew the silver 2 1/2" x 2 1/2" squares to the light blue ends of the strips #1.
|

|
| Sew the new strips to the left and right edges of the central part so that the silver ends are stitched to the light blue ends of the strips #2 and the dark blue strips are stitched to the dark blue ends of the strips #2. |
|
Quilting and Finishing
|
Now place the backing on a flat surface (table) face down. Cover with batting. Spread your working piece over it.
Pin all layers together.
We quilted in a free-motion style all over the working piece. |
|
Press with heavy steam. Square the piece.
Finish the raw edges with the binding. |
|
| Have fun! |
|
Back to Crescent Moon Tree
|
Back to Projects Page
|


