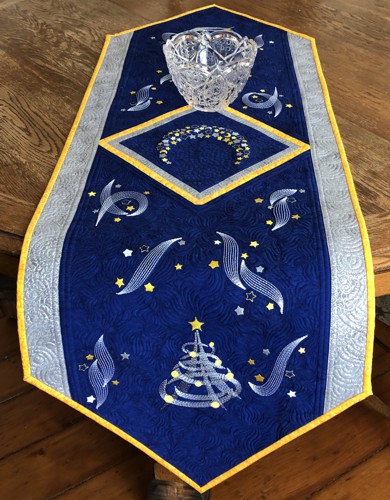
Enjoy our delightful tutorial on creating a Quilted Tablerunner adorned with celestial Night Sky embroidery. This project seamlessly combines the timeless charm of quilting with the ethereal beauty of a starlit night, offering a unique and captivating addition to your home decor. Let's get started!
We used the designs from the Night Sky Set and one of the designs from the Winter Wind Christmas Tree.
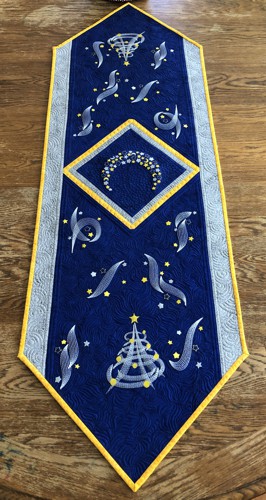
The finished size of the tablerunner is about 17 1/2" x 53 1/2". |
|
You will need :
- embroidery threads, either polyester or rayon,
- 1 yard of royal blue fabric;
- about 1/2 yard of silver colored fabric for the borders;
- yellow or golden fabric for the binding;
- light-weight cut-away embroidery stabilizer;
- fabric for the backing;
- batting;
- quilter's ruler;
- rotary cutter;
- iron;
- #12 universal needle;
- quilting threads (royal blue, and the colors of the fabrics you use);
- #12-#14 quilting needle.
|
|
Cutting:
|
Out of the blue fabric, cut
- 1 square measuring 8 1/2" x 8 1/2",
- 2 squares measuring 10 3/4" x 10 3/4",
- 2 rectangles measuring 15" 21 1/2" each.
|
Out of silver gray fabric, cut
- 2 strips measuring 1" x 8 1/2",
- 2 strips measuring 1" x 9 1/2" and
- 2 strips measuring 2 1/2" x 56".
|
Out of yellow fabric, cut
- 2 strips measuring 1" x 9 1/2" and
- 2 strips measuring 1" x 10 1/2".
Use the remaining fabric for the binding, you will need 4 strips 2 1/2" wide and the length of the width of the fabric (the average width of fabrics is about 40") . |
Assembly:
|
| Note: seam allowance is 1/4", press the seam immediately after you make it. |
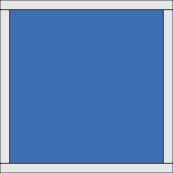
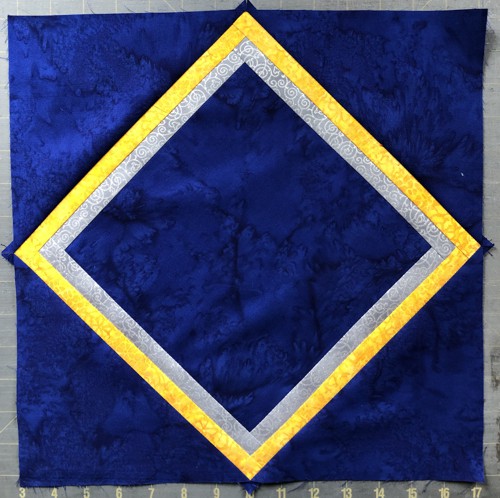
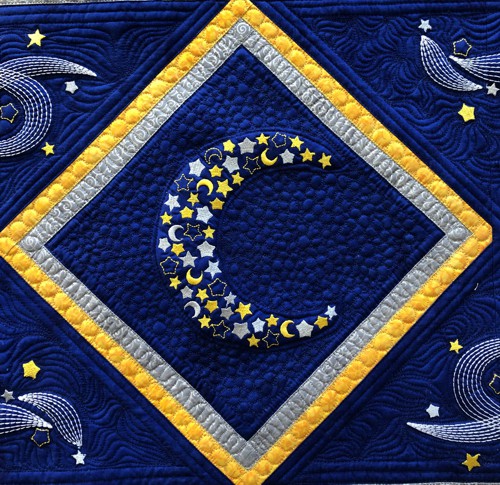
Sew the silver 1" x 8 1/2" strips to opposite sides of the blue 8 1/2" square.
Then sew the silver 1" x 9 1/2" strips to the remaining sides.
|
|
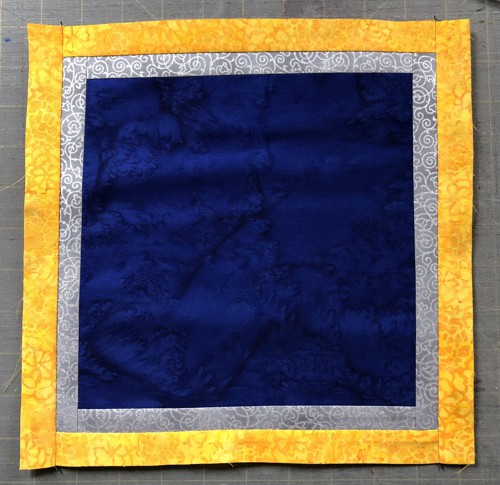
Sew the yellow 1" x 9 1/2" strips to the opposite sides of the same square.
Then sew the yellow 1" x 10 1/2" strips to the remaining sides.
|
|
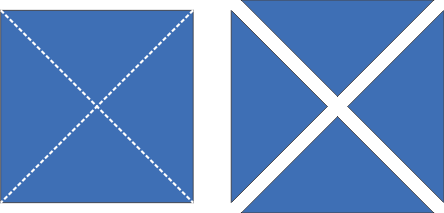
| Cut the 10 3/4" squares on the diagonals to get 4 triangles. |
|
| Working with one triangle at a time, sew them to the sides of the central square. |
|
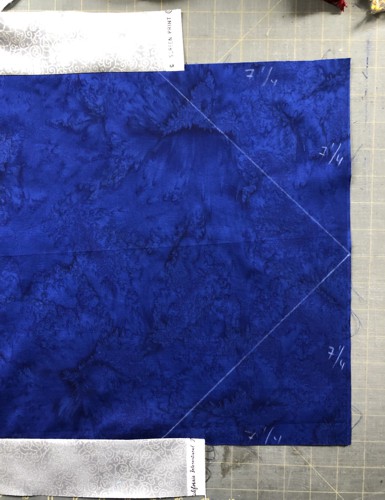
Sew the 15" x 21 1/2" rectangles to opposite sides of the working piece.
|

|
Sew the silver borders to the long sides of the working piece.
If the ends of the tablerunner are going to be angled, fold the silver strips (2 1/2" x 40"-42") widwise in half, lightly press to mark the center. Align the center of the border with the angle of the central diamond. Pin, stitch in place.
With the quilters ruler and chalk pencil, draw the angles on the ends of the tablerunner, but do not cut them yet. |
|
Embroidery:
|
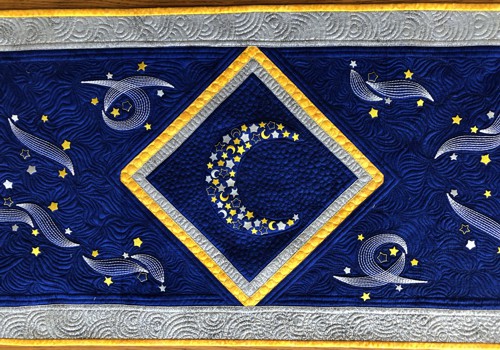
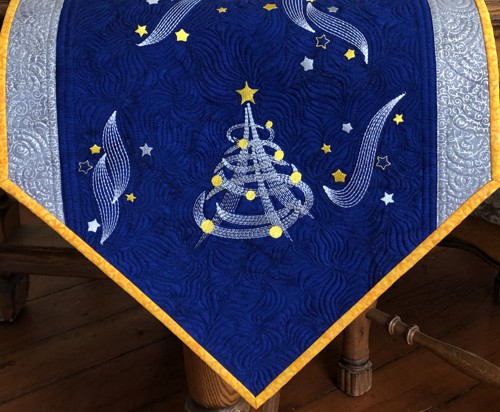
Upload the files of the Night Sky Set and one of the designs from the Winter Wind Christmas Tree to the embroidery machine.
Mark the position of the embroidery on the tablerunner. If you have a printer and embroidery software, print-outs of the designs can be helpful. If you do not, you can cut out rectangles of the same size as the designs and arrange them on the fabric to determine the position of the embroidery.
Select threads. Working with one pattern at a time, stabilize the area.
Hoop the fabric tightly and embroider the designs one by one.
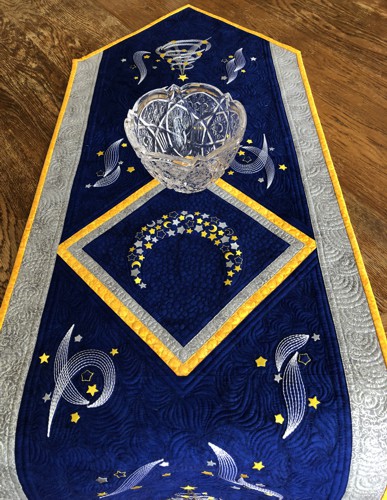
We embroidered the crescent moon in the center, Christmas trees on the ends and clouds with stars all over the piece. |
|
Quilting and Finishing
|
Now place the backing on a flat surface (table) face down. Cover with batting. Spread your working piece over it.
Pin all layers together.
We quilted in a free-motion style all over the tablerunner. Start from the central part, then procced to one end, then to another. |
|
Press with heavy steam. Square the piece and trim the ends.
Finish the raw edges with the binding. |
|
| Have fun! |
|
|
Back to Night Sky Set and Winter Wind Christmas Tree.
|
Back to Projects Page
|


