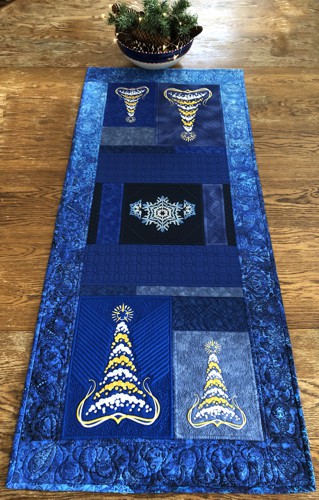
Welcome to our new project. This endeavor combines quilting and machine embroidery, turning fabric scraps into a festive table runner. Ideal for all skill levels, it blends sustainability and creativity, encouraging you to repurpose leftover fabrics into a vibrant Christmas decor piece. Let's dive in, hone our skills, and create something memorable for this holiday season!
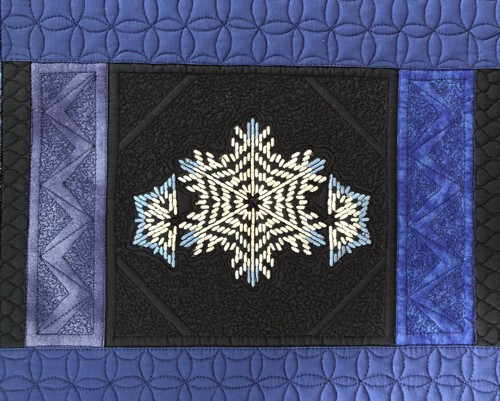
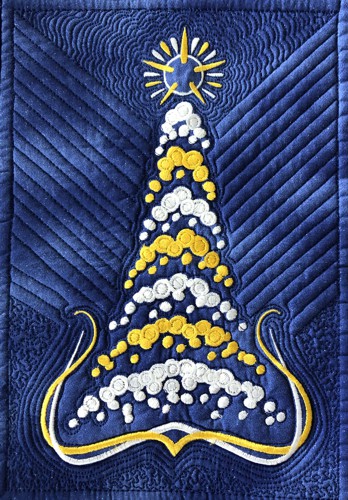
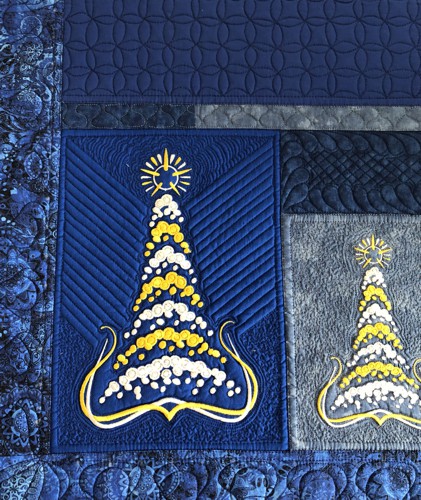
We used the designs of Christmas Miracle Tree (for large and mega hoops) and one of the designs from the Snowflake Motif Set.
The finished size of the tablerunner is about 20" x 46 1/2". |
|
You will need :
- embroidery threads either polyester or rayon,
- scraps of cotton fabrics in blue hues - solid colored or featuring subtle patterns;
- about of 1 yard of patterned blue fabric for the borders and binding;
- light-weight cut-away embroidery stabilizer;
- fabric for the backing;
- batting;
- quilter's ruler;
- rotary cutter;
- iron;
- #12 universal needle;
- quilting threads (black and blue to match your fabrics);
- #12-#14 quilting needle.
|
| Embroidery: |
Upload the files of the Christmas Miracle Tree (for large and mega hoops) and the large file of the snowflake from the Snowflake Motif Set to the embroidery machine.
Select threads. Stabilize the pieces of blue fabrics, feel free to use different fabrics as background.
Hoop the fabric tightly and embroider the designs one by one.
- Embroider the Snowflake once, trim stitch-out to 8 1/2" x 8 1/2" square.
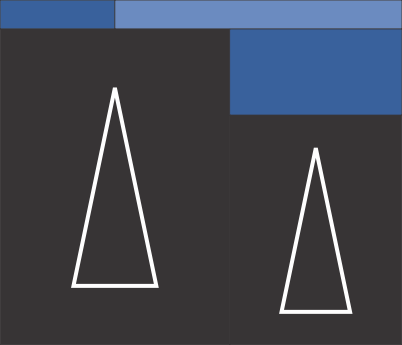
- Embroider the Christmas Tree for the mega hoop twice, trim the stitch-outs to 8 1/2" x 11 1/2" rectangle.
- Embroider the Christmas Tree for the large hoop twice, trim the stitch-outs to 8 1/2" x 6 1/2" rectangles.
|
Cutting the Other Parts of the Tablerunner:
|
| Note: when you're asked to cut 2 parts, preferably cut them of the same fabric. |
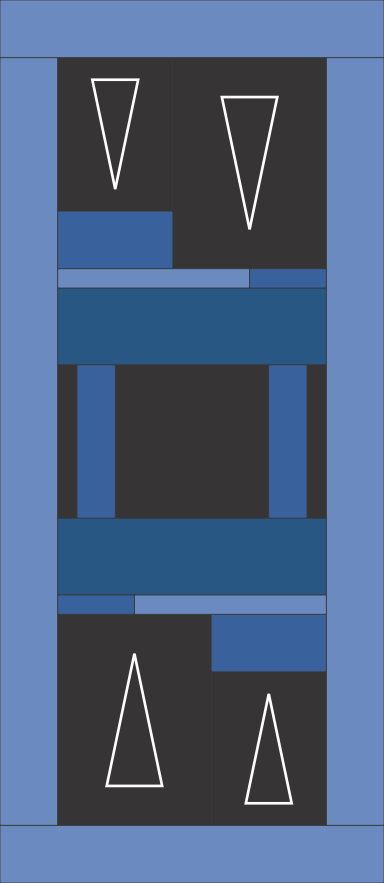
For the central part, you will need
- 2 strips measuring 2 1/2" x 8 1/2",
- 2 strips of measuring 1 1/2" x 8 1/2",
- 2 strips measuring 4 1/2" x 14 1/2".
|
For the end parts, you will need:
- 2 strips measuring 1 1/2" x 4 1/2",
- 2 strips measuring 1 1/2" x 10 1/2",
- 2 strips measuring 3 1/2" x 6 1/2".
|
For the borders, out of paterned fabric, cut
- 2 strips measuring 3 1/2" x 20 1/2" and
- 2 strips measuring 3 1/2" x 40 1/2".
Use the remaining fabric for the binding. |
Assembly:
|
| Note: seam allowance is 1/4", press the seam immediately after you make it. |
Central Part:
To the left and right edges of the piece with the snowflake, sew first the 2 1/2" x 8 1/2" strips, then the 1 1/2" x 8 1/2" strips.
|

|
Sew the 4 1/2" x 14 1/2" strips to the upper and lower edges of the snowflake piece.
|

|
End Parts:
Sew the 3 1/2" x 6 1/2" strips to the upper edge of the Tree stitch-out for the large hoop. |

|
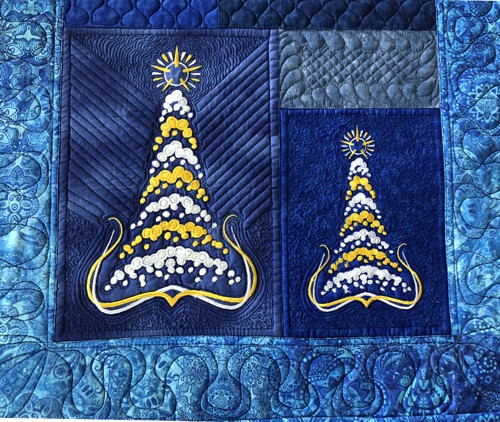
| Sew this piece to the right edge of the Tree stitch-out for the mega hoop. |

|
Sew the 1 1/2" x 4 1/2" and 1 1/2" x 10 1/2" strips together into a longer strip.
Sew this strip to the upper edge of the Trees piece. |
|
| Sew the end parts to the central part. |

|
Sew the long borders (3 1/2" x 40 1/2") to the long edges of the tablerunner.
Sew the short borders (3 1/2" x 20 1/2") to the short edges of the tablerunner. |
|
Quilting and Finishing
|
Now place the backing on a flat surface (table) face down. Cover with batting. Spread your working piece over it.
Pin all layers together.
We quilted in a free-motion style all over the tablerunner. Start from the central part, quilt around the embroidery first, then move from the center to the ends. |
|
Press with heavy steam. Square the piece - all angles should be 90 degrees and the opposite sides should be of the same length,
Finish the raw edges with the binding. |
|
|
|
|
| Have fun! |
|
|
Back to Christmas Miracle Tree and Snowflake Motif Set.
|
Back to Projects Page
|


