|
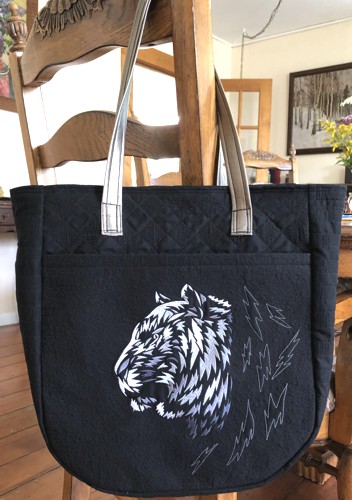
Welcome to our exciting sewing and embroidery project - Quilted Tote Bag with Silver Tiger Embroidery. This eye-catching project is not just about creating a practical item, but also about embracing creativity, honing your crafting skills, and expressing personal style.
Our quilted tote bag will be made of high-quality black fabric, providing a striking contrast to the star of the show - the Silver Tiger design. We've chosen the majestic tiger to impart a sense of strength, courage, and beauty to our design.
Prepare your sewing machines, gather your threads, and let's transform a piece of black fabric into a beautiful, practical, and personal masterpiece! The finished size of the bag is about 14"W x 15"H x 5"D. |
|
You will need :
- embroidery threads, either polyester or rayon;
- about 2 yards of black cotton fabric for the bag;
- medium-weight cut-away embroidery stabilizer;
- black polyester craft felt;
- quilter's ruler, rotary cutter, and/or scissors, safety pins;
- chalk pencil;
- a piece of faux leather for the handles (we chose silver-colored one to match the embroidery);
- a sew-on 1/2" size snap;
- iron;
- #1 and #14 universal needles;
- sewing pins;
- #12- #14 quilting needles;
- black quilting thread ;
- sewing threads - regular #40 and heavy duty (we used thread for upholstery).
|
| Embroidery: |
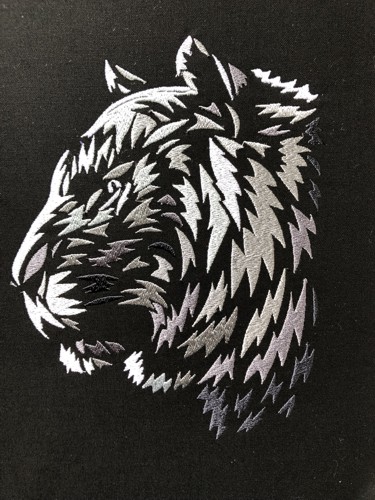
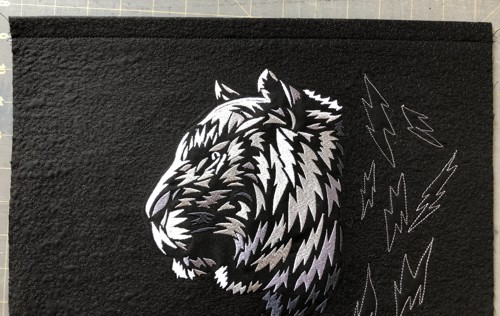
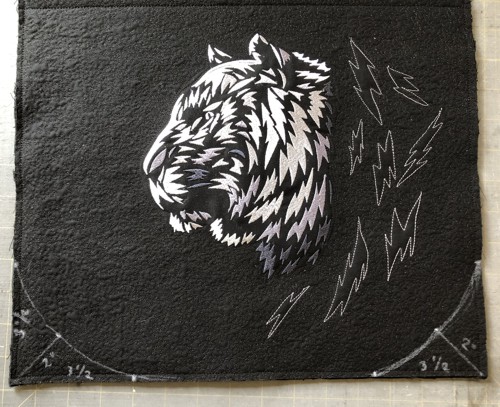
Prepare the fabric for embroidery. The piece should be approximately 15" H x 16" W.
Select threads. You can substitute colors, but take into consideration the color of the background.
Upload the file of the Silver Tiger into your machine. Stabilize the fabric and hoop it tightly.
Embroider the design in the center of the 15" H x 16" W piece.
Remove the excess stabilizer as close to the stitches as possible. Take care not to cut through the stitches. |
|
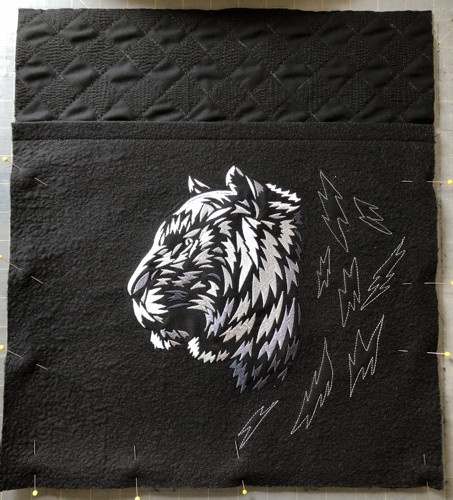
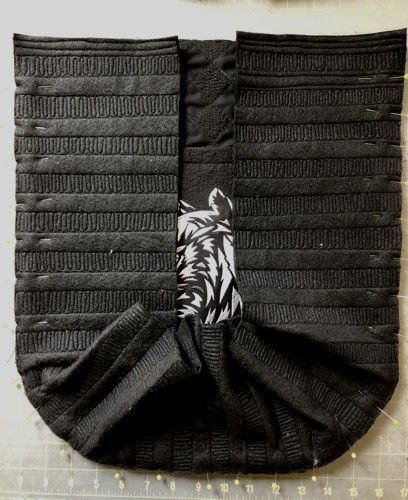
| Outer Pocket with Embroidery: |
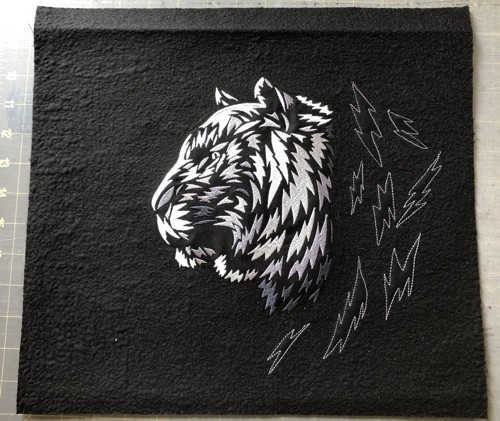
Place the stitch-out on a piece of polyester craft felt. Pin the 2 layers together. Quilt in a free motion style. Press with steam.
Square the piece and trim to 13 1/2" height and 15" wide.
Fold the upper edge 1" back and press. |
|
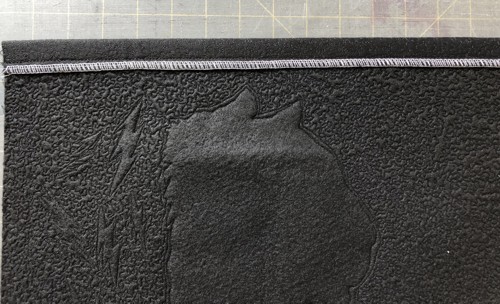
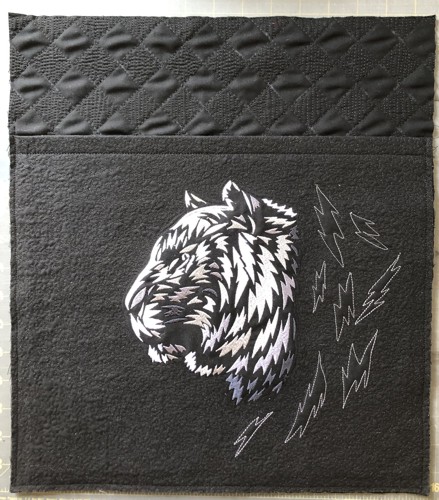
| Unfold the upper edge and finish it with zig-zag stitch or serger. Fold back and press again. |
|
| Topstitch about 1/2" from the edge. |
|
| Cutting and Quilting the Bag Parts: |
Out of black fabric, cut
- 2 squares measuring 17" x 17" for the outer panels ;
- 2 squares measuring 16" x 16" for the lining;
- 2 strips measuring 7" x 43"-44" (the width of the fabric),
- 1 piece measuring 7" x 14" for the inner pocket.
Out of black polyester craft felt, cut
- 2 squares measuring 17" x 17";
- 1 strip measuring 7" x 43"-44".
|
Pin each of the fabric 17" x 17" pieces with the the felt pieces.
Pin one of the fabric 7" x 43"-44" strips with the felt strip.
Quilt the parts in any fashion you like.
|
Trim the quilted panels to 16 1/2" H x 15" W.
Trim the strip to 6" x 42".
|
Assembly of the Outer Bag:
|
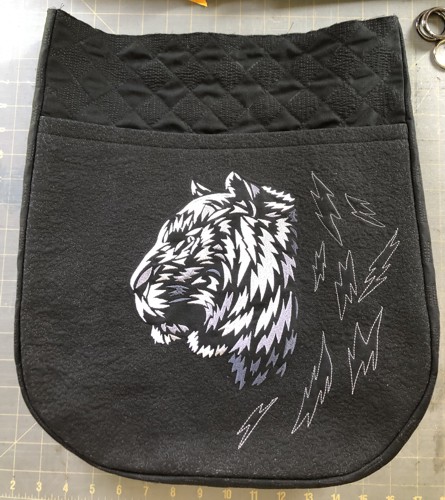
Position the panel with embroidery over one of the panels. Align the lower and side edges.
|
|
| Stitch the pocket to the panel with seam allowance 1/4". |
|
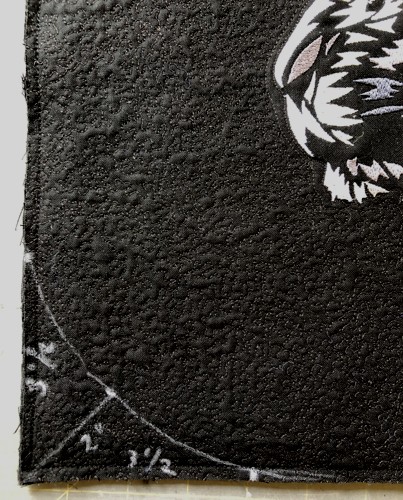
| Using the ruler and chalk pencil, measure 3 1/2" in both both directions from lower corners, place marks. Measure 2" along the diagonal. Draw an arc. |
|
|
Cut along the drawn lines.
Using the front panel as a pattern, round the lower corners of the back quilted panel and the panels of the lining. |
With right sides together, pin the side-bottom strip along the side-bottom edges of the front panel. One short of the side strip will protrude beyond the upper edge of the front panel.
Stitch both parts together. Seam allowance about 1/2". Cut away the protruding end of the side panel. |
|
| In the same way attach the back panel to the side-bottom panel. |
|
| The lining is sewn in the same way as the outer bag, but before you sew the panels together, make an inner pocket and sew it to one of the panels. |
To make the pocket, fold the 7" x 14" piece in half widthwise right side inwards. Stitch along 2 open edges. Press seams. Trim corners. Turn right side out. Press.
Tuck the raw edges 1/2" in. Press. Topstitch the opening closed.
Position the pocket on the lining panel, pin, topstitch in place. |
Sew the lining with seam allowance 1/4". Notch the curves.
Fold the upper edge 1/2" to the wrong side and press. |
|
Handles
|
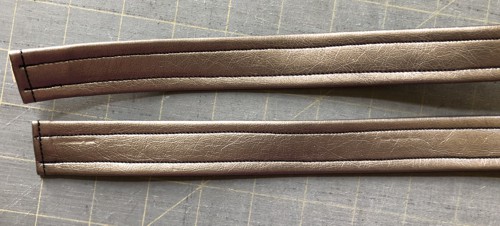
Out of the faux leather, cut 2 strips measuring 2 1/2" x 27". Fold the long edges to the wrong side to make them meet in the center. Pin in place.
Topstitch 1/4" from the edges. |
|
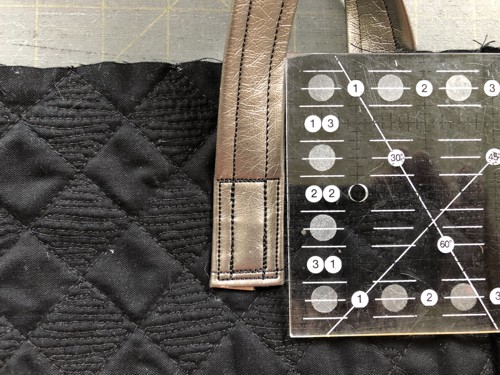
| Mark the placement of the handles on the front and back panels: 3" from the upper edge and 3" from the side panel. |
|
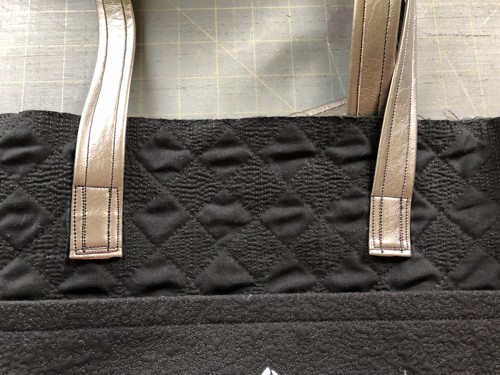
Stitch the handles to the outer bag.
|
|
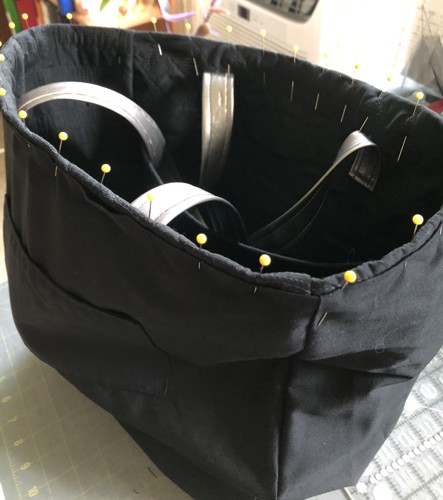
Fold the upper edge of the outer bag 1/2" to the wrong side and press.
With wrong sides together, pin the lining and the outer bag along the upper edges, the lining edge slightly below the edge of the outer bag.
Topstitch in place twice with seam allowance 1/4" and 3/8". |
|
| Sew on the snap. |
| Have fun! |
|
|
|
Back to Silver Tiger
|
Back to Projects Page
|


