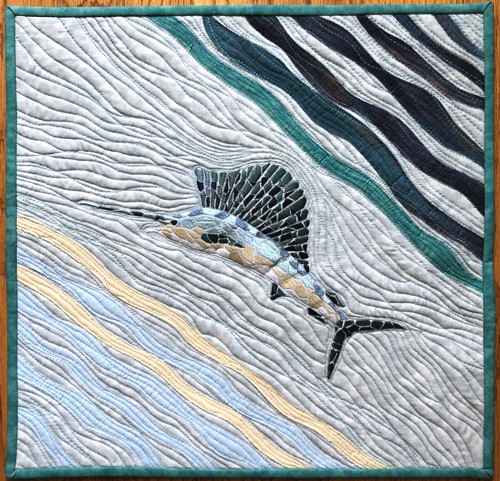
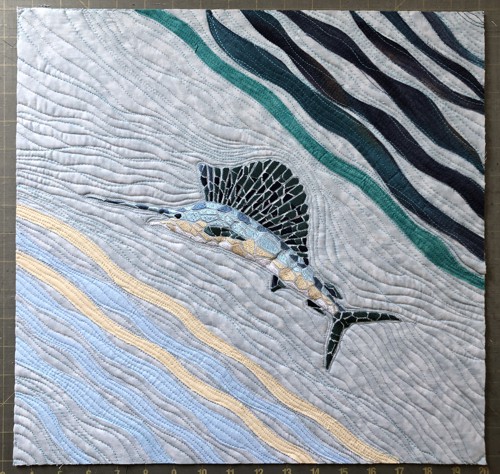
If you love the ocean and its creatures, you will enjoy making this small art quilt featuring Swordfish machine embroidery. This project is perfect for displaying your creativity and skill with fabric and thread. The quilt relies on fusible web to create the quilt top and requires no piecing!
The finished art quilt will measure 16 1/2" x 16 1/2" and will add a touch of nautical charm to any wall. Let's get started!
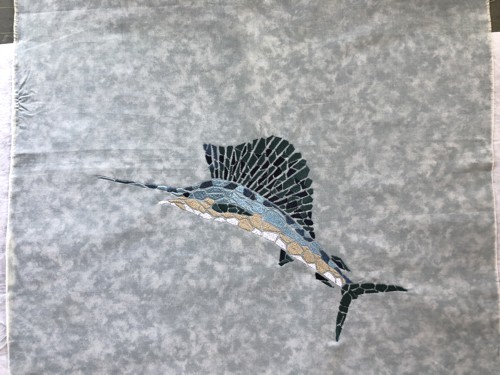
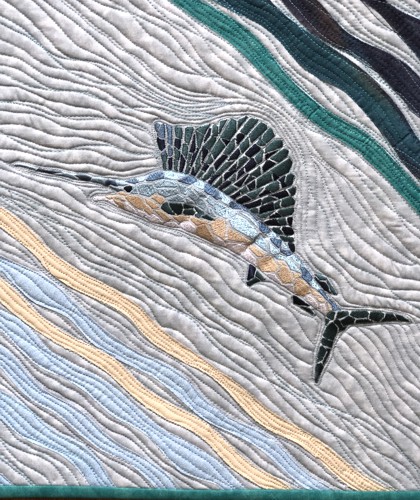
We used the design Swordfish Mosaic. |
|
You will need :
- embroidery threads either polyester or rayon, following our color card;
- 1 fat quarter of pale gray or pale blue fabric;
- scraps of fabric matching the colors of the embroidery;
- fabric for the backing and binding;
- light-weight cut-away embroidery stabilizer;
- Steam-a-Seam 2 (fusible web) or similar product for applique;
- batting;
- quilter's ruler;
- rotary cutter;
- iron;
- #12 universal needle;
- quilting threads (to match the colors of the fabrics you use);
- #12-#14 quilting needle.
|
Embroidery:
|
Select threads. Upload the file Swordfish Mosaic into the machine.
Mark the position of the embroidery approximately in the center of the gray/blue fat quarter.
Stabilize the chosen area. Hoop the fabric tightly and embroider the design. |
|
Applique:
|
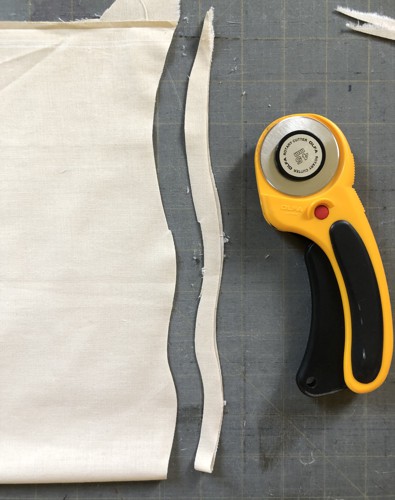
| Out of scraps of fabric, using either a rotary cutter or scissors, cut wavy strips approximately 1/2" wide and as long as the scraps permit. |
|
Position the strips on fusible web and cut the web according to the shape of the strips.
|
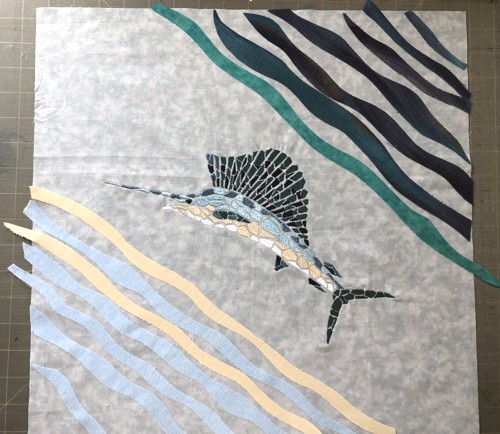
Position the strips onto the fat quarter with the swordfish stitch-out: in the upper right corner place the darker strips, in the lower left corner, place the lighter ones.
|
|
| Following the instructions of the web manufacturer, press the strips to fuse the web. |
Quilting and Finishing
|
Now place the backing on a flat surface (table) face down. Cover with batting. Spread your working piece over it.
Pin all layers together.
We quilted in a free-motion style all over the quilt. |
|
Press with heavy steam. Square the piece and trim it to the desired size.
Finish the raw edges with the binding. |
|
| Have fun! |
|
Back to Swordfish Mosaic
|
Back to Projects Page
|


