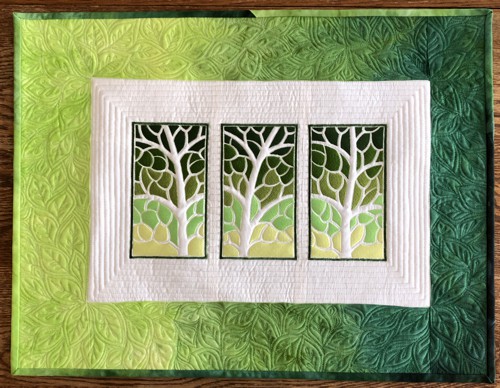
This small quilt features three exquisite Mosaic Tree Panels, adding a touch of nature's beauty to your home decor.
The intricate machine embroidery brings the trees to life with rich, vibrant colors and fine details that are sure to captivate your eyes. The border around the embroidery is carefully crafted using fabric in colors that match the embroidered panels, creating a cohesive and harmonious look.
The quilt is quilted free-motion with a leaf pattern, adding an extra layer of texture and dimension to the quilt.
We used the designs from the Mosaic Tree Panel Set. The finished size of the quilt is about 18" x 24". |
|
You will need :
- embroidery threads either polyester or rayon - please follow our color card or choose hues to your taste,
- off-white or pale cream fabric for the embroidery background (plrease note that the fabric is part of the design and shapes the tree trunks and branches)
- 1/2 of a batik or gradient-colored fabric in the hues of the embroidery;
- fabric for the backing and binding,
- light-weight cut-away embroidery stabilizer;
- batting;
- quilter's ruler;
- rotary cutter;
- iron;
- #12 universal needle;
- quilting threads ( the colors of the fabricss you use);
- #12-#14 quilting needle.
|
| Embroidery: |
Upload the files from the into the machine. Select threads. Stabilize the light fabric and hoop it tightly. Embroider the designs one by one.
Lay out the stitch-outs in the order in which you want to see them on the quilt. |
Trim the fabric around the stitch-out as follows:
The first (left) panel: leave 2 1/2" margins on the upper, lower and left edges; leave a 1/2" margin on the right edge.
The middle panel: leave 2 1/2" margins on the upper and lower edges, leave 1/2" margins on the left and right edges.
The third (right) panel: leave the 2 1/2" margins on the upper, lower and right edges; leave a 1/2" margin on the left edge. |
Cutting :
|
Out of fabric for the borders, cut:
- 2 strips measuring 3" x 18" and
- 2 strips measuring 3" x 17".
Use the remaining green fabric for the binding.
Out of fabric for the backing, cut a piece measuring about 20" x 26".
Out of batting, cut a piece measuring 20" x 26".
|
Assembly:
|
| Note: seam allowance is 1/4", press the seam immediately after you make it. |
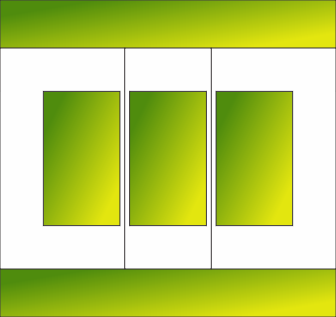
Sew the embroidered parts together. Measure the piece, it should be 12" x 18" wide.
|

|
Sew the 3" x 18" strips to the upper and lower edges of the central part.
|
|
| Sew the 3" x 17" strips to the left and right edges of the central part. |

|
Quilting and Finishing
|
Now place the backing on a flat surface (table) face down. Cover with batting. Spread your working piece over it.
Pin all layers together.
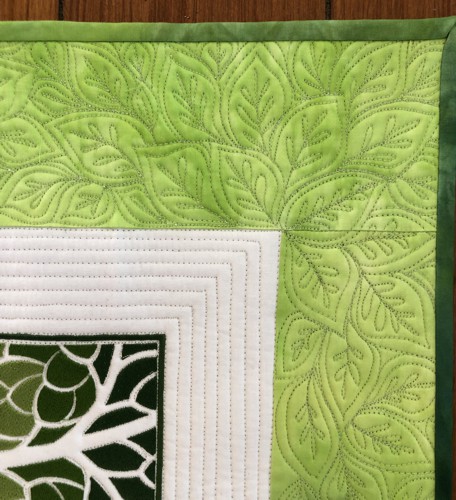
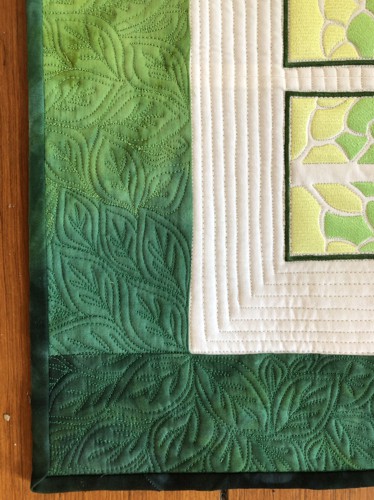
We quilted along the trunks and branches inside the the embroidery and in parallel lines around the embroidery.
The borders are quilted in a free-motion style with a leaf pattern. |
|
Press with heavy steam. Square the piece.
Finish the raw edges with the binding. |
|
| Have fun! |
|
Back to Mosaic Tree Panel Set
|
Back to Projects Page
|


