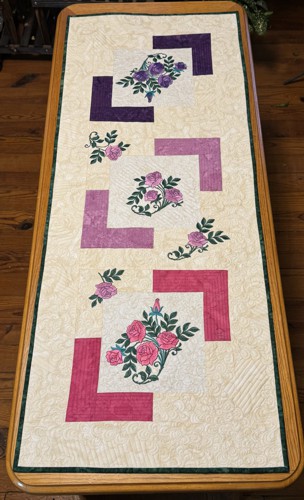
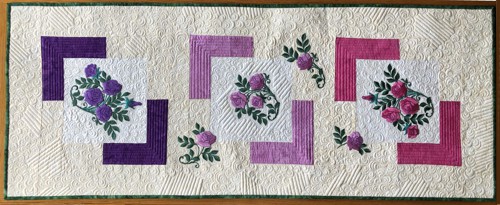
Welcome to our Camellia Quilted Tablerunner tutorial! In this guide, we'll walk you through the steps to create a chic and functional table runner using quilting techniques and machine embroidery. Whether you're a seasoned quilter or just starting out, this tutorial will provide clear instructions to help you piece, quilt, and adorn your table runner with beautiful camellia embroidery designs. Let's get started on this creative journey together!
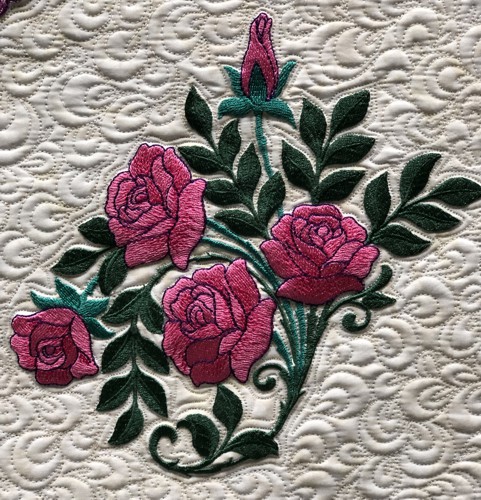
We used the designs from the Camellia Set.
The finished size of the tablerunner is about 18" x 44 1/2".
|
|
You will need :
- embroidery threads either polyester or rayon;
- about 1 yard of light-colored cotton fabric for the main part of the runner;
- small amount of cotton fabrics in 3 hues, matching the colors of the threads you select for the flowers (we used bright pink, lilac and purple);
- light-weight cut-away embroidery stabilizer;
- fabric for the backing;
- batting;
- quilter's ruler;
- rotary cutter;
- iron;
- #12 universal needle;
- quilting threads (the colors of the fabrics you use);
- #12-#14 quilting needle.
|
|
Cutting:
|
Out of the light-colored fabric, cut
- 3 squares measuring 8 1/2" x 8 1/2",
- 6 strips measuring 2 1/2" x 6 1/2",
- 6 strips measuring 2 1/2" x 4 1/2",
- 2 strips measuring 2 1/2" x 12 1/2",
- 2 strips measuring 3 1/2" x 40 1/2" and
- 2 strips measuring 3 1/2" x 19 1/2".
|
Out of pink, lilac and purple fabrics each, cut:
- 2 strips measuring 2 1/2" x 4 1/2" and
- 2 strips measuring 2 1/2" x 6 1/2".
|
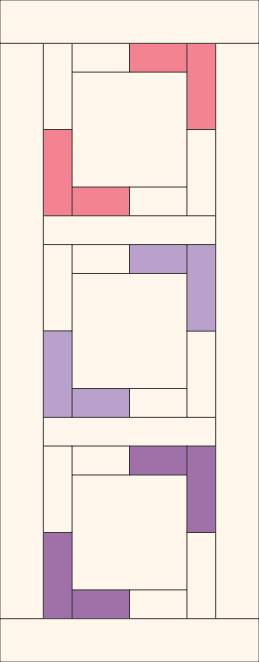
Assembly:
|
| Note: seam allowance is 1/4" if otherwise recommended, press the seam immediately after you make it. |
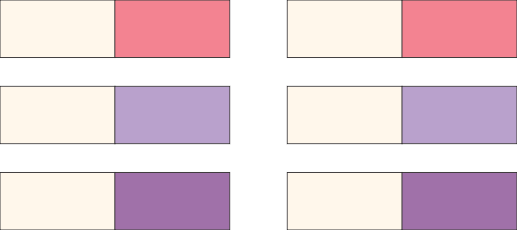
Sew pink, lilac and purple 2 1/2" x 4 1/2" strips to the light-colored 2 1/2" x 4 1/2" strips. You will get 6 2-color strips measuring 2 1/2" x 8 1/2" each.
|
|
| Sew pink, lilac and purple 2 1/2" x 6 1/2" strips to the light-colored 2 1/2" x 6 1/2" strips. You will get 6 2-color strips measuring 2 1/2" x 12 1/2" each. |

|
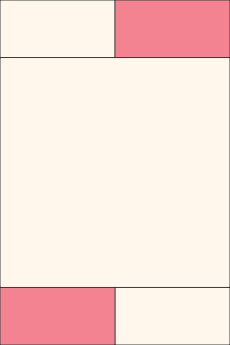
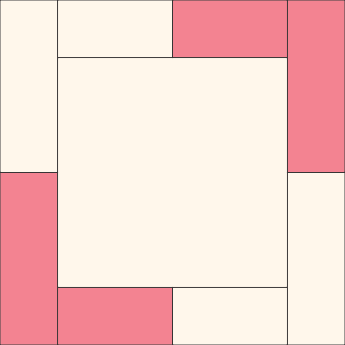
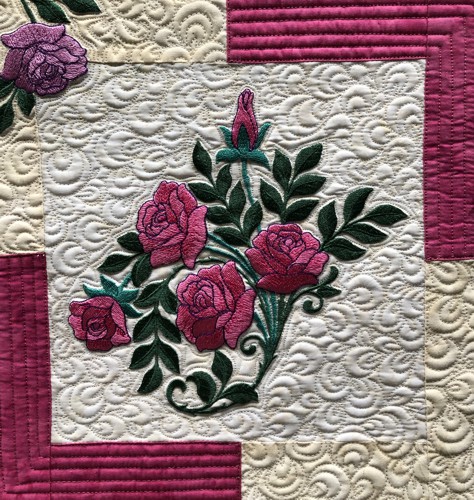
Sew the 2-color pink 8 1/2" strip to the upper edge of the 8 1/2" square with the pink end facing right.
|
| Sew another 2-colored pink 8 1/2" strip to the lower edge of the 8 1/2" square with the pink end facing left. |
|
| Sew the 2-colored pink 12 1/2" strip to the right edge of the square with the pink end facing up. |
| Sew the 2-colored pink 12 1/2" strip to the left edge of the square with the pink end facing down. |
|
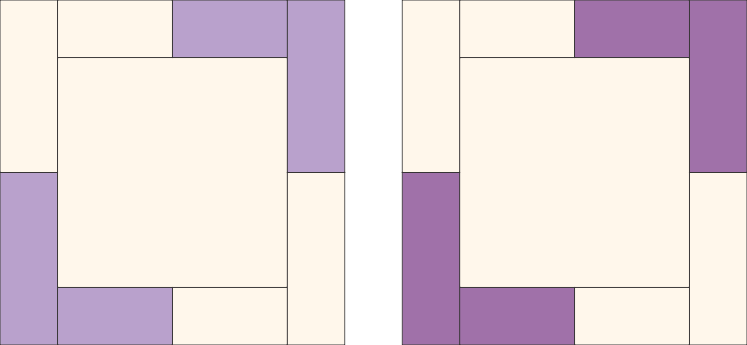
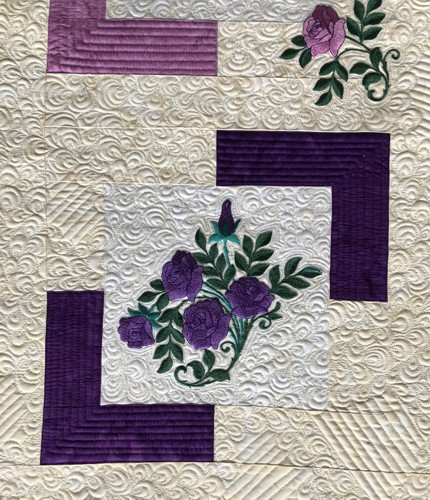
| Repeat for the lilac and purple strips and the squares. |
|
| Sew the 2 1/2" x 12 1/2" light-colored strip to the bottom edge of the pink square. |
| Sew the lilac square to the bottom edge of the working piece with the pink square. |
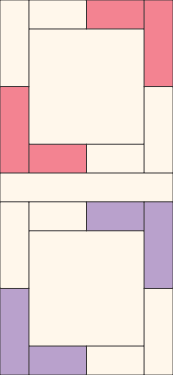
|
| Sew another 2 1/2" x 12 1/2" light-colored strip to the bottom edge of the lilac square. |
| Sew the puple square to the bottom edge of the working piece. |
|
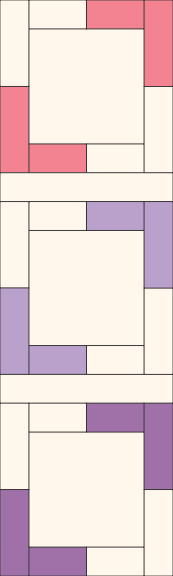
Sew the 3 1/2" x 40 1/2" strips to the long sides of the working piece.
Sew the 3 1/2" x 19 1/2" strips to the short sides of the working piece. |
|
| Embroidery |
Select and upload the files of the Camellia Set to the embroidery machine.
Select threads. It's a good idea to make a test stitch-out to check that you like your selection.
Mark the position of the embroidery on the fabric for the backround. If you have embroidery software, paper print outs might be helpful.
Working with one design at a time, stabilize the chosen area. Hoop the fabric tightly and embroider the designs one by one.
|
|
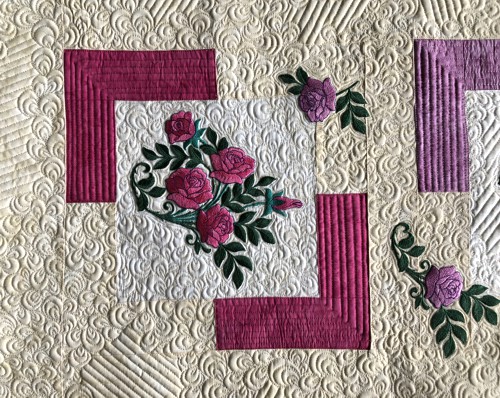
Quilting and Finishing
|
Now place the backing on a flat surface (table) face down. Cover with batting. Spread your working piece over it.
Pin all layers together.
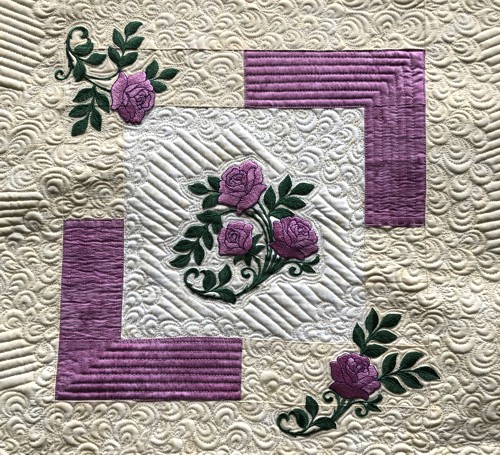
We quilted in a free-motion style all over the working piece. Start from the central square, and echo-quilt the emboidery first. Then gradually move to another squares and quilt the borders last. |
|
Press with heavy steam. Square the piece - all angles should be 90 degrees and opposite sides of the same length.
Finish the raw edges with the binding. |
|
| Have fun! |
|
|
Back to Camellia Set
|
|
Back to Projects Page
|


