|
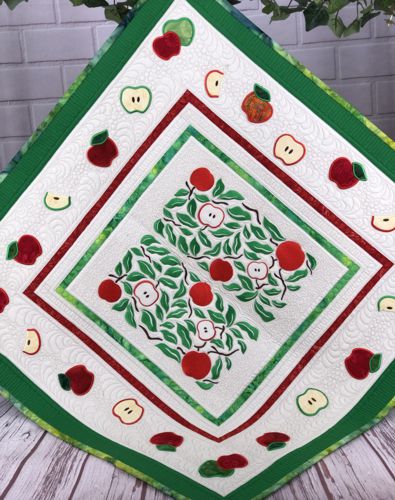
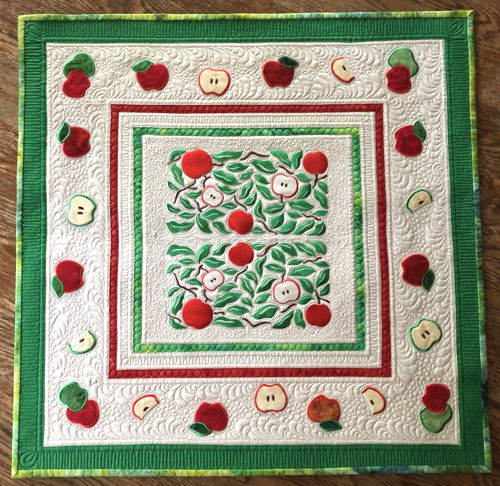
Welcome to the Quilted Tabletopper with Apple Embroidery tutorial, where you’ll learn to sew a festive summer-themed tabletopper. This guide walks you through adding machine embroidery with apple designs and quilting the layers for a finished look. Follow the steps to create a practical piece for your table this season. We used the apple design from the Art Nouveau Flower Panel Set and designs from the Apple Applique Set.
The finished size of the quilt is about 27" x 27". |
|
You will need :
- embroidery threads, either polyester or rayon;
- about 1 yard of light-colored solid fabric for the central part and borders;
- about 1/2 yard of green fabric for the borders and binding;
- small amount of red fabric for the borders;
- scraps of red, green and pale yellow fabrics for the applique;
- light-weight cut-away embroidery stabilizer;
- batting and backing;
- quilter's ruler;
- rotary cutter;
- iron;
- #12 universal needle;
- quilting threads of matching colors;
- #12-#14 quilting needle.
|
|
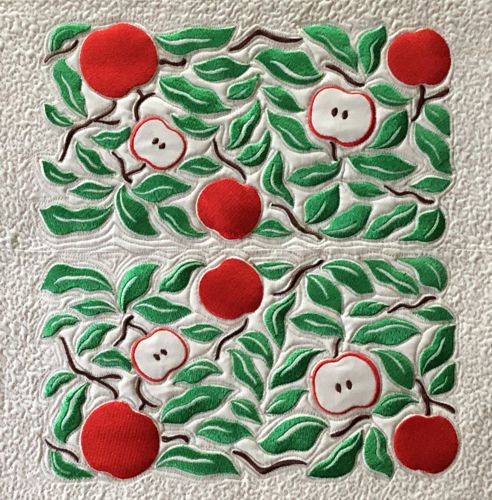
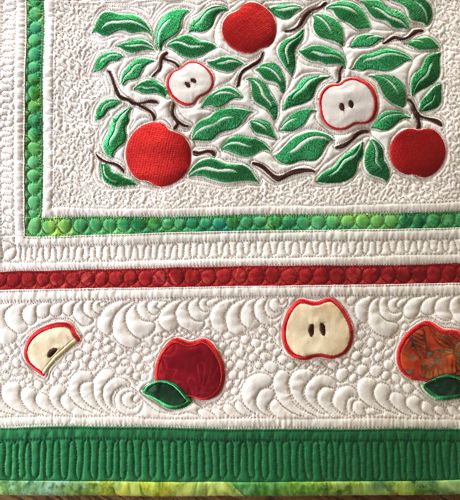
| Embroidery and Sewing the Central Part: |
For the central part, upload the file with the apple panel from the of the Art Nouveau Flower Panel Set to the embroidery machine.
Select threads. Stabilize a piece of light-colored fabric.
Hoop the fabric tightly and embroider the design.
Make the mirror image of the design and embroider it again on another pice of fabric.
Remove the excess stabilizer. |
Align the two stitch-outs and sew them together leaving 1/4"-3/8" distance between the panels. Trim the seam and press it open.
Trim the working piece to a 13" x 13" square. |
|
Cutting:
|
Out of green fabric, cut
- 2 strips measuring 1" x 13";
- 2 strips measuring 1" x 14";
- 2 strips measuring 2" x 25" and
- 2 strips measuring 2" x 28 1/2".
Use the remaining fabric for the binding. |
Out of the light-colored fabric, cut
- 2 strips measuring 1 1/2" x 14";
- 2 strips measuring 1 1/2" x 16";
- 2 strips measuring 4 1/2" x 17";
- 2 strips measuring 4 1/2" x 25" .
|
Out of the red fabric, cut
- 2 strips measuring 1" x 16"; and
- 2 strips measuring 1 1/2" x 17".
|
Assembly:
|
| Note: seam allowance is 1/4" if otherwise recommended, press the seam immediately after you make it. |
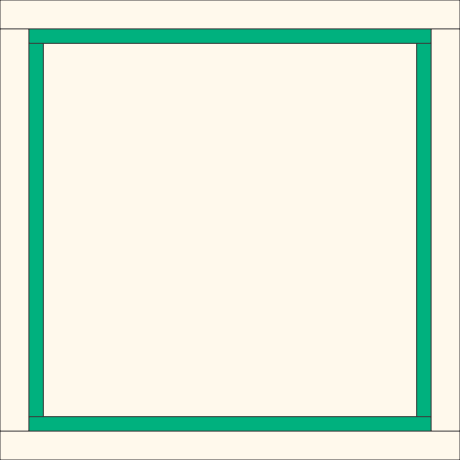
Sew the 2 green strips measuring 1" x 13" to the opposite edges of the central part.
Then sew the green strips measuring 1" x 14" to the remaining opposite edges of the central part.
|
|
Sew the 1 1/2" x 14" light-colored strips to the opposite edges of the working piece.
Sew the 1 1/2" x 16" to the remaining opposite edges of the working piece. |
|
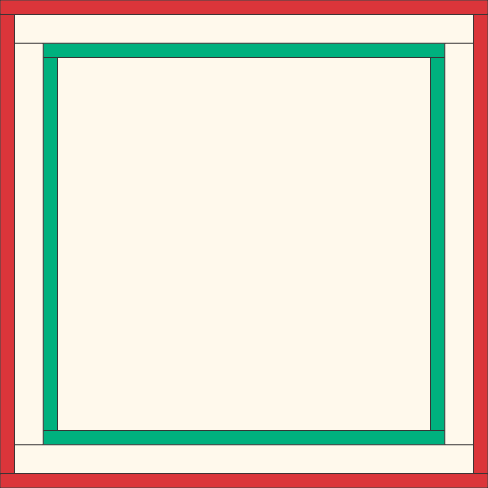
Sew the 2 red strips measuring 1" x 16" to the opposite edges of the working piece.
Then sew the red strips measuring 1" x 17" to the remaining opposite edges of the working piece. |
|
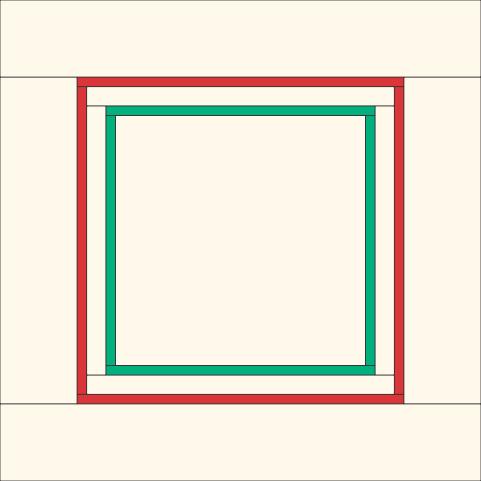
Sew the light-colored 4 1/2" x 17" strips to the opposite edges of the working piece.
Sew the light-colored 4 1/2" x 25" to the remaining opposite edges of the working piece. |
|
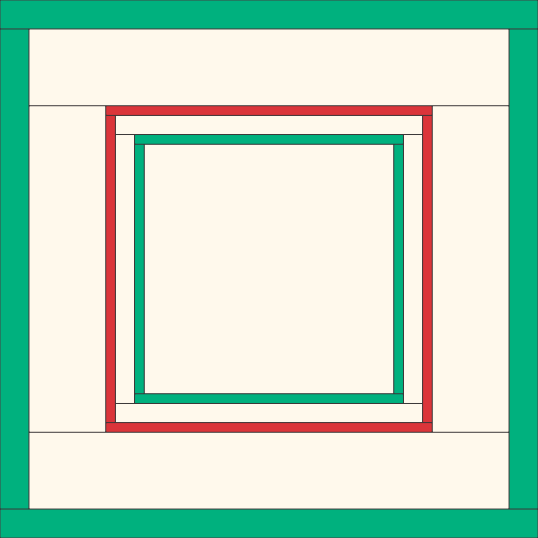
Sew the green 2" x 25" strips to the opposite edges of the working piece.
Sew the green 2" x 28 1/2" to the remaining opposite edges of the working piece. |
|
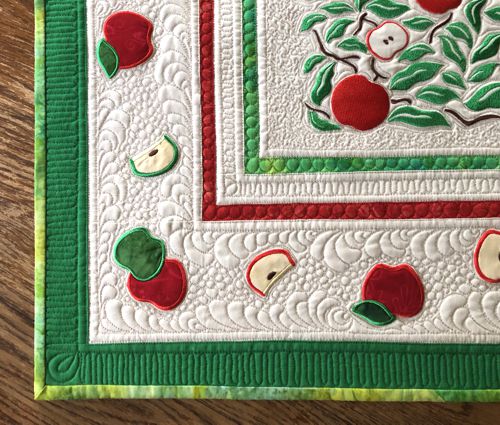
| Embroidery of the Borders: |
Upload the files from the Apple Applique Set to the embroidery machine.
Select threads and scraps for applique.
Mark the position of the embroidery on the light-colored borders. If you have a printer and embroidery software, print-outs of the designs can be helpful. If you do not, you can cut out rectangles of the same size as the designs and arrange them on the fabric to determin the position of the embroidery.
Working with ine pattern at a time, stabilize the area. Hoop the fabric tightly and embroider the designs one by one.
Remove the excess stabilizer.
|
Quilting and Finishing
|
Now place the backing on a flat surface (table) face down. Cover with batting. Spread your working piece over it.
Pin all layers together.
We quilted in a free-motion style all over the working piece. Start from the central part, and echo-quilt the emboidery.
Then proceed to the borders, quilting them in order from the inner ones to outer ones.
when quilting the border with applique, again, first echo-quilt the embroidery, then the area around. |
|
Press with heavy steam. Square the piece - all angles should be 90 degrees and opposite sides of the same length.
Finish the raw edges with the binding. |
|
| Have fun! |
|
Back to Art Nouveau Flower Panel Set and Apple Applique Set.
|
Back to Projects Page
|


