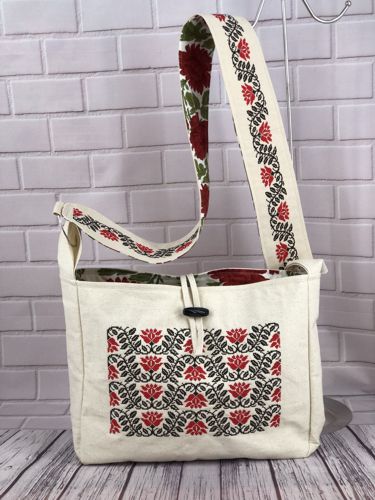
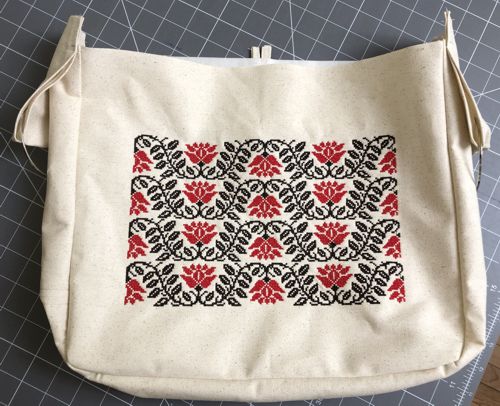
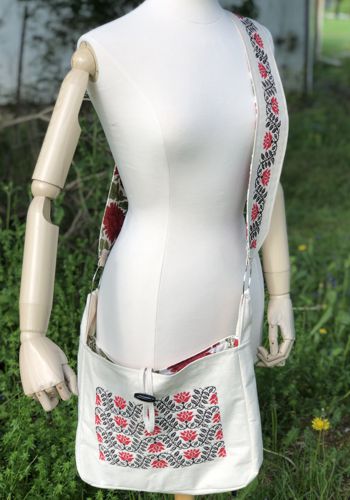
This tutorial guides you through creating a Cross-Body Boho Style Canvas Bag with Folklore Embroidery. You’ll learn how to embroider a detailed folklore design and sew a functional, stylish bag. The project combines hand embroidery with basic sewing techniques to craft a unique accessory. It’s perfect for those with some experience in embroidery and sewing who want to make a boho-inspired piece. Follow the steps to create a bag that’s both practical and artistic, ideal for everyday use or gifting.
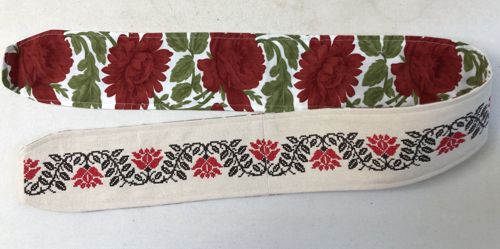
We used the designs from the Rose Border Set.
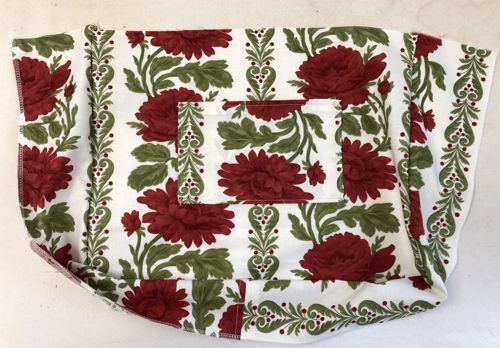
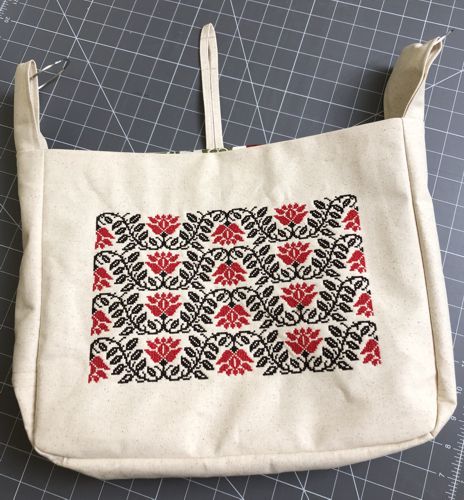
The finished size of the bag is about 14"W x 11 1/2"H x 3"D, the handle strip is 54" long and 3 1/2" wide, it can be adjusted to any length.
|
|
You will need :
- embroidery threads, (you can use black and red, as we did, or choose any other colors);
- mwdium-weight cut-away embroidery stabilizer
- 1 yard of light-colored cotton canvas/duck cloth;
- 1/2 yard of cotton fabric for the lining;
- light-weight iron-on sewing interfacing.
|
You will also need:
|
- quilter's ruler,
- rotary cutter and/or scissors,
- graph pencil,
- iron,
- #12 universal needle, and sewing thread,
- #16-18 univesal needle and extra strong thread for upholstery,
- 2 large steel rings of about 2 1/2" - 3" in diameter (available in craft shops, jewelry department)
- a large decorative button.
|
Embroidery:
|
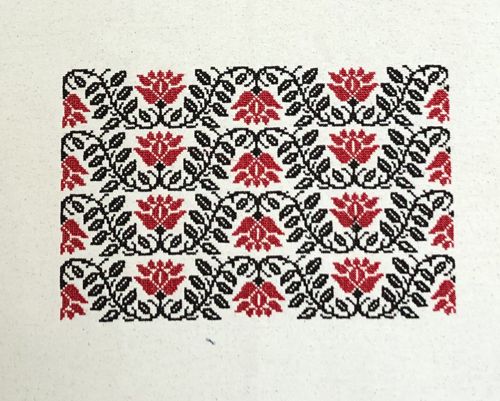
For this bag we chose the longest file from the Rose Border Set (259mm x 41mm - 9.92" x 1.58"). Upload the file into your machine. On the screen of the machine, repeat the file 4 times with minimum distance between the neighboring designs.
Select threads. Stabilize a piece of canvas fabric (of about 16" x 18" size) with medium-weight cut-away stabilizer. Hoop the fabric tightly. Embroider the designs in the center of the piece.
If you wish, repeat the embroidery for the back panel. |
|
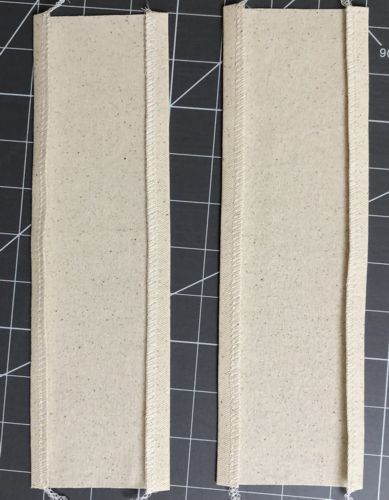
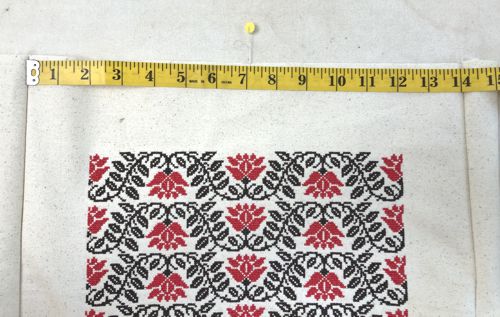
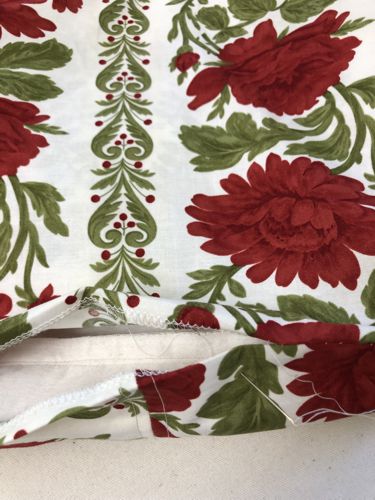
Press the stitch-outs and trim the piece, leaving 3" margins on the top and bottom edges and 2 1/2" margins on the left and right edges. The finished panels will measure 15 1/2" W x 13 1/2"H.
|
| For the handle, on separate pieces of canvas, embroider the same design 4 more times. Trim the stritch-outs, leaving 1 1/2" margins on all sides. |

|
Cutting:
|
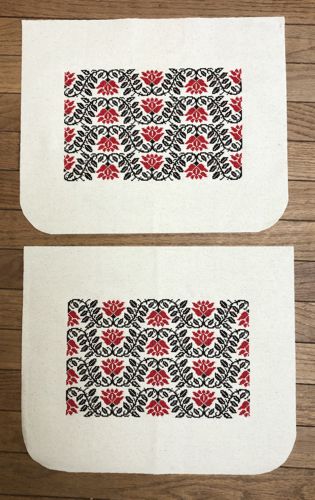
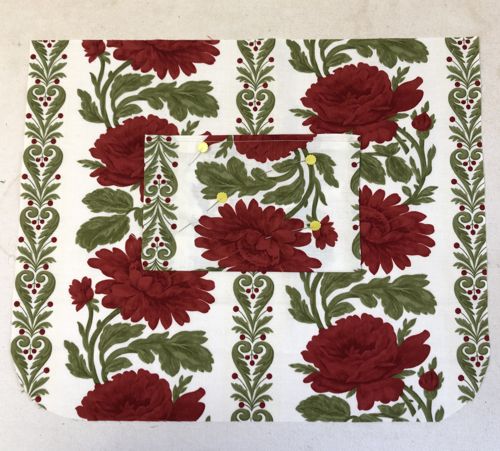
| On the lower edge of the front panel, wrong side facing, draw a 45 degree line from one of the corners. Measure 1" along the line and mark, measure 2 1/2" along the edges and place marks. Connect all 3 marks with a curved line. |

|
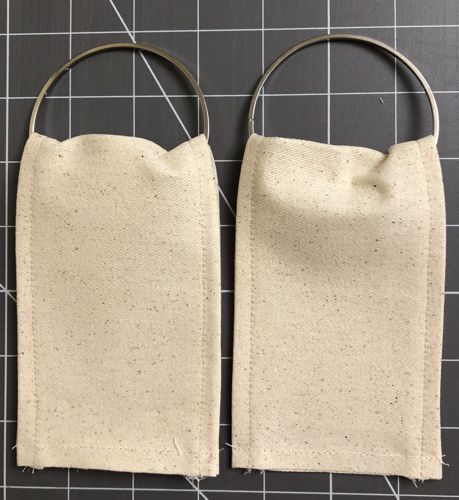
Cut away the corner. Using this corner as a template, fold the panel in half and trace the curved line in the other lower corner. Cut it away.
|
| Using the panel as a template, cut away the corners of the back panel. |
|
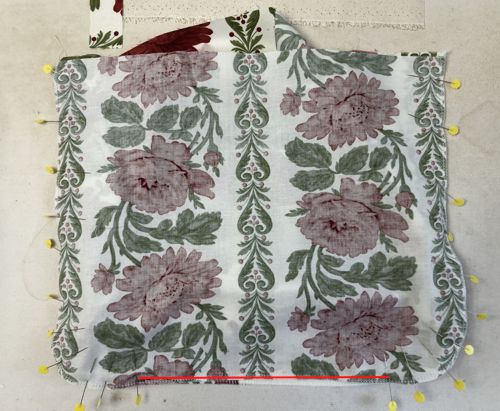
| Using one of the panels as a template, cut 2 panels of the lining. |
|
| Measure the sides and the bottom of the panel, it should be 38" long. If your measurements differ, make the necessary adjustments for the side-bottom strip. |
Out of canvas fabric, cut
- a side-bottom strip measuring 4" x 38 1/2",
- 2 strips measuring 4" x 10",
- 2 strips measuring 2" x 3" and
- 1 strip measuring 1 1/4" x 14".
|
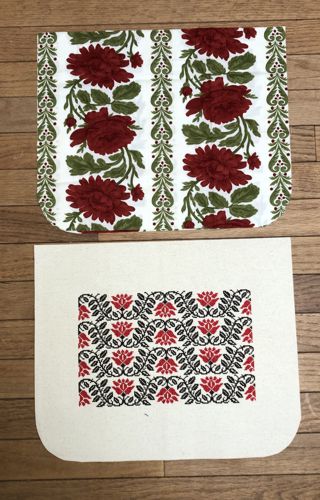
Out of the fabric for the lining, cut
- a piece measuring 8" x 10" for the inner pocket,
- a strip measuring 4" x 38 1/2" for the side-bottom part.
You'll also need a lining for the handle/ shoulder strip, it will be cut later. |
| Out of sewing interfacing, cut a strip measuring 4" x 38 1/2". |
Handle
|
Sew the 4 stitch-outs into a long strip, aligning the embroidery.
|

|
Press the seams open, trim them to 1/2" width.
Measure the handle strip and out of the lining fabric cut a strip of the same size.
|
With right sides inside, align and pin both strips together.
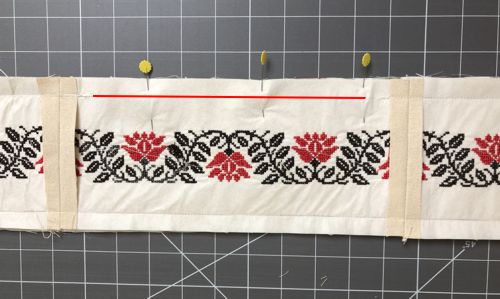
With the graph pencil and ruler, draw 1/2" seam allowance along the long sides and 1/4" seam allowance along the short sides.
Continue the width of the embroidery onto the 1/4" seam allowance line (shown in red), place marks. Measure 2" from the 1/4" seam allowance line along the 1/2" seam allowance line, place marks. Connect the marks with lines.
|

|
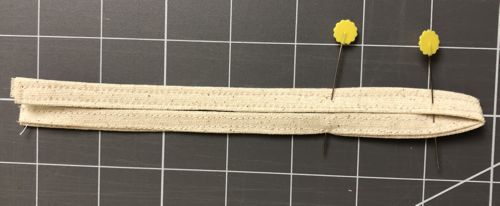
Stitch along the lines, leaving one section unstitched (shown in red).
|
|
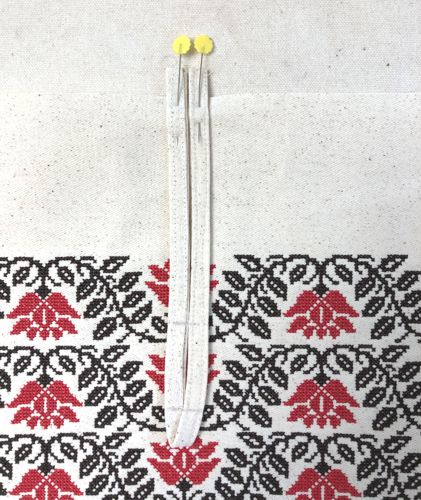
| Trim the ends, leaviing 1/4" seam allowance. Cut away the stabilizer on the seam allowance. |
|
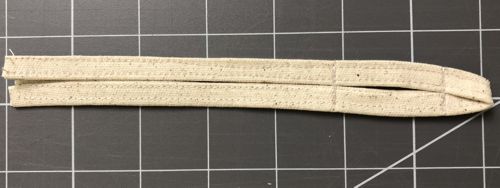
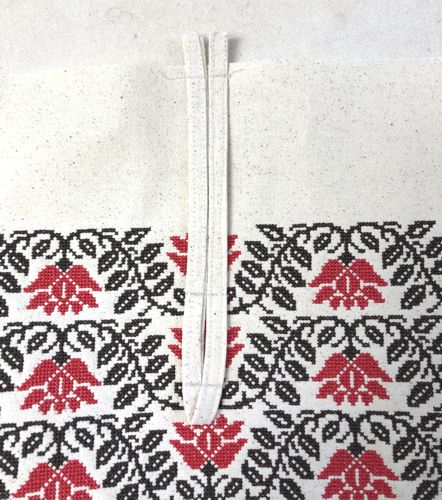
Turn tright side out through the unstitched section. Fold the seam allowance of the unstitched section 1/2" inside. Press.
Topstitch along the edges with seam allowance 1/4". Put the finished shoulder strap aside for the time being. |
|
Additional Small Parts for the Bag:
|
A Loop for the Button
|
Fold the 1 1/4" x 14" strip lengthwise in half and press.
Fold the long edges to the pressed center line and press again. |
|
Fold the strip by the central line and topstitch along the edges.
|
| Fold the strip in half in a V-shape. Pin 1" from the V-tip. Measure the button and place another pin on the size of the button. |
|
Topstitch along the pins a couple of times.
|
|
| Put the button loop aside for the time being. |
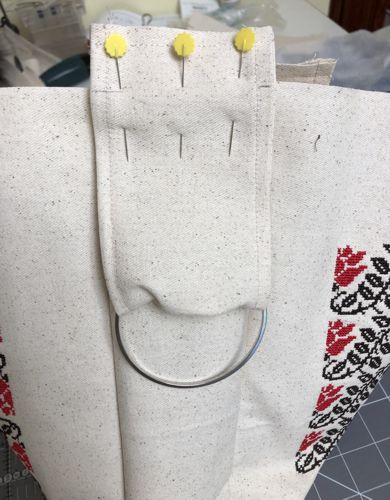
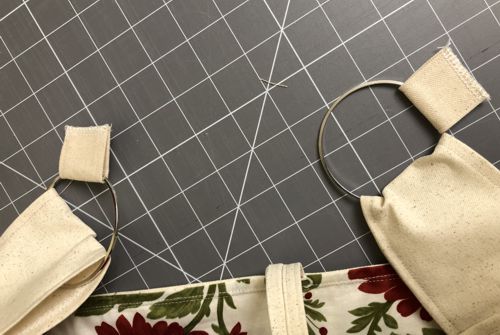
Strips for the Rings:
|
Finish the long edges of the 4" x 10" strips with zig-zag stitch.
Fold the long edges 1/4" back, press. |
|
Topstitch.
|

|
Put through the rings, fold aligning the short ends. Topstitch the short ends together.
|
|
Set aside for the time being.
|
Small Strips for the Shoulder Strip:
|
Finish the long edges of the 2" x 3" with zig-zag. Fold them 1/4" back, press. Topstitch.
Set aside for the time being. |
| Assembly: |
| Position the interfacing strip over the wrong side of the canvas 4" x 38 1/2" strip. Fuse as instructed by the manufacturer. |
| Pin the finished strip along the sides and bottom of the front, or back, panel. |
|
Stitch the parts together, seam allowance 1/2". Step 1-2 mm from the first stitch-line and stitch again.
|
|
| In the same way attach the remaining panel. |
|
On the upper edge of the back panel find the center, mark with a pin.
|
|
| Pin the button loop over the mark, the V-tip down, the ends protruding over the edge 1/2". |
|
Topstitch in place with seam allowance 1/4".
|
|
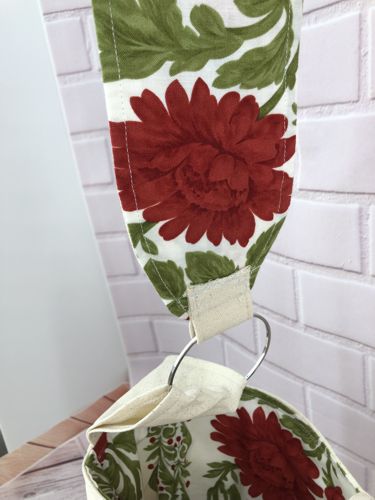
Pin the loops with the rings to the upper edges of the bag sides, short ends of the loops protruding 1" beyond the upper edge.
|
|
| Stitch in place, seam allowance 1/4". |
|
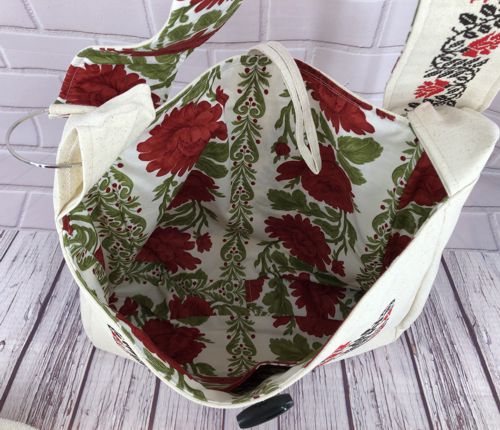
The Lining:
|
To make the inner pocket, fold the 8" x 10" piece in lengwise half, right side inside. Stitch the sides, seam allowance 1/4".
Turn the right side out. Press. Tuck the upper, unfinished, edges 1/2" inside. Press. Topstitch, seam allowance 1/2". |

|
| Pin the pocket to one of the lining panels. Topstitch it in place along the side and bottom edges. |
|
Pin the side-bottom lining strip to the panel.
|
|
Stitch in place, seam allowance slightly more than 1/4".
|
|
| Pin the remaining panel in place. Stitch, leaving part of the bottom (shown in red) unstitched. |
|
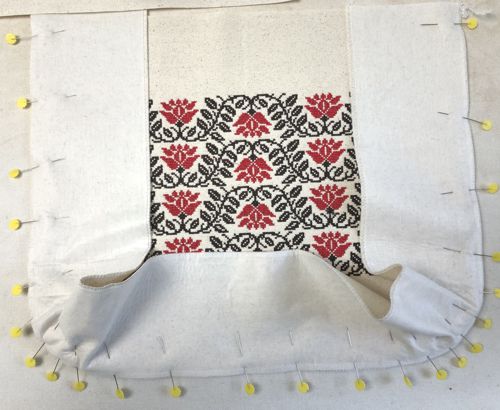
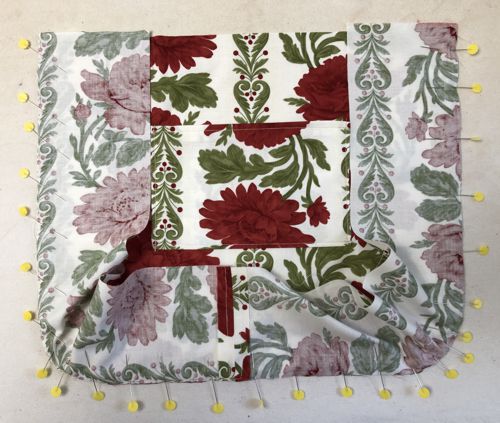
| With right sides together, insert the outer bag into the lining. Align and pin together all seams and upper edges. |
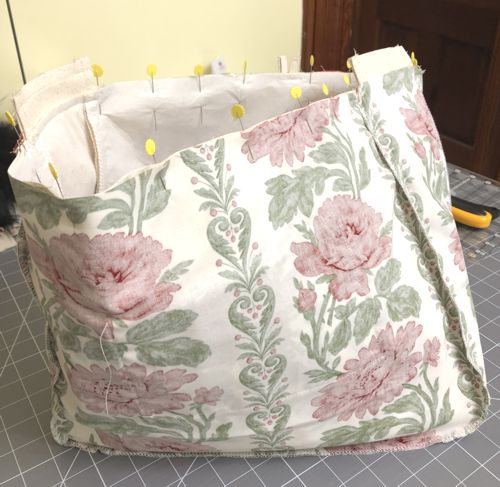
|
Stitch along the upper edge with seam allowance about 1/2".
|
|
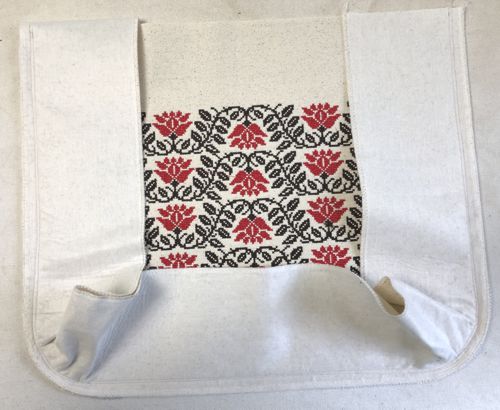
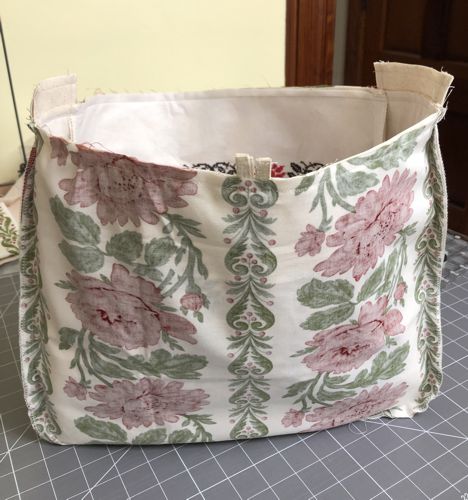
Through the opening in the bottom of the lining, turn the working piece right side out. Straighten and press the upper edge. Topstitch along the upper edge twice with seam allowance 1/4" and about 1/2".
|
|
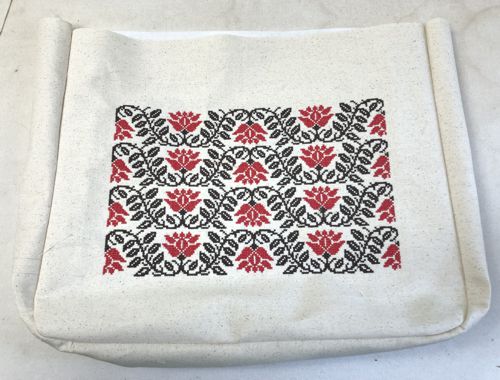
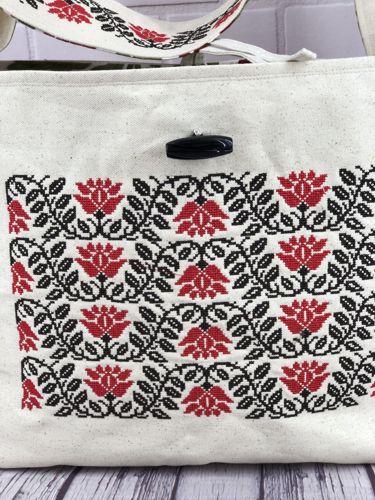
Sew the button to the front panel.
|
|
| By hand, sew the openning in the lining closed. |
|
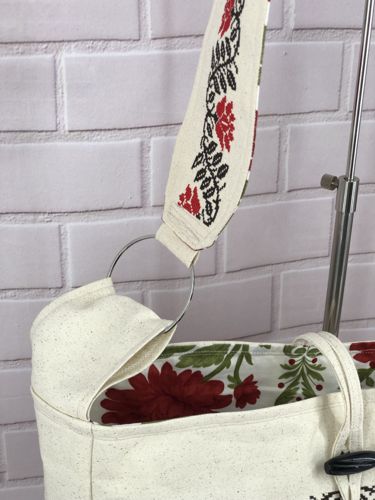
| Fold the small 2" x 3" strips through the rings, align and stitch together the short ends. Finish the raw edges with zig zag. |
|
Pin the loop ends to the lining of the shoulder strap. Topstitch in place with several parallel lines.
|
|
|
| And you are done! |
|
| Have fun! |
|
|
Back to Rose Border Set
|
Back to Projects Page
|


