|
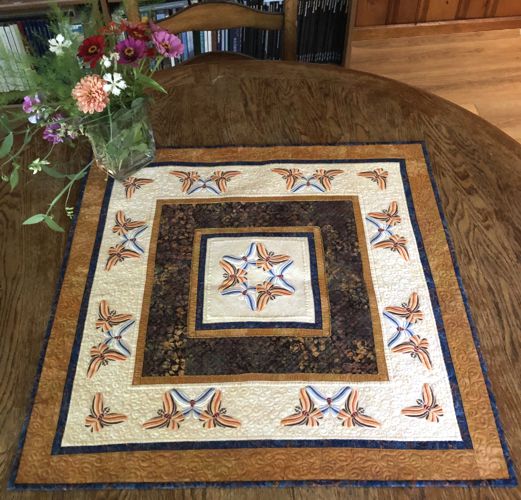
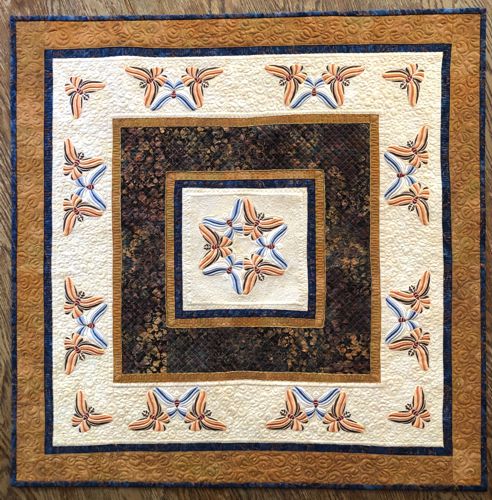
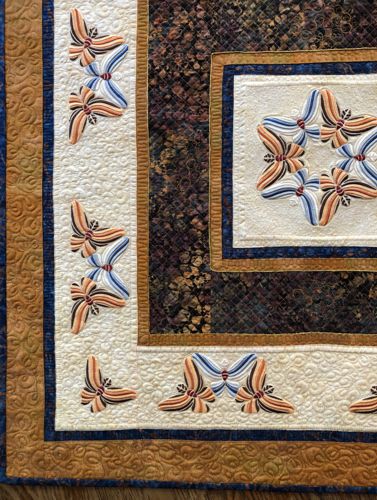
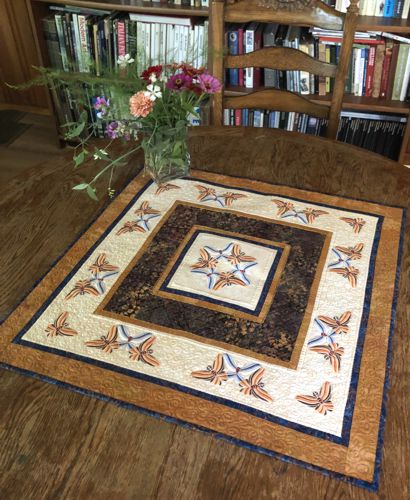
Learn to create an Art Nouveau Butterfly Table Topper or Wall Quilt with this clear tutorial, ideal for adding a special touch to your space. This guide covers sewing the quilt, adding machine embroidery to feature butterfly designs, and quilting to finish the piece. Follow the steps to make a lovely decoration for your table or wall. We used the designs from the Butterfly Motif Set.
The finished size of the quilt is about 28 1/2" x 28 1/2".
|
|
| For the quilt, we selected 4 fabrics to match the colors of the embroidery. Feel free to change the colors of the embroidery and make your own selection of matching fabrics. |
You will need:
- embroidery threads, either polyester or rayon (you can use our color card or select your own colors);
- about 3/4 yard of light-colored solid fabric for the central part and the fifth border with embroidery (we used pale cream);
- about 1/2 yard of fabric for the first and sixth borders and binding (we used dark blue with golden highlights batik);
- about 1/2 yard of fabric for the third border (we used patterned batik with blue, golden and brown spots);
- about 1 yard of golden brown fabric for the second, fourth and outer borders (we used golden brown fabric);
- light-weight cut-away embroidery stabilizer;
- batting;
- quilter's ruler;
- rotary cutter;
- iron;
- #12 universal needle;
- quilting threads of matching colors;
- #12-#14 quilting needle.
|
|
Cutting:
|
Out of the light-colored fabric, cut:
- 1 square measuring 8 1/2" x 8 1/2"
- 2 strips measuring 4 1/2" x 17 1/2"
- 2 strips measuring 4 1/2" x 25 1/2"
|
Out of the blue fabric, cut:
- 2 strips measuring 1" x 8 1/2"
- 2 strips measuring 1" x 9 1/2"
- 2 strips measuring 1" x 25 1/2"
- 2 strips measuring 1" x 26 1/2"
Use the remaining fabric for the binding.
|
Out of the golden brown fabric, cut:
- 2 strips measuring 1" x 9 1/2"
- 2 strips measuring 1" x 10 1/2"
- 2 strips measuring 1" x 16 1/2"
- 2 strips measuring 1" x 17 1/2"
- 2 strips measuring 2 1/2" x 25 1/2"
- 2 strips measuring 2 1/2" x 29 1/2"
|
Out of the patterned fabric, cut:
- 2 strips measuring 3 1/2" x 10 1/2"
- 2 strips measuring 3 1/2" x 16 1/2"
|
Assembly:
|
| Note: Seam allowance is 1/4" unless otherwise recommended. Press the seam immediately after you make it. |
Sew the 2 blue 1" x 8 1/2" strips to the opposite edges of the light-colored square.
Then sew the 1" x 9 1/2" blue strips to the remaining opposite edges of the square.
|

|
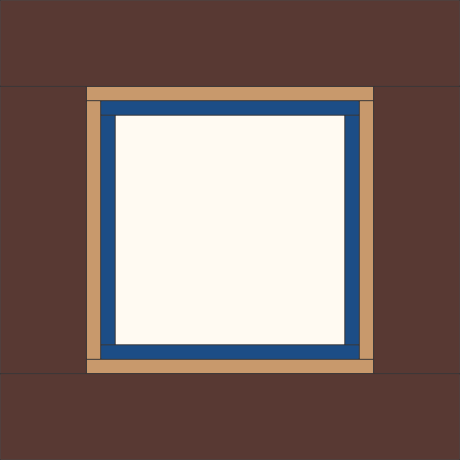
Sew the 1" x 9 1/2" golden brown strips to the opposite edges of the working piece.
Sew the 1" x 10 1/2" golden brown strips to the remaining opposite edges. |

|
Sew the 3 1/2" x 10 1/2" patterned strips to the opposite edges of the working piece.
Sew the 3 1/2" x 16 1/2" patterned strips to the remaining opposite edges of the working piece. |
|
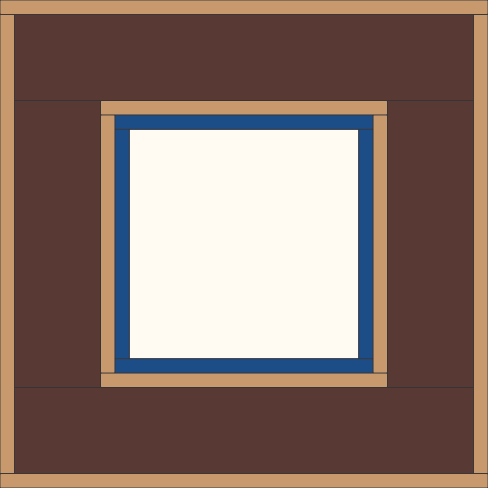
Sew the 1" x 16 1/2" golden brown strips to the opposite edges of the working piece.
Sew the 1" x 17 1/2" golden brown strips to the remaining opposite edges of the working piece. |
|
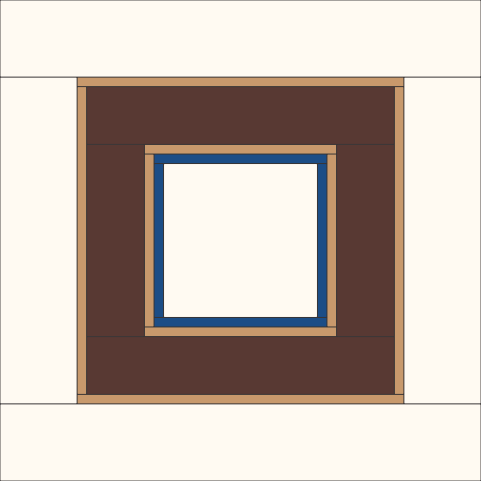
Sew the 4 1/2" x 17 1/2" light-colored strips to the opposite edges of the working piece.
Sew the 4 1/2" x 25 1/2" light-colored strips to the remaining opposite edges of the working piece. |
|
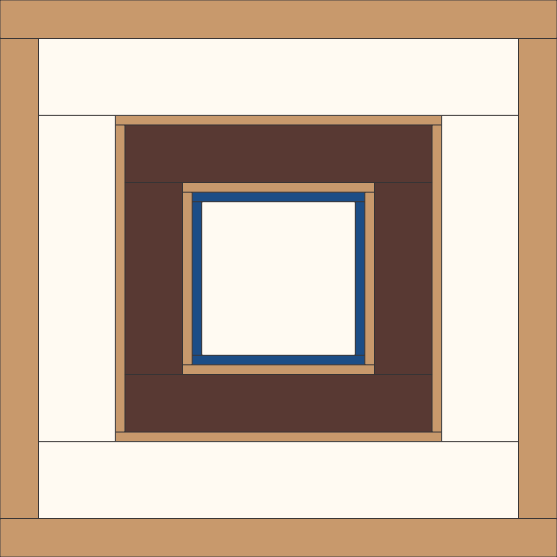
Sew the 2 1/2" x 25 1/2" golden brown strips to the opposite edges of the working piece.
Sew the 2 1/2" x 29 1/2" golden brown strips to the remaining opposite edges of the working piece. |
|
| Embroidery |
Upload the files of the Butterfly Motif Set to the embroidery machine.
Select threads.
Stabilize the central part.
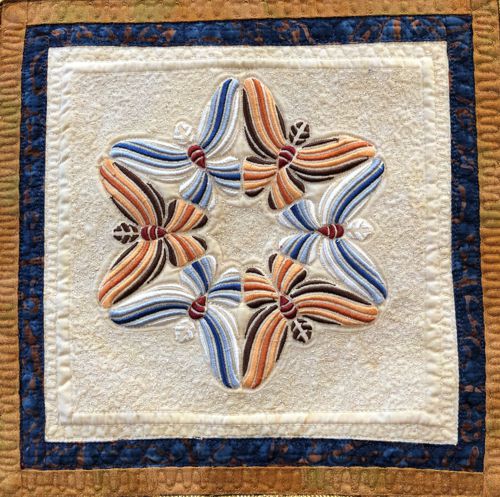
Hoop the fabric tightly and embroider the round design in the center.
Remove the excess stabilizer.
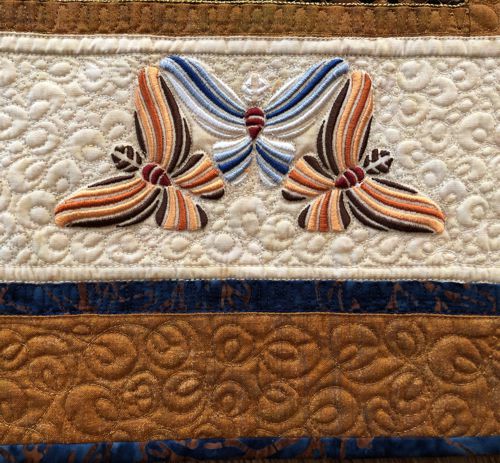
Mark the position of the 3-butterfly designs on the light border and 1 butterfly design in the corners of the light border.
Embroider the designs one by one.
|
Quilting and Finishing
|
Now place the backing on a flat surface (table) face down. Cover with batting. Spread your working piece over it.
Pin all layers together.
We quilted in a free-motion style all over the working piece. Start from the central part, and echo-quilt the embroidery first.
Then proceed to the borders, using matching threads and changing them as needed. |
|
Press with heavy steam. Square the piece - all angles should be 90 degrees and opposite sides should be the same length.
Finish the raw edges with the binding. |
|
|
| Have fun! |
|
|
Back to Butterfly Motif Set.
|
Back to Projects Page
|
