This tutorial guides you through creating a Quilted Tote with Celestial Motifs Embroidery using sewing, quilting, and machine embroidery techniques. You’ll learn how to sew, embellish with celestial designs like stars and sun, and quilt a sturdy tote bag. The project combines fabric layers with embroidery to make a useful bag. Follow the steps to craft a tote perfect for daily use or gifting. We used the design of Sun and Moon and the designs from the Small Star Set.
The finished size of the bag is about 16"W x 14"H x 4"D.
|

|
You will need :
- embroidery threads,
- about 3/4 yard of blue cotton fabric for the outer bag (we used royal blue batik);
- about 1/2 yard of cotton fabric for the lining;
- light-weight cut-away stabilizer;
- low-loft polyester batting;
- for the handles, you can either use 1" wide webbing of matching color, or sew the handles out of blue fabric.
|
You will also need:
|
- quilter's ruler;
- rotary cutter and/or scissors;
- tailor's chalk pencil;
- iron;
- #16 univeral needle and extra strong sewing thread;
- #12-14 quilting needle and quilting threads of colors matching the fabrics;
- sew-on snap 1/2" large.
|
Embroidery:
|
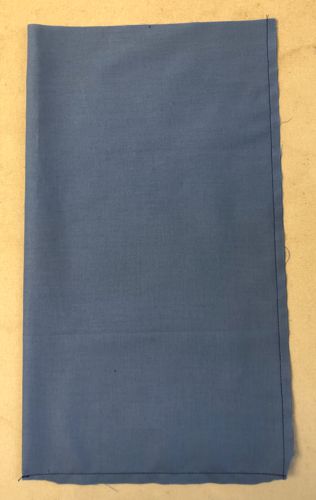
Out of blue fabric, cut 2 squares 19" - 20" large.
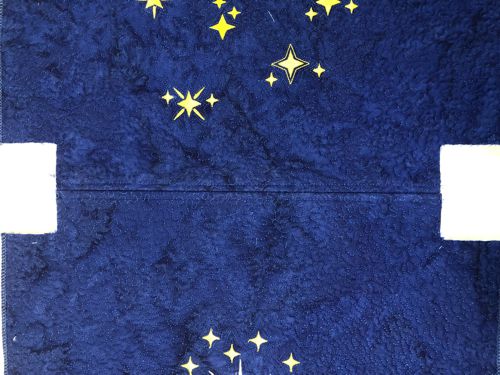
Prepare threads. Upload the file of the Sun and Moon and the files from the Small Star Set into your machine.
In the center of the first square, embroider the Sun and Moon and embroider the stars all over the second square. Don't forget to stabilize the fabric with light-weight cut-away stabilizer and hoop tightly.
|

|
| Quilting: |
Prepare 2 "sandwiches": place the lining/backing pieces on a flat surface (table) face down. Cover with batting. Spread both panels over them.
Pin all layers together.
We quilted in a free-motion style all over both panels. Start from the embroidery, and echo-quilt it, then proceed from the center to the outer edges. Use the thread to match the colors of the fabric. |
| After quilting is done, press with heavy steam and trim both panels to 17" x 17 1/2". Finish the side and bottom raw edges with zig-zag stitch or on a serger/overlock. |
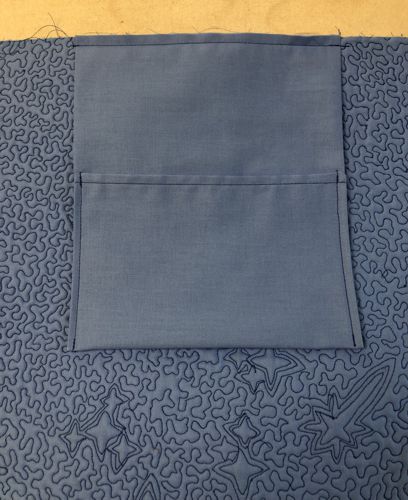
Inner Pocket(s)
|
Out of the fabric for the lining, cut a piece measuring 14"H x 16"W. Fold the piece widthwise in half, face inside. Stitch one long side and one short side together, seam allowance 1/4". Trim the corners. Turn the piece right side out. Press.
|
|
| Topstitch the short finished edge, seam allowance 1/4". Fold the finished short edge 4 1/2" - 5", align the side edges and stitch the sides together to shape a pocket. |

|
Assembly:
|
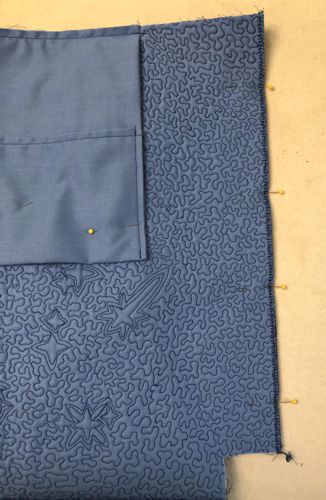
| On the lower edge of both panels, cut out 2" x 2" squares at the corners. |

|
Position the panels face to face, align all edges. Pin the bottom. Stitch together with seam allowance 1/2".
Open and press the seam.
Topstitch 1/4" on both sides of the seam. |
|
|
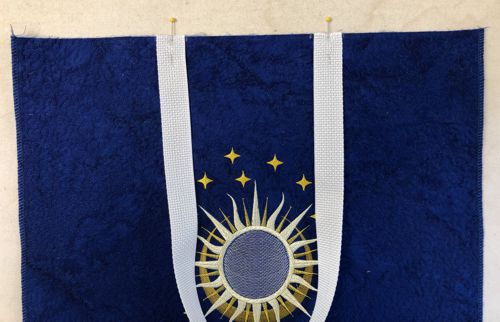
Cut the webbing in 2 pieces, choose the length of the handles yourself, ours is 26" long.
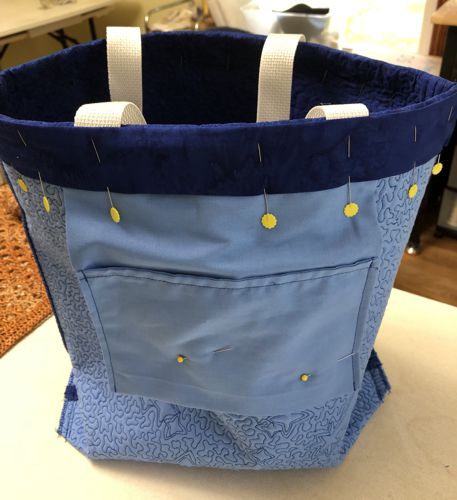
Pin one handles to the upper edges of the front and back panels, equal distance from the side edges.
|
|
| Topstitch the handles to the panel, seam allowance 1/4". |
| Pin the pocket with its raw edge to the back panel's upper edge, equal distance from the side edges. Stitch in place, seam allowance scant 1/4". |
|
| Pin the pocket with 2-3 pins in place, so it's not in your way while sewing. |
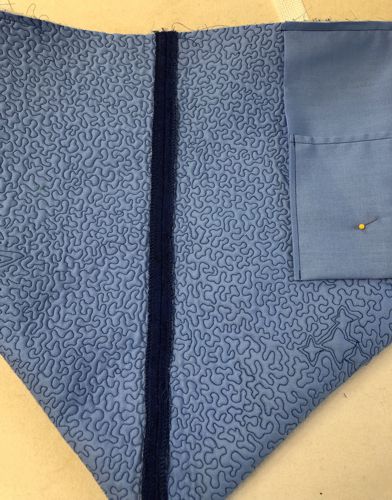
| Fold the working piece, face inside, align the sides. Working with one side at a time, stitch with seam allowance 1/2". |
|
Open and press the seam. Topstitch 1/4" on both sides of the seam.
Repeat for the other side. |
|
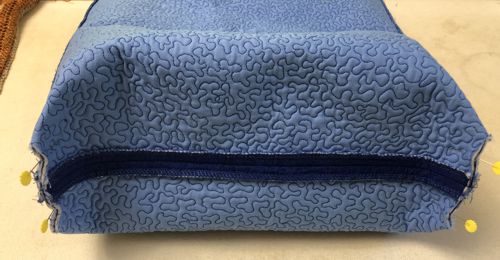
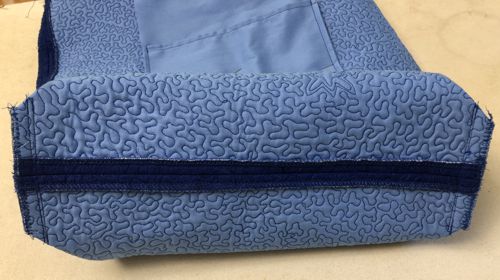
To shape the bottom, fold the bottom of the bag so that the bottom and the side seams align. Pin.
|
|
Stitch. Seam allowance 1/2". Stitch several parallel lines.
Finish the raw edge with zig-zag or overlock. |
|
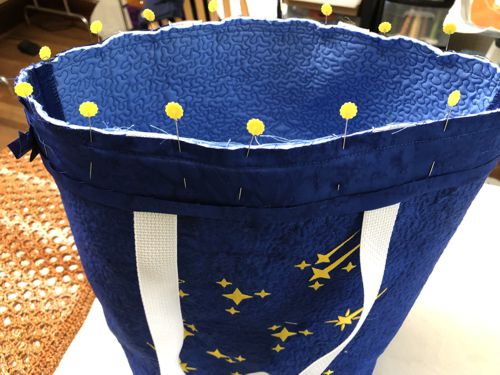
Measure the upper edge of the tote around. Out of blue fabric, cut a strip 2 1/2" wide and the length of the circumference plus 1 inch.
Fold one of the long edges of the strip back about 1/2" and press.
Keeping the folded edge down and wrong side facing, fold the right short edge 1/2" and press.
Right side to right side and raw edge to raw edge, starting with the folded short edge of the strip, pin the strip along the upper edge of the tote. In the end overlap the unfinished short edge with the folded short edge.
Stitch with seam allowance 1/2". |
|
| Turn the bag wrong side out. Fold the upper edge with the binding onto the wrong side. Pin the folded edge. |
|
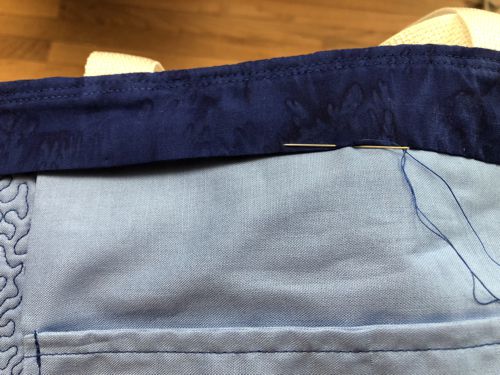
Topstitch along the upper edge twice - 1/4" and 1/2" from the edge.
Handstitch the folded edge of the strip to the lining. Press. |
|
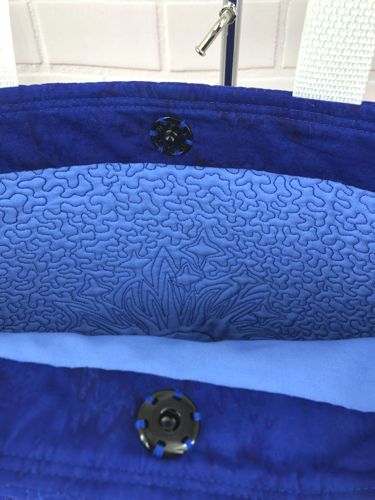
Sew the snap onto the wrong side of the bag between the handles.
|
|
| Have fun! |

|

|
|
Back to Sun and Moon and Small Star Set
|
Back to Projects Page
|


