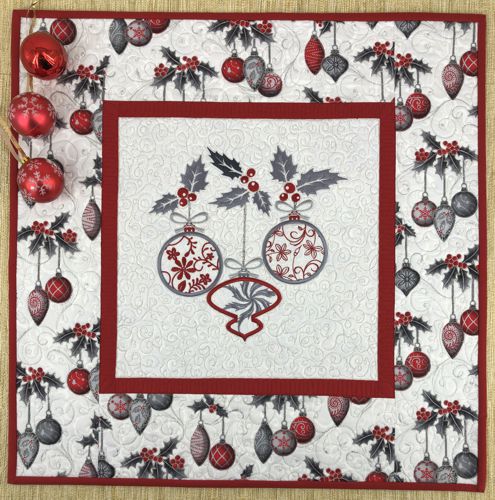
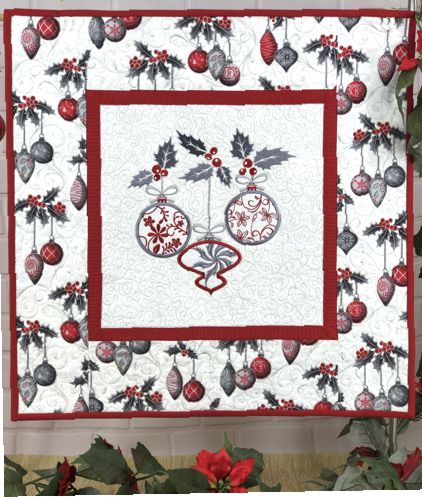
This tutorial guides you through sewing, quilting, and adding machine embroidery to create a festive Christmas-themed wall quilt or table topper.
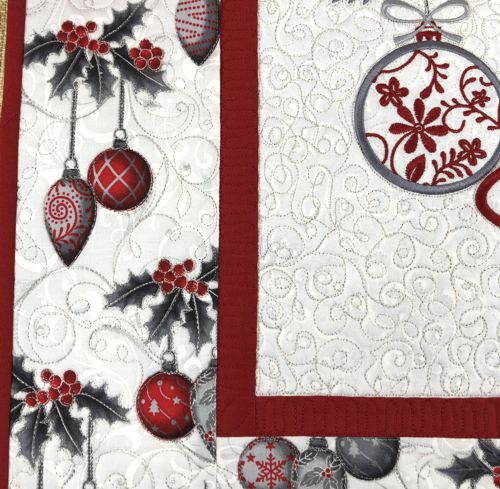
The design draws inspiration from the Hoffman California International Fabrics collection "Holiday Wishes." Its pattern of holly leaves and hanging Christmas ornaments in red and gray tones on a light bluish-gray background led us to select embroidery designs in matching colors. If you do not have this exact fabric, choose another with a similar holiday print and adjust the embroidery thread colors to coordinate with your fabric.
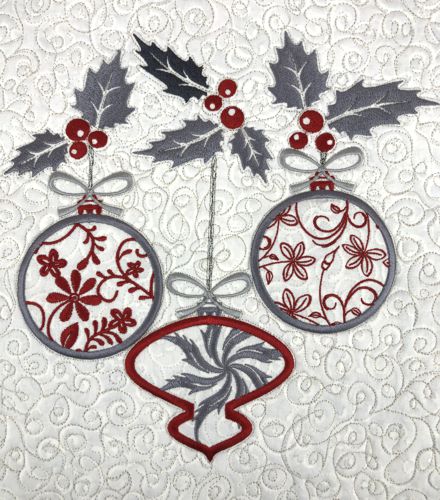
We used the designs from the Holly Set, Applique Christmas Ornaments and Applique Christmas Balls.
The finished size of the quilt is about 21" x 21".
|
|
You will need:
- Embroidery threads (polyester or rayon) according to the colors of the border fabric
- A fat quarter of light-colored fabric for the central part with embroidery
- Small amount of red fabric matching the colors of the embroidery for the first border and binding
- 1/2 yard of fabric with Christmas ornaments pattern
- Fabric for the backing
- Medium-weight cut-away embroidery stabilizer
- Batting
- Quilter's ruler
- Rotary cutter
- Iron
- #12 universal needle for piecing
- Quilting threads of matching colors
- #12-#14 quilting needle
|
Embroidery:
|
On the light-colored fabric for the central part, use the paper print-outs or test stitch-outs of the designs to plan the layout of the picture you are going to embroider.
Upload the selected files from the Holly Set, Applique Christmas Ornaments and Applique Christmas Balls to the embroidery machine.
Select threads. Stabilize the fabric. Hoop tightly and embroider the designs in the center.
In our case, we did not use the applique fabric. If you are using a different fabric for the borders, you might need the applique fabric. |
Trim the stitch-out to 12 1/2" x 12 1/2" square.
|
|
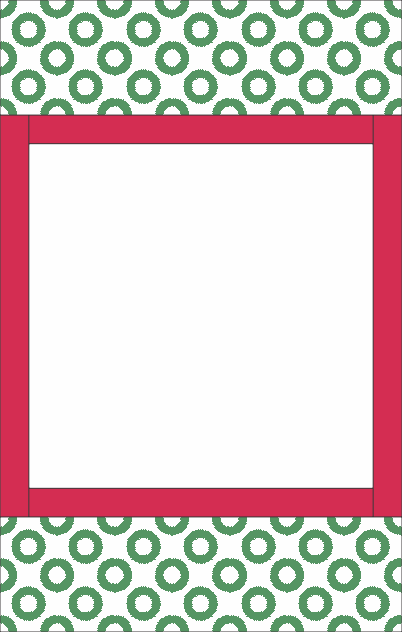
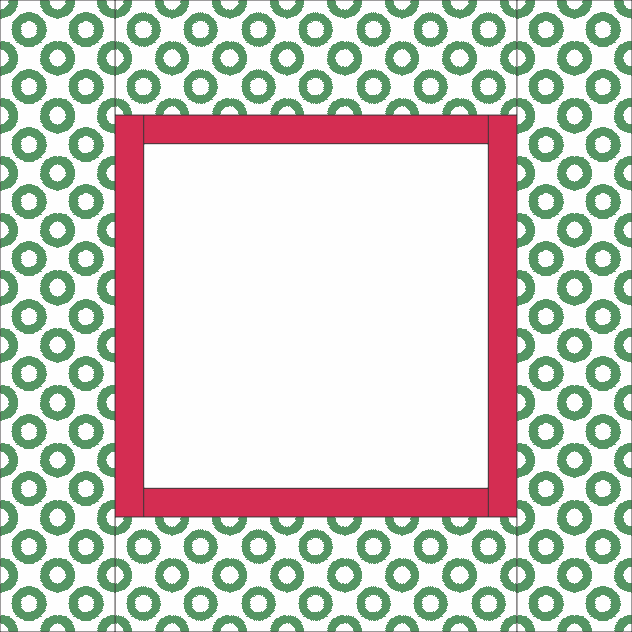
| Cutting: |
Out of fabric for the first border (in our case, red):
- 2 strips measuring 1 1/2" x 12 1/2"
- 2 strips measuring 1 1/2" x 14"
Out of fabric for the second border:
- 2 strips measuring 4 1/2" x 14"
- 2 strips measuring 4 1/2" x 22"
|
Assembly:
|
| Note: Seam allowance is 1/4". Press the seam immediately after you make it. |
Sew the 2 shorter red strips to the upper and lower edges of the central part.
Then sew the remaining red strips to the left and right edges of the central part.
|

|
| Sew the 4 1/2" x 14" patterned strips to the upper and lower edges of the working piece. |
|
Sew the 4 1/2" x 22" strips to the left and right edges of the working piece.
|
|
Quilting and Finishing
|
Place the backing on a flat surface (table) face down. Cover with batting. Spread your working piece over it.
Pin all layers together.
We quilted with gray metallic thread in a free-motion style all over the working piece. Start from the central part and echo-quilt the embroidery first. Then we mostly traced the pattern of the background fabric.
|
Press with steam. Square the piece. All angles should be 90 degrees and opposite sides of the same length.
Finish the raw edges with the binding. |
|
| Have fun! |
|
|
Back to Holly Set, Applique Christmas Ornaments and Applique Christmas Balls.
|
Back to Projects Page
|


