|
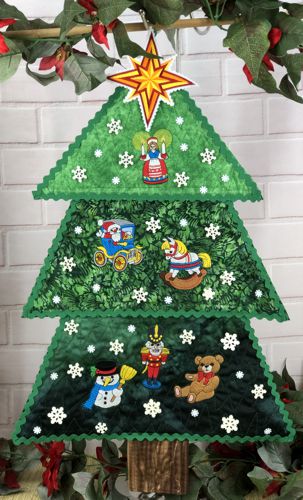
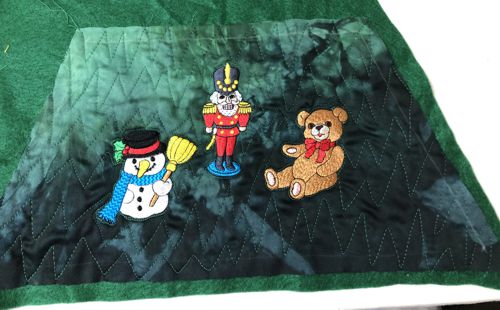
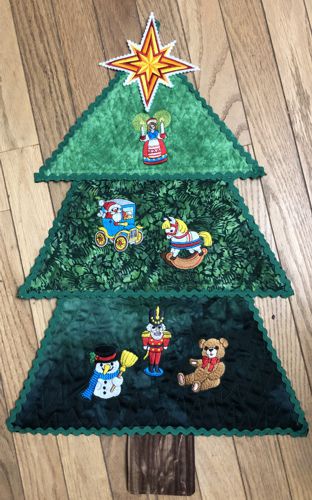
Spark holiday joy with this adorable Christmas Tree Quilted Wall Hanging! Stitch tiered evergreen layers, quilt with flair, and dazzle with machine-embroidered appliques: nutcracker, rocking horse, teddy, snowman, and a glowing star. Add ric-rac trim and snowflake sparkle for extra magic. Quick, fun, and festive, perfect for quilters and embroiderers ready to deck the walls!
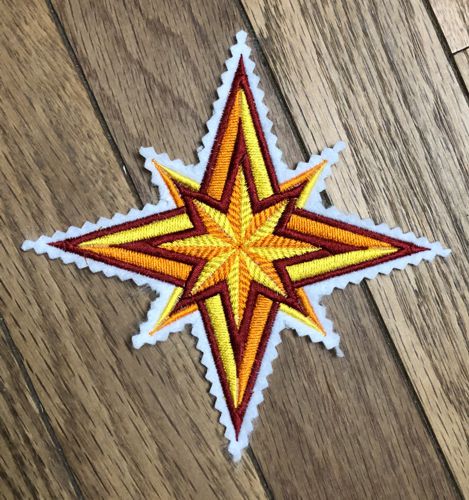
For this project we used the designs from the Christmas Ornament Set and the design of the Star of Bethlehem for a small, 4" x 4", hoop.
The finished size of the wall hanging is about 25" high and 16" wide at the lower edge of the first level of the tree.
|
|
Materials needed:
- Embroidery threads (polyester or rayon) according to color card
- Fat quarters of 3 different green fabrics for the tree
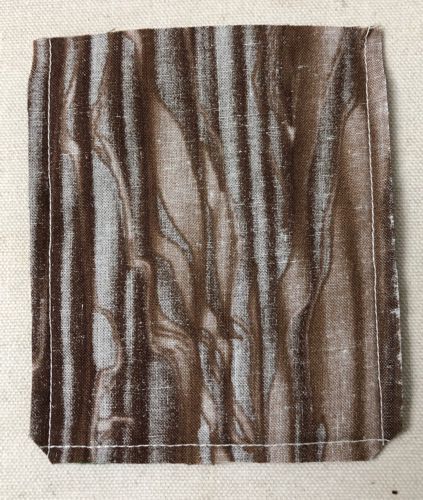
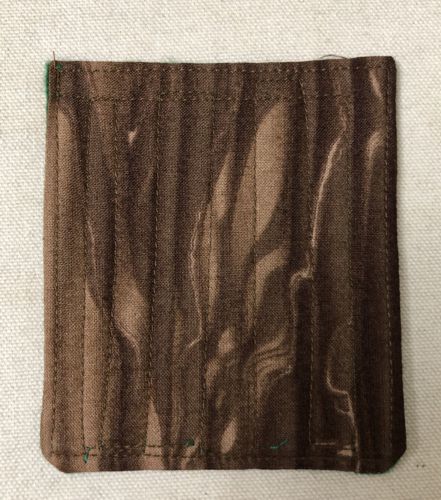
- 4" x 4" piece of brown fabric for the trunk
- White and green polyester craft felt
- Medium-weight cut-away embroidery stabilizer
- Large rick-rack trim, preferably green (or green bias tape for finishing edges)
- Paper for templates and graph pencil
- Chalk pencil and pins
- Quilter's ruler
- Rotary cutter or scissors
- Pinking shears (zig-zag edge shears)
- Iron
- #12 universal needle for piecing
- Quilting threads in matching colors
- #12 quilting needle
- Snowflake buttons (optional)
|
Templates:
|
| Gift wrap paper with 1" square gridding is perfect for making templates. You can also use any other paper, or draw the templates directly on your fabric. |
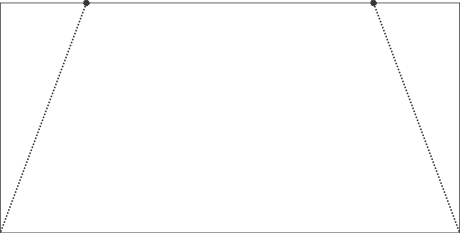
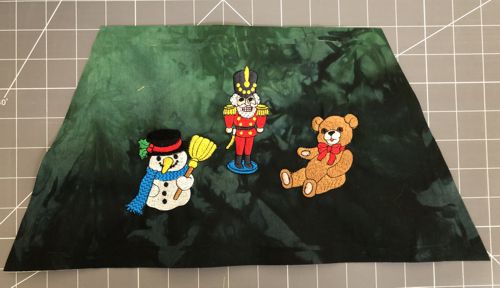
For the lowest level of the tree, draw a rectangle 16" x 8".
Along the top edge, measure 3" from both corners and place a mark.
Draw a line from the marks to the bottom corners.
Cut out the trapezoid.
Note: If you are drawing on fabric, DO NOT cut out yet. |
|
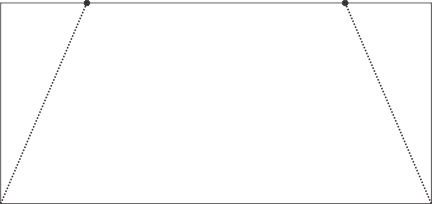
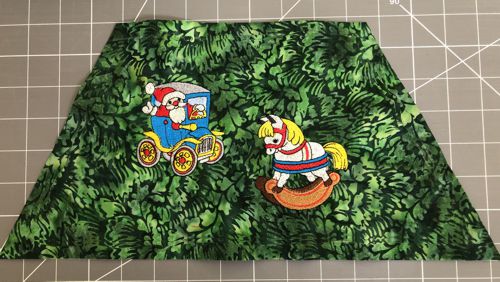
| For the middle level, draw a rectangle 15" x 7". Repeat all steps as for the first level. |
|
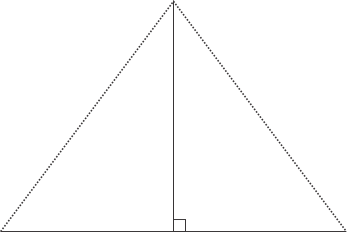
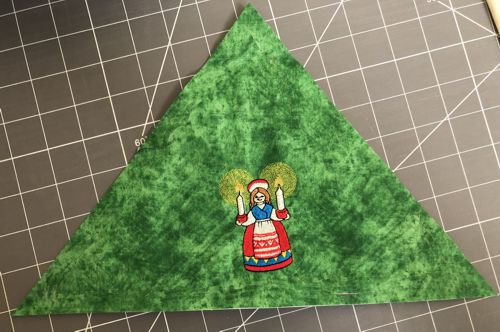
For the upper part, draw a line 12" long and find the midpoint. From the midpoint, draw a perpendicular line 8" high. Connect the ends of the lines to form a triangle.
Cut the paper template out. DO NOT cut out if you draw on fabric. |
|
| Trace the paper templates onto the fabric, but do not cut them out! |
| Embroidery: |
Upload the files from the Christmas Ornament Set to your embroidery machine and select threads.
Stabilize the fabric and hoop tightly.
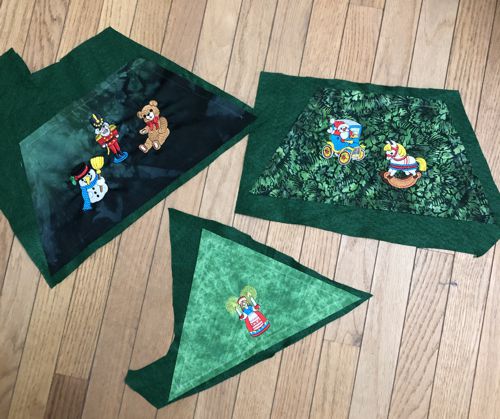
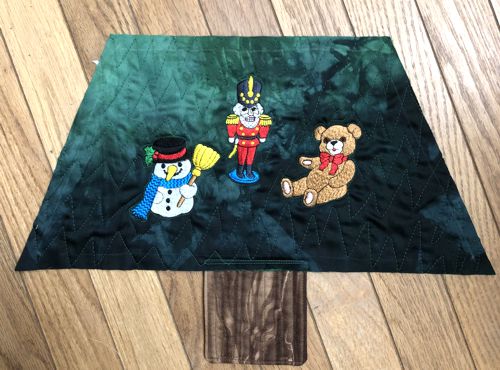
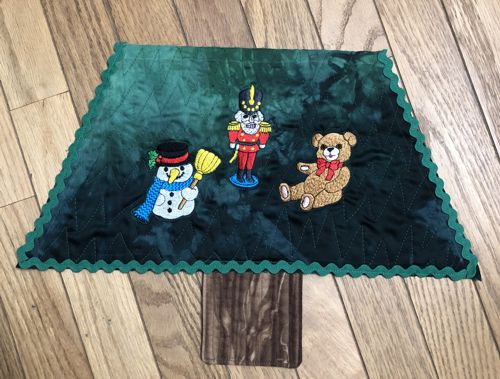
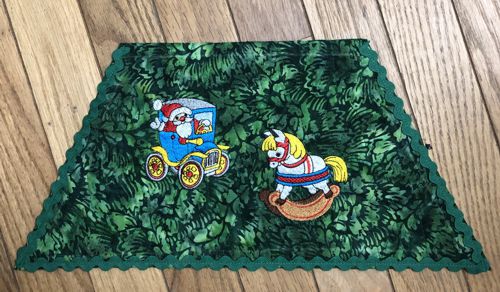
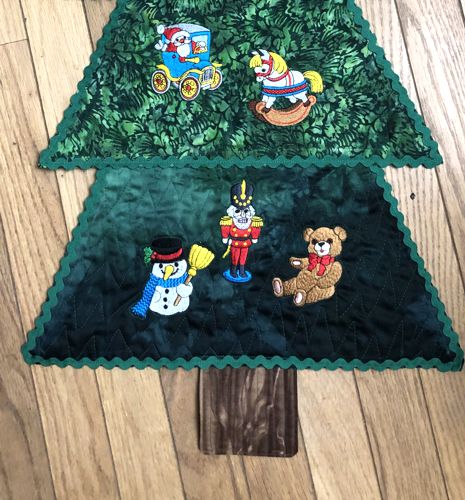
Embroider the designs one by one: 3 on the first level, 2 on the second level, and 1 on the upper level.
Cut out along the template margins. |
|
|
|
| Place the stitch-outs on green felt. Pin both layers together. |
|
Echo-quilt around the embroidery, then quilt all over the pieces in a free-motion style.
Trim the felt. |
|
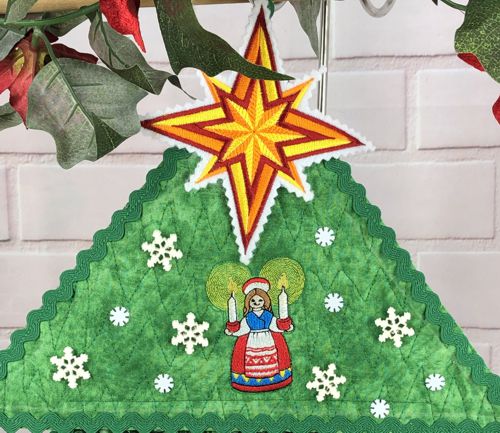
Upload the file of the Star of Bethlehem for a small hoop into the embroidery machine. Select thread.
Stabilize a piece of white felt with cut-away stabilizer. Hoop tightly.
Embroider the design.
Cut away the stabilizer around the embroidery.
Using pinking shears (zig-zag edge shears), cut out the star. |
|
| The Trunk: |
To make the trunk, cut a rectangle 3 1/2" x 4" from both brown fabric and green felt. Position the fabric face down on the felt and stitch along 3 edges with a 1/4" seam allowance.
Trim the corners. |
|
Turn the piece right side out and press. Tuck the upper edge inside, press, and topstitch.
Quilt the piece in straight parallel lines. |
|
Assembly:
|
| Overlap the trunk piece with the lower edge of the first level by about 1/2". Pin and topstitch in place. |
|
| Pin the rick-rack trim along the side and lower edges of the first level. Topstitch the trim in place. |
|
| Pin the rick-rack trim along the side and lower edges of the second level. Topstitch the trim in place. |
|
| Position the second level over the upper edge of the first level, overlapping by about 1/2". Pin and topstitch in place. |
|
| In the same manner, topstitch rick-rack trim to the upper level of the tree, starting from the apex of the triangle. Make a loop with one end of the trim and stitch in place. |
| Position the star at the apex of the triangle. Pin and topstitch in place. |
|
Finishing:
|
The wall hanging is now complete! You can further decorate it with crystals, beads, or buttons. We used plastic snowflake buttons of different sizes.
|
|

|
| Have fun! |
|
Back to Christmas Ornament Set and Star of Bethlehem
|
Back to Projects Page
|


