|
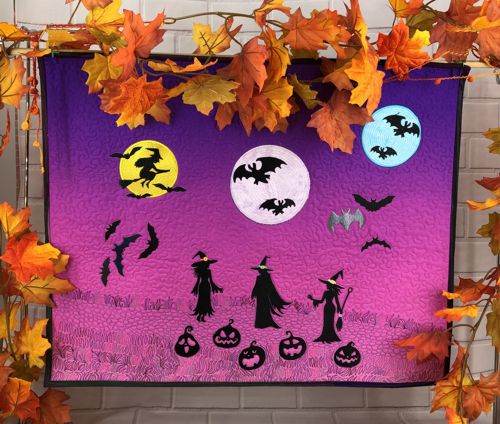
Create a Halloween Witches' Moonlit Flight Quilt with this step-by-step tutorial, perfect for adding a festive touch to your home. This guide covers sewing the quilt, using machine embroidery to add Halloween designs, and finishing with quilting. Follow the instructions to make a striking wall quilt for the season.
We used the designs from the following sets: Halloween Witches, Jack-O-Lanterns, Halloween Bats and moon designs from the Halloween Moon Applique (for 4"x4" and 5"x7" hoops) and Halloween Moon.
The finished size of the quilt is approximately 20 1/2" x 25 1/2".
|
|
You will need:
- Embroidery threads (polyester or rayon)
- About 3/4 yard of fabric for the top (we chose gradient pink-to-deep purple fabric; feel free to choose any background color you like: the more vibrant, the better!)
- Fabric for binding and backing
- Scraps of light-colored fabrics for applique (choose any colors you like)
- Light- to medium-weight cut-away embroidery stabilizer
- Batting
- Quilter's ruler, rotary cutter, and chalk pencil
- Iron
- #12 universal needle
- Quilting threads in matching colors
- #12-#14 quilting needle
- Printer and embroidery software (optional but very helpful)
|
Embroidery
|
| This is a whole-cloth quilt, so no additional piecing is needed. However, you should determine the size of your quilt and use the chalk pencil to draw the margins. Do not cut out the piece yet: leave extra fabric beyond the margins to help with hooping. |
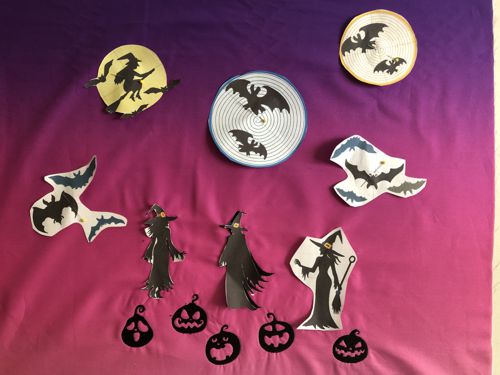
Mark the position of the embroidery designs. If you have a printer and embroidery software, printouts of the designs can be very helpful. Test stitch-outs can also be used for this purpose.
If you do not have a printer and do not wish to make test stitch-outs (though we recommend doing so), you can cut out rectangles the same size as the designs and arrange them on the fabric to determine the embroidery placement. |
|
Upload the necessary files to the embroidery machine.
Select your threads and stabilize the fabric.
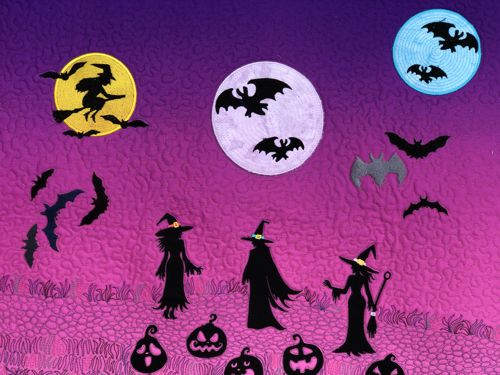
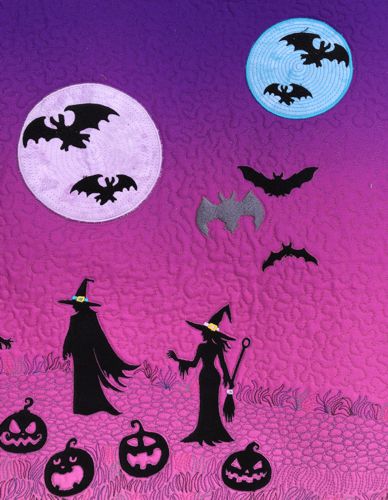
Hoop the fabric tightly and embroider the designs one by one, starting from the bottom (Jack-O-Lanterns) and moving up (witches, bats, moons).
Remove the excess stabilizer after each stitch-out. |
Quilting and Finishing
|
Place the backing on a flat surface (table) face down. Cover with batting, then spread your embroidered piece over it.
Pin all layers together.
We quilted in a free-motion style all over the piece. Start from the bottom and echo-quilt the pumpkins first, then gradually move up.
Change threads as needed. |
|
Press with heavy steam. Square the piece: all angles should be 90 degrees and opposite sides should be the same length.
Finish the raw edges with binding. |
|
| Have fun! |

|
|
Back to Halloween Witches, Jack-O-Lanterns, Halloween Bats, Halloween Moon Applique, and Halloween Moon.
|
Back to Projects Page
|


