|
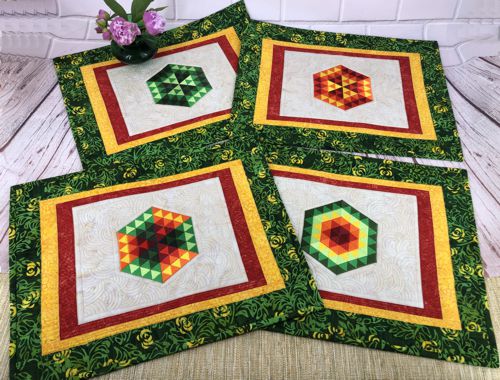
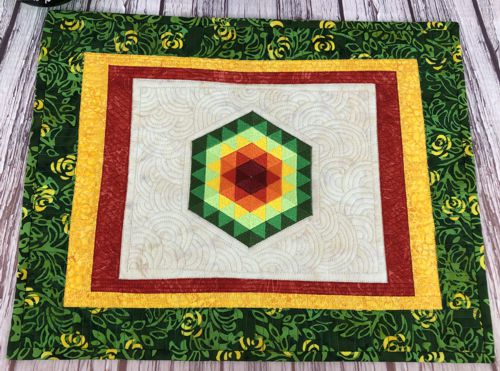
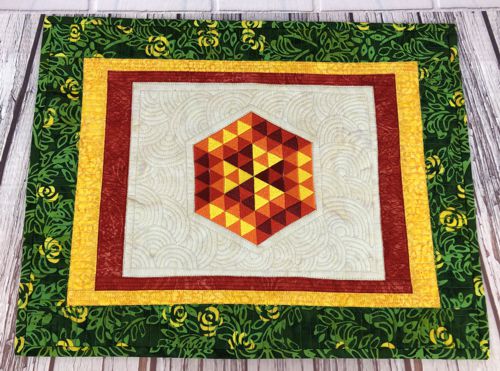
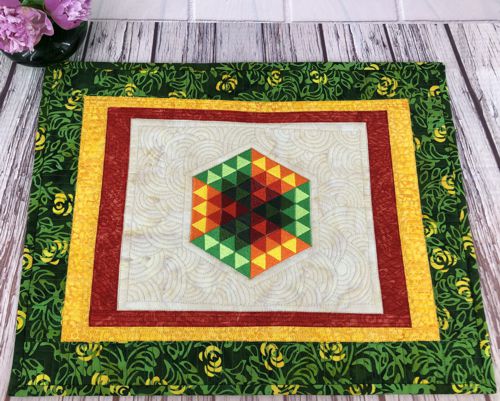
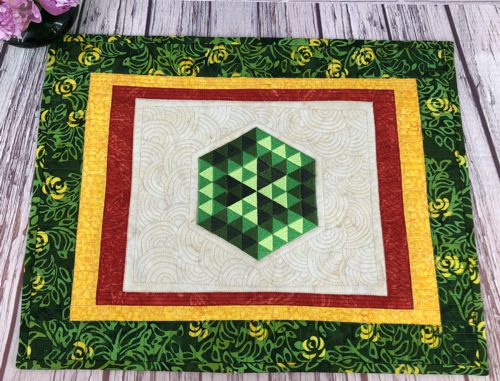
This tutorial guides you through creating Quilted Placemats with Hexagon Motif Embroidery using sewing, quilting, and machine embroidery techniques. You’ll learn how to sew, embellish with hexagon designs, and quilt a set of functional placemats. The project combines layered fabric construction with detailed embroidery for a vibrant table accent. It’s perfect for those with some sewing and quilting experience who want to craft a colorful set. Follow the steps to make placemats that enhance any dining space. We used the design from the Hexagon Motif Set.
The finished size of each piece is about 17" x 13".
|
|
You will need :
- embroidery threads, either polyester or rayon, feel free to choose your own colors of the embroidery and fabrics;
- about 1/2 yard of light-colored solid fabric for the central part;
- small amount of red and yellow fabric for the borders;
- about 1/2 yard of green fabric for the borders and binding;
- light-weight cut-away embroidery stabilizer;
- batting and backing;
- quilter's ruler;
- rotary cutter;
- iron;
- #12 universal needle;
- quilting threads of matching colors;
- #12-#14 quilting needle.
|
|
Cutting:
|
For one placemat you will need the following parts.
Out of the light-colored fabric, cut a piece measuring 8 1/2" x 10 1/2";
Out of red fabric, cut
- 2 strips measuring 1 1/2" x 8 1/2";
- 2 strips measuring 1" x 12 1/2".
Out of yellow fabric, cut
- 2 strips measuring 1 1/2" x 9 1/2" and
- 2 strips measuring 1" x 14 1/2";
|
Out of green fabric, cut
- 2 strips measuring 2" x 10 1/2",
- 2 strips measuring 1 1/2" x 14 1/2",
- 2 strips measuring 2" x 17 1/2",
- 2 strips 2 1/2" wide and the length of the width of the fabric for the binding.
|
| Note: for 2 placemats multiply the amount of each part by 2, for 4 placemats multiply by 4, etc. |
|
Assembly:
|
| Note: seam allowance is 1/4" if otherwise recommended, press the seam immediately after you make it. |
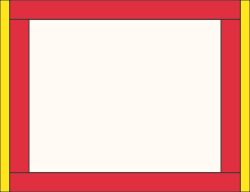
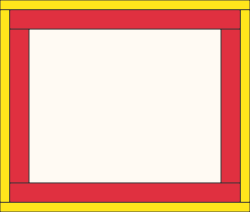
Sew the red 1 1/2" x 8 1/2" strips to the left and right edges of the central part.
|

|
| Sew the red 1" x 12 1/2" strips to the upper and lower edges of the working piece. |

|
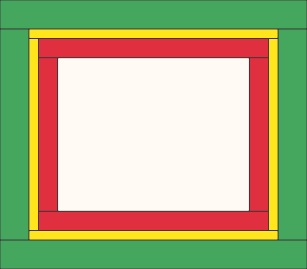
Sew the yellow 1 1/2" x 9" strips to the left and right edges of the working piece.
|
|
| Sew the yellow 1" x 14 1/2" strips to the upper and lower edges of the working piece. |
|
| Sew the green 2" x 10 1/2" strips to the left and right edges and the green 2" x 17 1/2" strips to the upper and lower edges of the working piece. |
|
| Embroidery |
Upload the files of the Hexagon Motif Set to the embroidery machine.
Select threads. Stabilize the central part.
Hoop the fabric tightly and embroider the designs in the center.
Remove the excess stabilizer.
|
Quilting and Finishing
|
Now place the backing on a flat surface (table) face down. Cover with batting. Spread your working piece over it.
Pin all layers together.
We quilted in a free-motion style all over the working piece. Start from the central part, and echo-quilt the emboidery first with matching thread.
Change to mayching thread, when quilting the borders. |
Press with heavy steam. Square the piece - all angles should be 90 degrees and opposite sides of the same length.
Finish the raw edges with the binding. |
|
|
|
|
| Have fun! |
|
Back to Hexagon Motif Set.
|
Back to Projects Page
|


