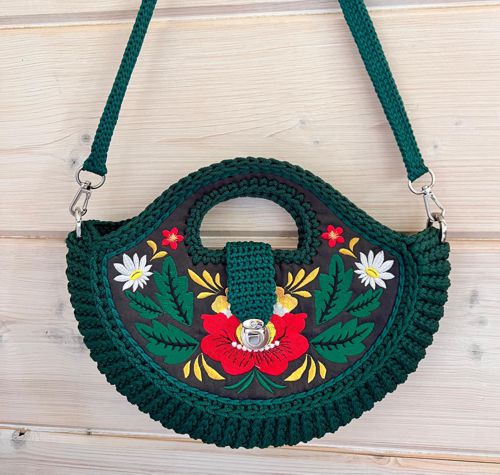
This tutorial guides you through creating a Purse with Embroidered Panels and Crocheted Sides using sewing, machine embroidery, and crochet techniques. You’ll learn how to sew panels, embellish them with embroidery designs, and finish the sides with crochet stitches. The project combines fabric and yarn to make a useful purse. Follow the steps to craft a bag suitable for daily use or gifting.
This project combines crochet and machine embroidery. We used Flower Panel for a Purse machine embroidery design. We are not including instructions on how to crochet the purse here. There are many video tutorials on YouTube. We provide some links towards the end of this tutorial.
The finished size of the purse is about 9 1/2" H (with the handle) 6 1/2" (from the upper edge to the bottom) x 12 1/2" W (measurements are without the shoulder strap).
|
|
You will need :
- embroidery threads either polyester or rayon,
- faux leather of any color,
- medium-weight cut-away embroidery stabilizer,
- heavy-weight stabilizer/interfacing, such as Pellon Peltex
- 3 mm cord, or any thick yarn recommended in video tutorials,
- 4 mm crochet hook,
- lock clasp for bags (optional), (available on Amazon: here and here) (affiliate links)
- hole puncher for leather (affiliate link)
- 2 swivels (affiliate link)
- 2 O-rings for purse strap (affiliate link)
|
Embroidery:
|
Upload the files into your embroidery machine.
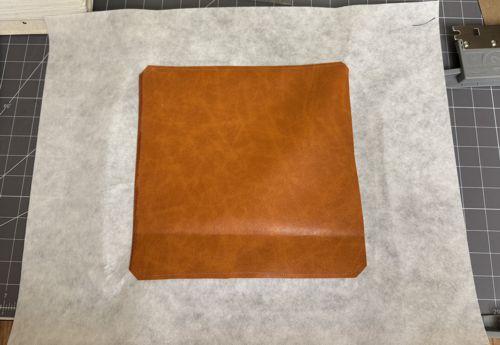
Cut a piece of the faux leather by the size of the hoop. Sew the the piece to the stabilizer along the perimeter.
|
|
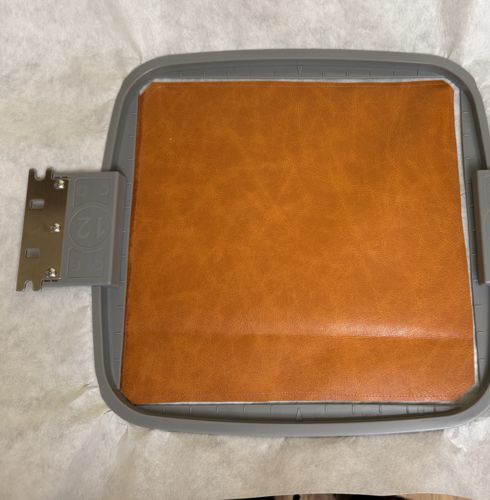
Hoop the stabilizer tightly and embroider the design.
Make the second stitch-out of the design for the back panel. |
|
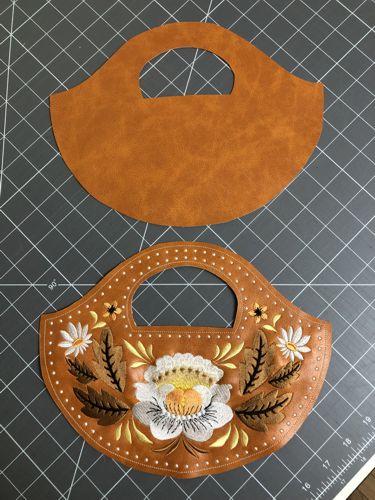
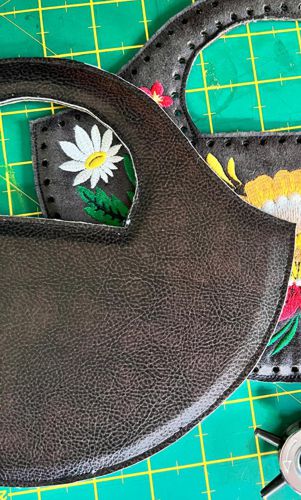
Cut each stitch-out with seam allowance of 1/4".
Using the stitch-outs as a template, cut 2 more shapes out of the faux leather for the backing; and cut 2 shapes out of heavy-weight stabilizer/interfacing. |
|
Assembly:
|
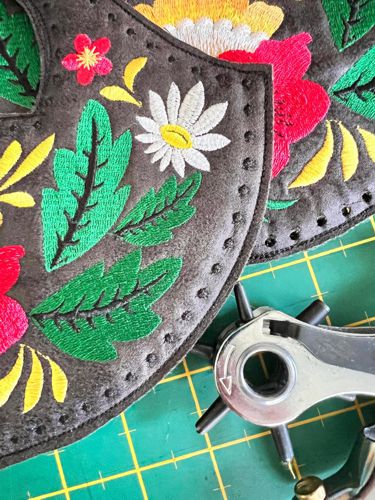
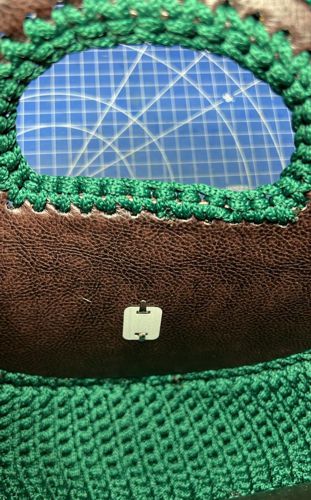
Make 2 "sandwiches" placing the faux leather shapes wrong to wrong side with the interfacing shape between them. Pin together.
On your sewing machine , topstitch along the embroidered outer line.
|
|
| With the hole puncher, punch holes along the edges in the places marked by the embroidered dots. . |
|
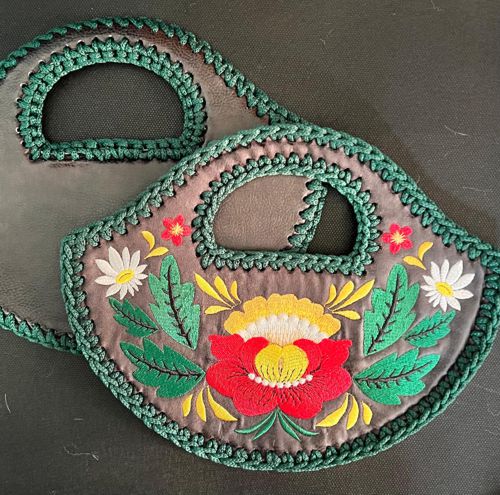
| Holding the panels with right sides facing, make a row of single crochet around each panel. |
|
| Attach cord/yarn to the left corner of the front panel, chain 12 and connect to the corner of the back panel. Then make a row of single crochet to return to the front panel, connect, crochet back. |
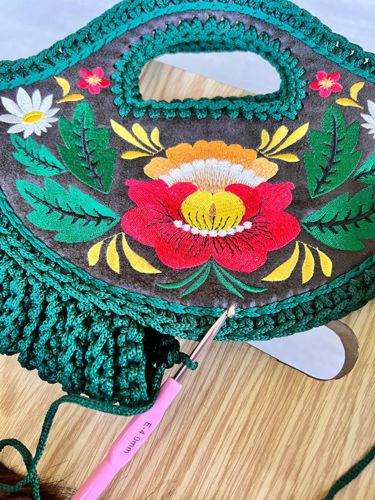
Continue crocheting using the following video tutorial from YouTube (not affiliated with us):
https://www.youtube.com/watch?v=HknraSPFFR4
|
|
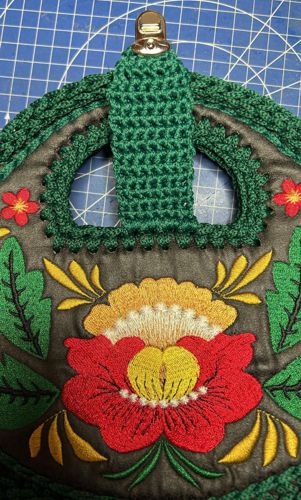
| If you wish, on the back panel, crochet the strap for the clasp. Attach the clasp to the end. |
|
| Attach the second part of the clasp to the front panel. |
|
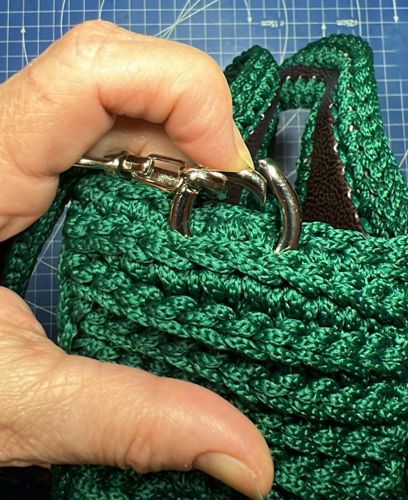
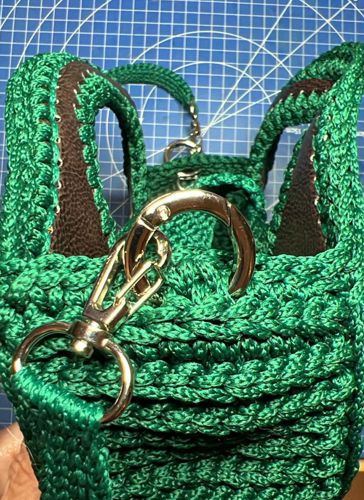
Crochet a shoulder strap of the desired length. Attach the swivels to the ends.
Insert the rings between the crocheted stitches on the sides. |
|
| Attach swivels with the shoulder strap. |
|
| Have fun! |
|
Back to Flower Panel for a Purse
|
|
Back to Projects Page
|


