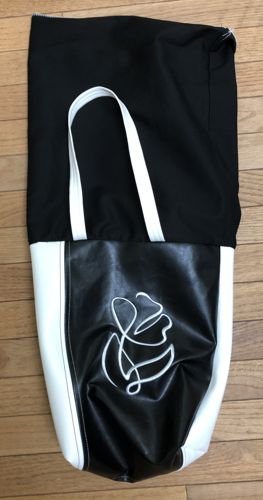
This tutorial guides you through creating a summer bag using sewing and machine embroidery techniques. You’ll learn how to construct a stylish tote bag and embellish it with a unique floral design. The project combines durable faux leather with detailed embroidery for a lightweight, summer-ready accessory. It’s ideal for those with some sewing and embroidery skills looking to craft a chic, personalized bag. Follow the steps to make a versatile tote perfect for everyday use or gifting. We used designs from the Flower Doodles Set. The designs are available in 3 sizes. We used the Large hoop size (5" x 7"). However the other sizes will work great for this bag too.
The finished size of the bag is about 11" W x 12" H x 5" D. |
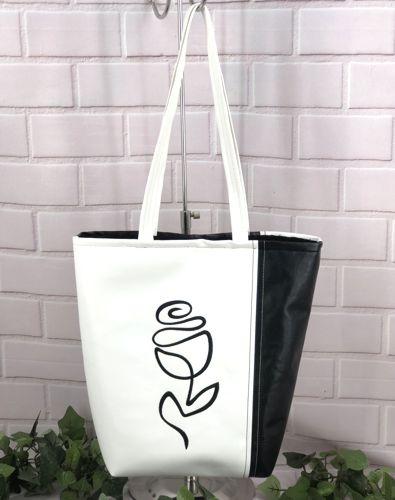
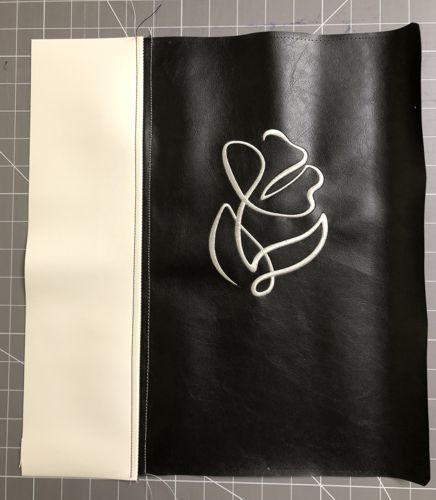
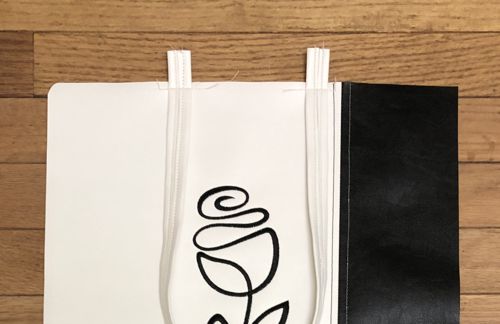
The front of the bag
|
You will need :
- embroidery threads,
- white and black faux leather (or feel free to choose your own contrast colors);
- cotton fabric for the lining;
- medium-weight cut-away stabilizer.
|
You will also need:
|
- quilter's ruler;
- rotary cutter and/or scissors;
- tailor's colored chalk pencil;
- graph pencil;
- iron;
- #12 universal needle, and sewing thread;
- #18 univeral needle and extra strong thread (we used polyester upholstery threads);
- sew-on snap 1/2" large.
|
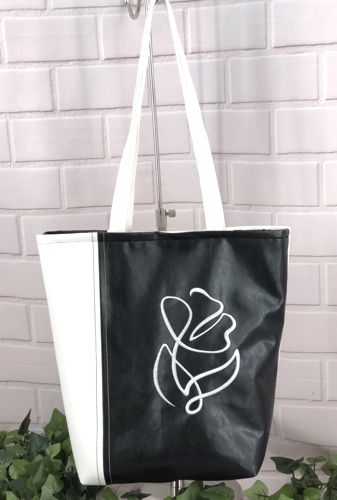
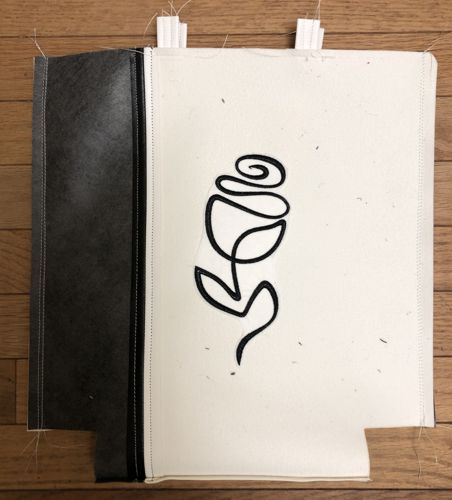
The back of the bag |
| Cutting: |
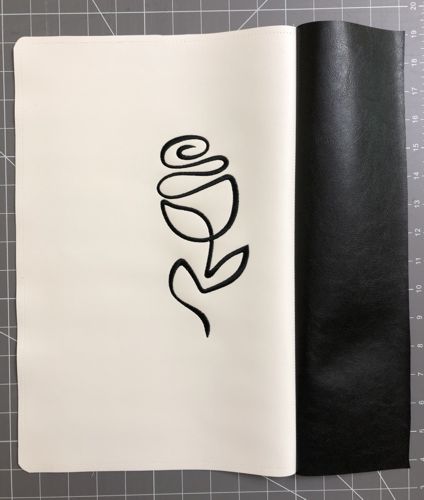
Out of white faux leather, cut
- one piece measuring 15 1/2" x 10 1/2",
- one piece measuring 15 1/2" x 4 1/2", and
- 2 strips measuring 1 1/2" x 25".
Out of black faux leasther, cut
- one piece measuring 15 1/2" x 10 1/2", and
- one piece measuring 15 1/2" x 4 1/2".
Out of the fabric for the lining, cut
- 2 panels measuring 15 1/2" x 14" and
- a piece measuring 6 1/2" x 15" for the pocket.
|
Embroidery:
|
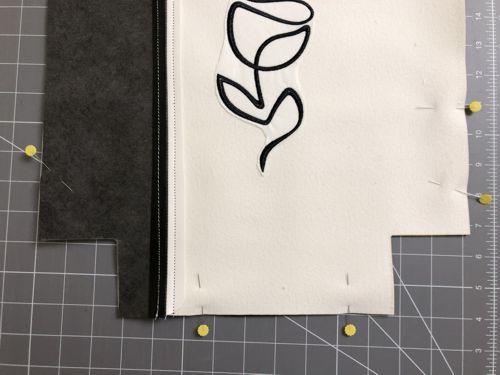
In order to prepare the faux leather for embroidery, with a graph pencil, trace the outline of the inner frame of the hoop on a piece of stabilizer. The piece of stabilizer should be larger than the piece of faux leather.
Place the faux leather face down on a table, cover with the stabilizer, tracing lines facing up. Pin. Sew the leather piece and stabilizer together following the tracing lines.
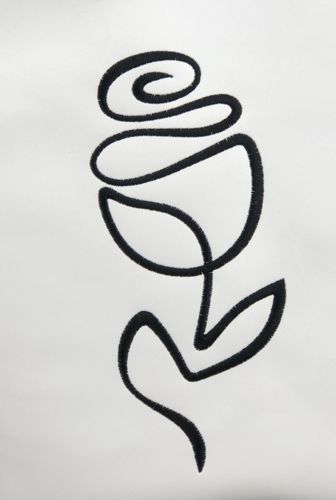
Hoop the stabilizer only. Choose the files you like from the Flower Doodles Set and upload them into your machine. Embroider with black thead on the white panel and with white thread on the black panel.
|
|
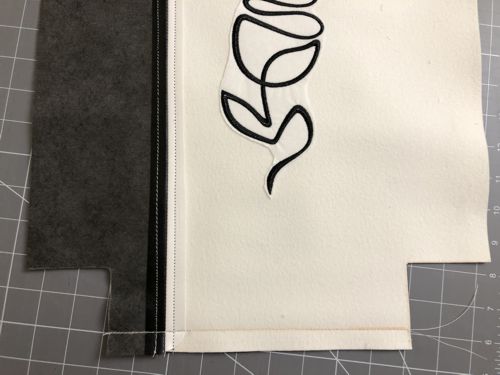
Unravel the tracing stitches, cut-away the excess stabilizer around the embroidery.
Repeat for the black panel. |
Outer Bag:
|
| Note: seam allowance is 1/2" unless otherwise recommended. Use #18 universal needle and extra-strong thread. |
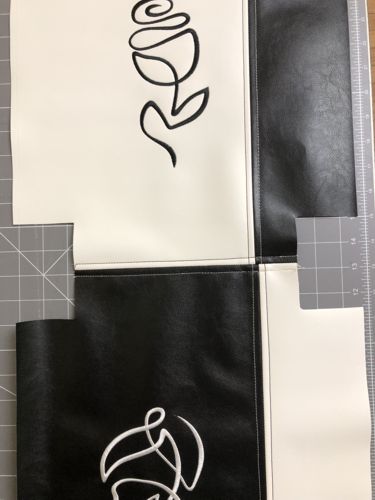
| Sew the black 4" x 15 1/2" strip to the right edge of the white panel. |
|
| Open the seam and topstitch 1/4" on both sides of the seam. |

|
| Repeat for the black panel, but sew the white strips to the left edge. |
|
Position the panels face to face, align and pin all edges together.
On the lower edge of both panels, cut out 2 1/2" x 2 1/2" squares at the corners. |
|
| Sew the bottom together. It helps if you draw the 1/2" seam allowance first and stitch over the line. |
|
| Open the seam and topstitch 1/4" on both sides of the seam. |
|
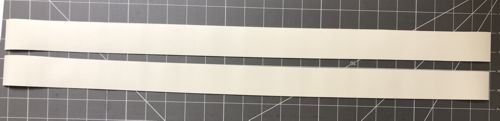
| To make the handles, with graph pencil draw a line along the center of the 1 1/2" x 25" strips from one short edge to the other on the wrong side. |
|
| Fold one long edge to the line and top-stitch, repeat for the other long edge. |
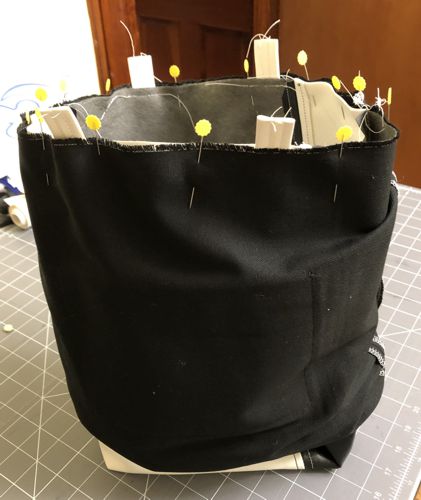
| Pin the handles to the upper edges of the bag, with ends protruding 1" beyond the edges of the bag. |

|
| Stitch them in place with seam allowance 1/4". |
|
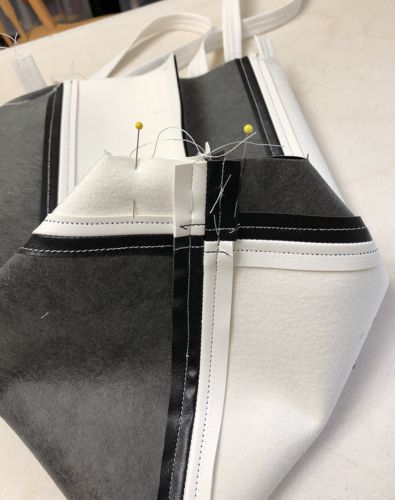
| Fold the bag with right sides together, align the edges. Stitch the sides, seam allowance 1/2". |
|
| To shape the bottom, fold the bottom of the bag so that the bottom and the side seams align. Pin. |
|
| Stitch. Seam allowance 1/2". Stitch several parallel lines. |

|
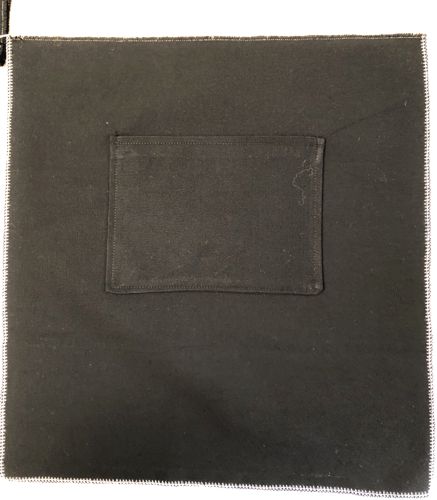
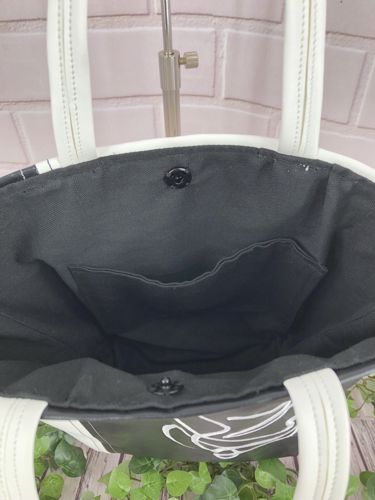
| Lining and Inner Pocket(s): |
| Note: use #12 universal needle and regular sewing thread. Seam allowance 1/4". |
| Finish the raw edges of the fabric 15 1/2" x 14" pieces with zig-zag stitch or overlock. |
|
Fold the 6 1/2" x 15" piece of lining fabric widthwise in half, face inside. Stitch the sides together, seam allowance 1/4". Trim the corners. Turn the piece right side out. Press.
Tuck the unfinished edges of the pocket 1/2" inside, press. Topstitch closed.
|
Pin the pocket on one of the lining panel's wrong side, so that it's positioned 3 1/2" from the upper edge and equal distance from the side edges. Stitch in place, seam allowance scant 1/4".
|
|
| Position the lining panels face to face, align all edges, pin and sew the sides together. Open and press the seams. |
Assembly:
|
With right sides together, put the lining onto the outer bag. Align and pin the edges and the side seams together.
Stitch together with seam allowance 1/4". |
|
Unfold the lining.
|
|
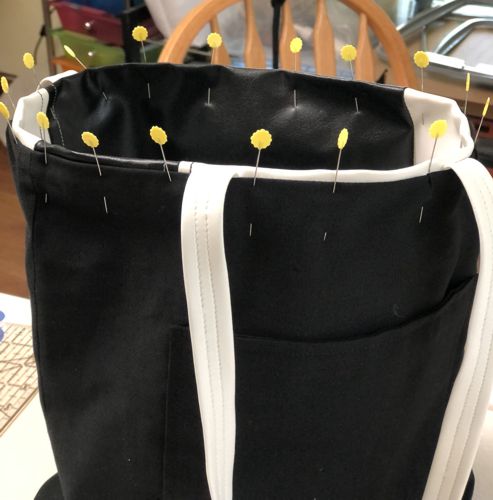
| Turn the bag wrong side out. Fold the upper edge with the lining 1/4" onto the wrong side. Pin the edge. |
|
| Topstitch along the upper edge twice - 1/4" and 1/2" from the edge. |
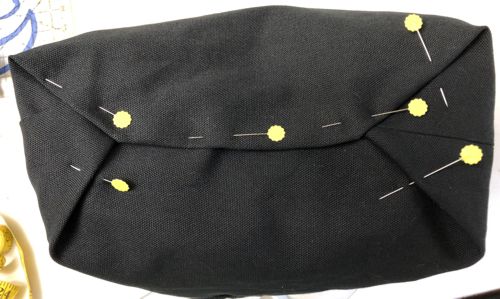
Fold the bottom of the lining in an envelope shape. Pin. Then handstitch the folded lines.
|
|
Sew the snap onto the wrong side of the bag between the handles.
|
| Turn the bag right side out. |
| That's it! |
|
| Have fun! |
|
Back to Flower Doodles Set
|
Back to Projects Page
|


