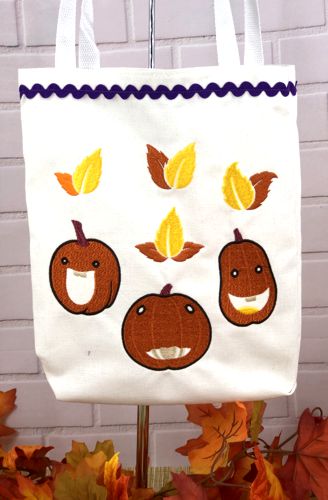
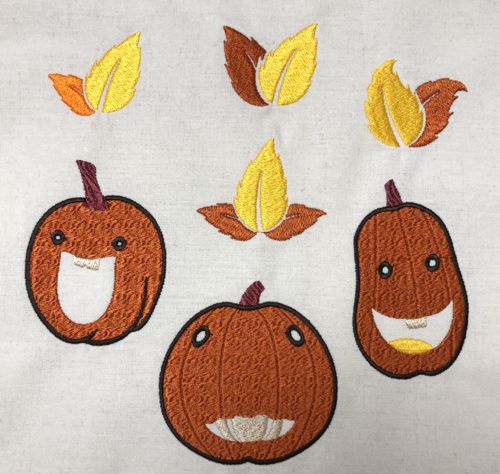
This is a quick 2-hour project to make a unique Trick-or-Treat tote bag for your kids (or yourself). For this tote we used the designs from the Silly Pumpkin Set and Fall Leaves Set.
The finished size of the tote is about 11"W x 13"H.
|
|
You will need:
- embroidery threads (polyester or rayon);
- dense cotton or cotton blend fabric;
- 1/2" wide polyester webbing for the handles;
- light to medium weight cut-away embroidery stabilizer;
- quilter's ruler;
- sewing pins;
- rick-rack trim (optional);
- rotary cutter, or scissors and fabric pencil;
- iron;
- #12-#14 universal needle;
- sewing machine;
- serger (optional).
|
Cutting and embroidering:
|
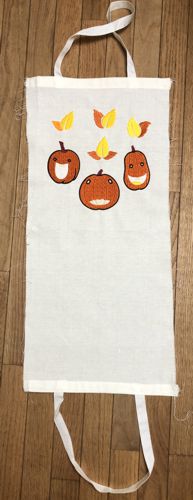
From the fabric, cut 1 piece measuring 12" x 28"
Finish all 4 edges with either zig-zag stitch or serger. Fold the piece widthwise in half and press to mark the bottom line.
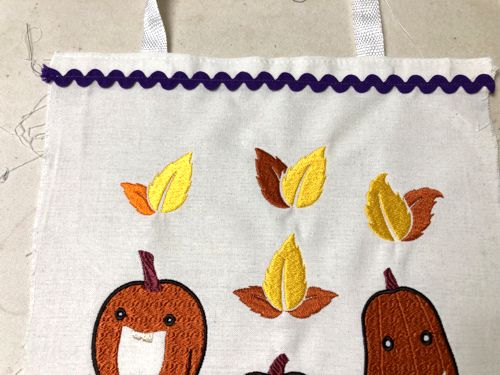
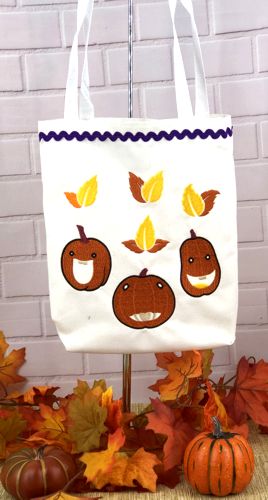
Fold the short sides 1" back and press with steam. Choose the designs you want to embroider from the Silly Pumpkin Set and Fall Leaves Set.
|
| Mark the placement of the embroidery about 2" from the bottom line and 3" from one of the short edges. Stabilize the fabric, hoop tightly, and embroider the designs one by one. |
|
| From the webbing, cut 2 pieces measuring 20" each for the handles |
Assembly:
|
Note: seam allowance is about 1/2".
|
Working from the right side, pin the short ends of the webbing pieces to the short edges of the working piece at equal distance from the long/side edges. Sew them in place within the 1" margin defined by the pressed lines. Turn the short edges back along the pressed lines and topstitch in place.
|
|
| If you want additional embellishment, sew a trim over the seam. We used medium-size purple rick-rack trim. |
|
| Fold the piece right side inside along the pressed bottom line and pin the sides together. |
| Stitch the sides together with a seam allowance of about 1/2". To shape the bottom, separate the front and back sides at the corners. Center the seam on the side with the bottom creased line. Measure 1" along the seam from the corner. Draw a line perpendicular to the seam across the corner. Machine-stitch along the line. Repeat for the other corner. |
| Turn right side out. |
| Have fun! |
|
|
Back to Silly Pumpkin Set and Fall Leaves Set.
|
Back to Projects Page
|


