|
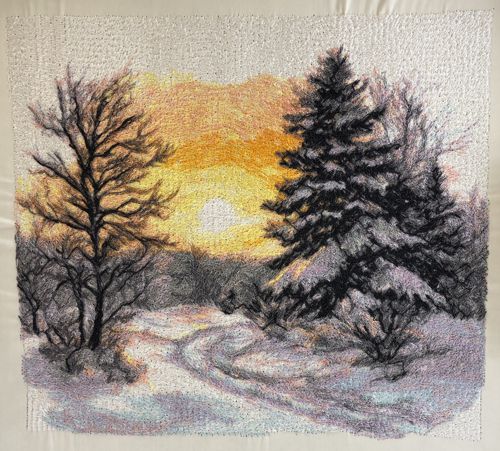
Create a Winter Sunset Wall Quilt with this easy tutorial, great for adding a seasonal touch to your home. This guide covers sewing the quilt, using machine embroidery to add a winter scene, and finishing with quilting. Follow the steps to make a lovely wall decoration for the colder months. For this small quilt we used the design of the Winter Sunset.
The finished size of the quilt is about 13" x 15".
|

|
You will need:
- embroidery threads, either polyester or rayon, according to our color card
- a fat quarter of white fabric for the embroidery
- small amounts of different fabrics matching the colors of the embroidery
- a larger piece of fabric for the binding, preferably one of those used for the borders
- a fat quarter of fabric for the backing
- medium-weight cut-away embroidery stabilizer
- batting
- quilter's ruler
- rotary cutter
- iron
- #12 universal needle for piecing
- quilting threads of matching colors and invisible thread for quilting through embroidery
- #12-#14 quilting needle
|
Embroidery:
|
Upload the Winter Sunset to the embroidery machine.
Select threads.
Stabilize the piece of white fabric.
Hoop the fabric tightly and embroider the design.
Trim away excess stabilizer around the embroidery. |
|
Trim the embroidery, leaving 1/4" margins all around.
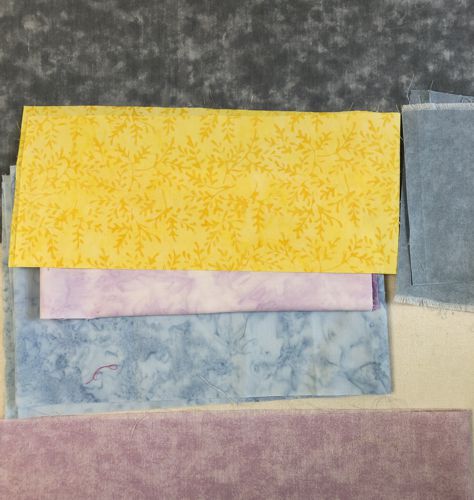
Choose fabrics that match your embroidery thread colors. We selected:
- golden yellow,
- pale lilac,
- deeper lilac (for binding),
- light gray,
- dark gray,
- grayish blue.
|
|
Cutting and Assembly:
|
| This is just one way to frame your winter landscape embroidery. You can use different fabrics or change the strip widths to create your own unique look. |
| We'll cut and sew as we go. |
| Use 1/4" seam allowance and press each seam right after sewing it. |
Measure the stitch-out with the 1/4" margins.
Our piece measures 8" x 9". Yours may be slightly different (within 1/16" to 1/8"), so adjust strip lengths as needed.
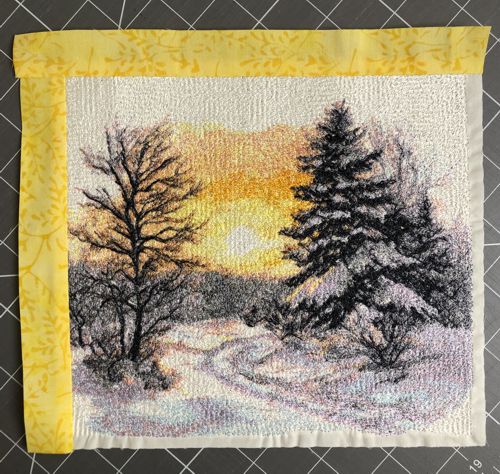
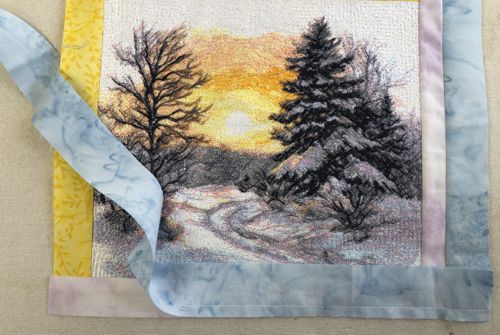
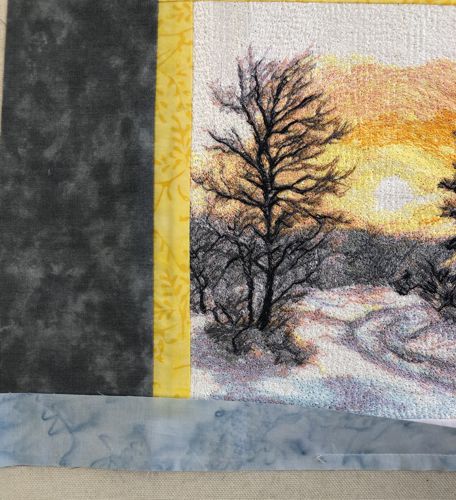
From yellow fabric cut:
- a strip measuring 1 1/4" x 8" and sew it to the left edge of the stitch-out
- a strip measuring 1 1/4" x 9 1/2" and sew it to the upper edge of the stitch-out
|
|
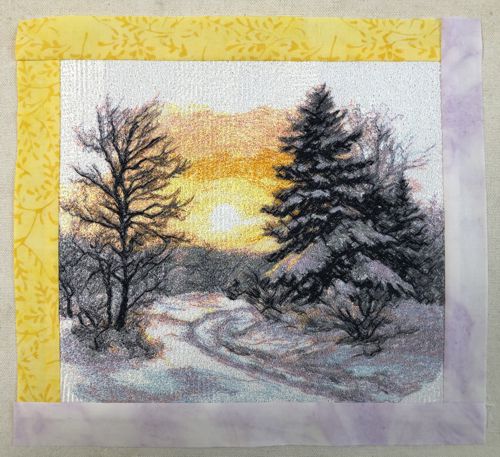
From pale lilac fabric cut:
- a strip measuring 1 1/4" x 8 3/4" and sew it to the right edge of the embroidery
- a strip measuring 1 1/4" x 10" and sew it to the bottom edge of the embroidery
|
|
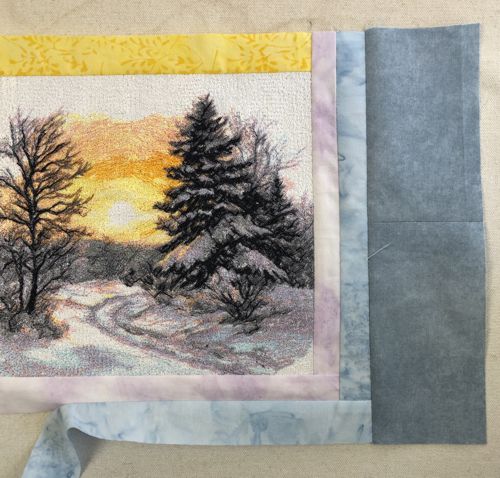
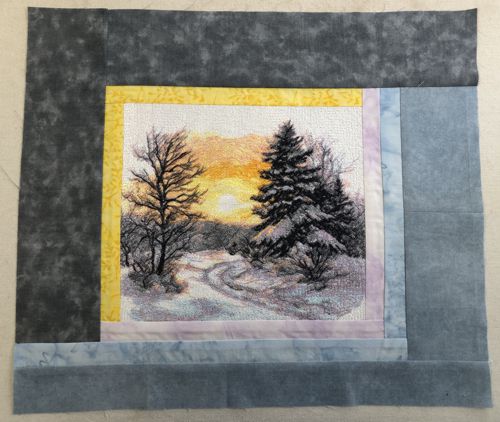
From grayish blue fabric cut:
- a strip measuring 1 1/4" x 9 1/4" and sew it to the right edge of the working piece
- a strip measuring 1 1/4" x 13" and sew it to the bottom edge of the piece, but stop stitching 1"-2" from the end (don't sew all the way across)
|
|
From light gray fabric cut:
- a strip measuring 3" x 10" and stitch it to the right edge of the working piece
|
|
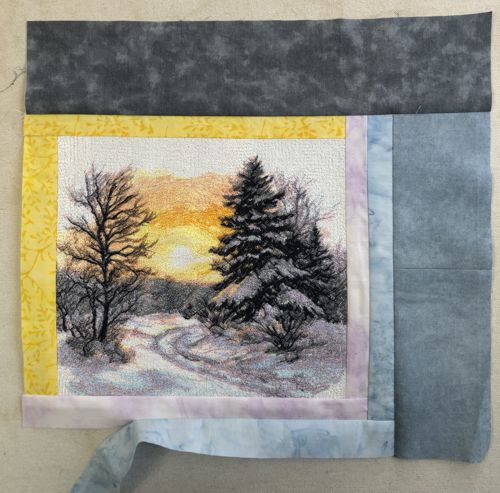
From dark gray fabric cut:
- a strip measuring 3" x 13" and sew it to the upper edge of the working piece
|
|
From dark gray fabric cut:
- a strip measuring 3" x 12" and sew it to the left edge of the working piece
|
|
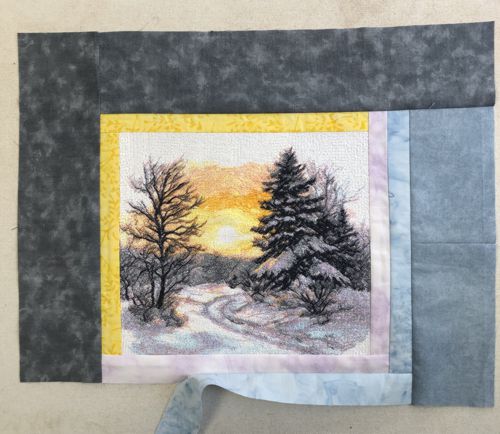
| Finish stitching the grayish blue strip at the bottom. |
|
From light gray fabric cut:
- a strip measuring 1 1/2" x 16" and stitch it to the bottom edge of the working piece
|
|
Quilting and Finishing
|
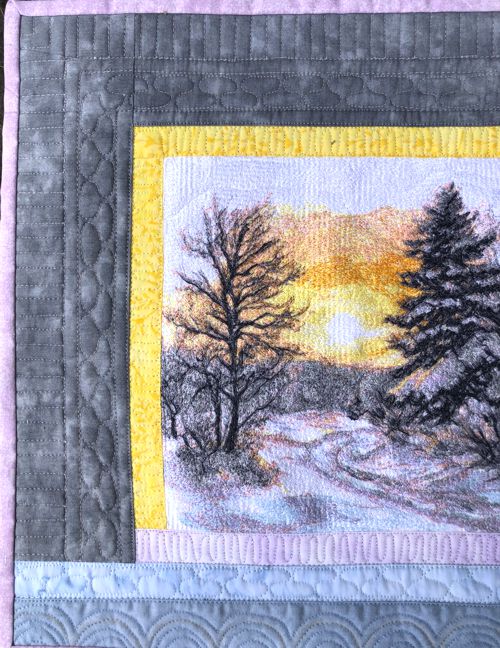
Place the backing face down on a flat surface. Layer the batting on top, then add your quilt top.
Pin all layers together.
We used free-motion quilting throughout. Start in the center and quilt through the embroidery with invisible thread, following the outlines of trees, snowdrifts, and clouds. Keep the quilting light. You just want to secure the embroidery so it doesn't puff up.
Then quilt the borders, changing thread colors as needed. |
|
Press with heavy steam and square up the quilt. Make sure all corners are 90 degrees and opposite sides are equal.
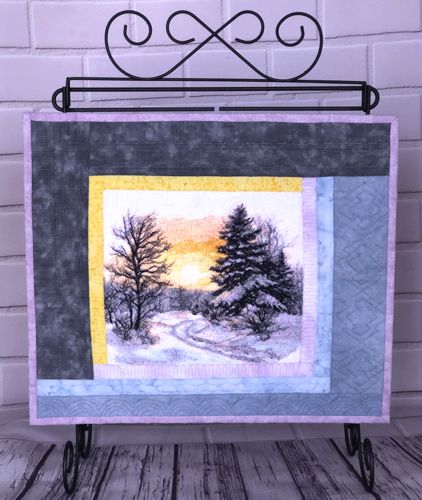
Finish the raw edges with the binding. |

|
| Have fun! |
|
|
Back to Winter Sunset
|
Back to Projects Page
|


