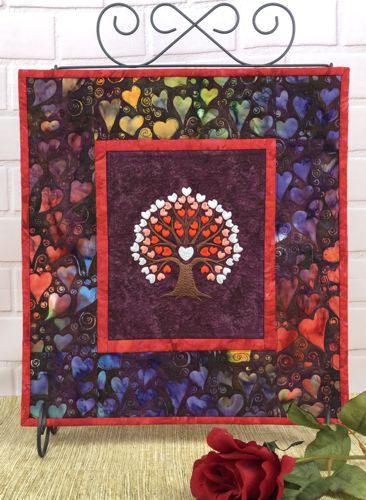
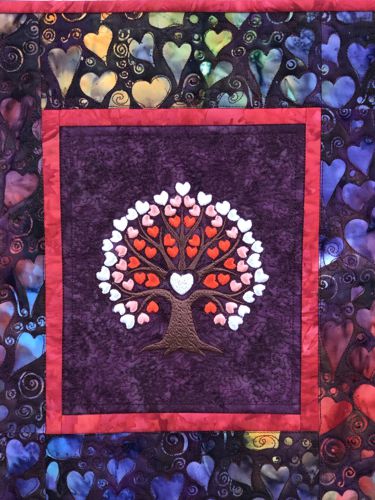
This tutorial shows you how to create a Valentine-themed wall quilt or table topper featuring a central embroidered tree made of hearts. You will learn to piece the background, add borders, apply machine embroidery, and finish with simple quilting. The project works well for beginners who know basic sewing and want to practice embroidery techniques.
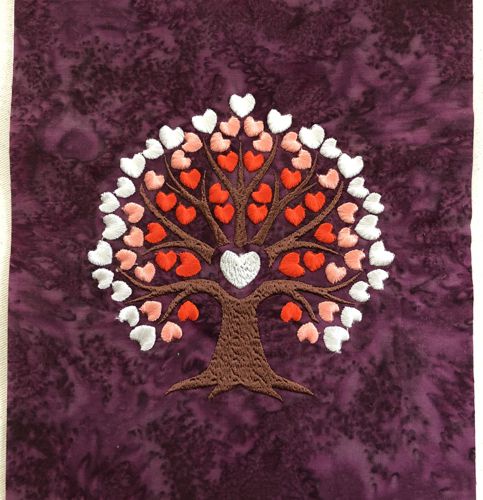
We used the Love Blooms design, which is for a large 5" x 7" hoop.
The finished size of the quilt is about 14" x 15 1/2".
You will need:
Embroidery threads (polyester or rayon) according to the color card, or choose colors to match the border fabric
A piece of solid-colored fabric for the central part with embroidery (we used burgundy because it's one of the colors on the second border)
Small amount of red fabric matching the embroidery colors for the first border and binding
A fat quarter of fabric with Valentine-themed pattern
Fabric for the backing
Medium-weight cut-away embroidery stabilizer
Batting
Quilter's ruler
Rotary cutter
Iron
#12 universal needle for piecing
Quilting threads in matching colors
#12-#14 quilting needle
Embroidery:
Upload the Love Blooms file to the embroidery machine. Select threads. Stabilize the fabric. Hoop tightly and embroider the design in the center.
Trim the stitch-out to a 7 1/2" x 9" rectangle.
Cutting:
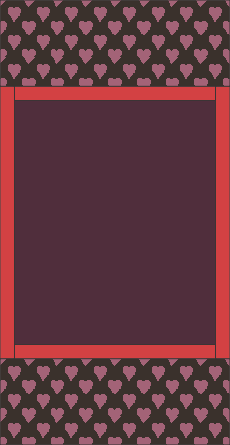
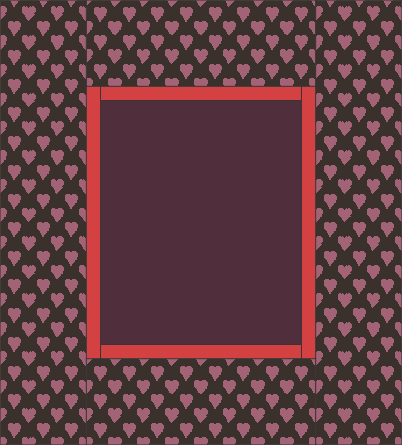
Out of the first border fabric (red in our case):
Cut 2 strips measuring 1" x 7 1/2"
Cut 2 strips measuring 1" x 10"
Out of the second border fabric:
Cut 2 strips measuring 3 1/2" x 8 1/2"
Cut 2 strips measuring 3 1/2" x 16"
Assembly:
Note: Seam allowance is 1/4". Press the seam immediately after you make it.
Sew the two 1" x 7 1/2" red strips to the upper and lower edges of the central part. Then sew the two 1" x 10" red strips to the left and right edges of the central part.
Sew the 3 1/2" x 8 1/2" patterned strips to the upper and lower edges of the working piece.
Sew the 3 1/2" x 16" strips to the left and right edges of the working piece.
Quilting and Finishing
Place the backing on a flat surface (table) face down. Cover with batting. Spread your working piece over it.
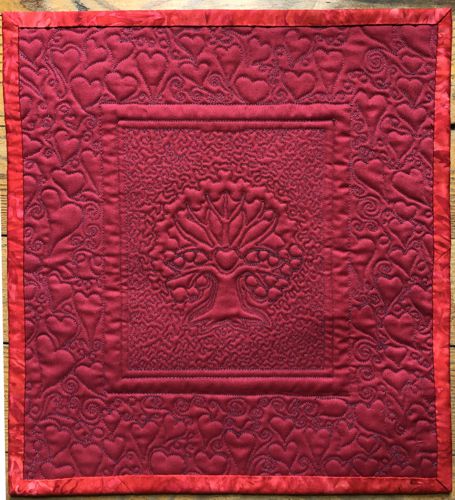
Pin all layers together. Quilt with matching threads in a free-motion style all over the working piece. Start from the central part and echo-quilt the embroidery first. Then proceed to the borders. We mostly traced the pattern of the hearts on the fabric of the second border (see the picture below, the back side of the quilt).
Press with steam. Square the piece. All angles should be 90 degrees and opposite sides should be the same length. Finish the raw edges with the binding.