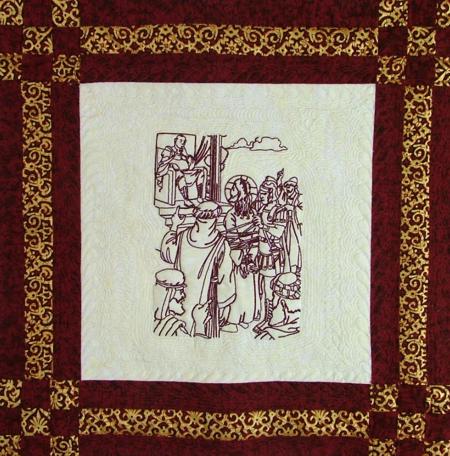
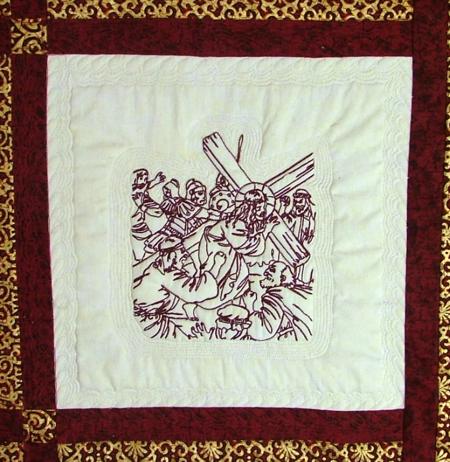
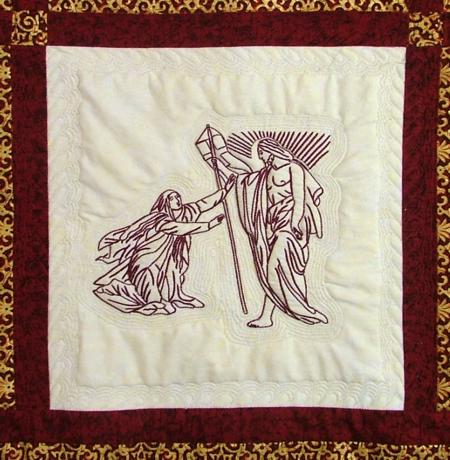
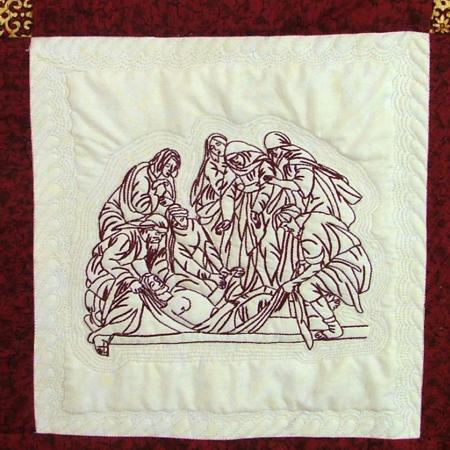
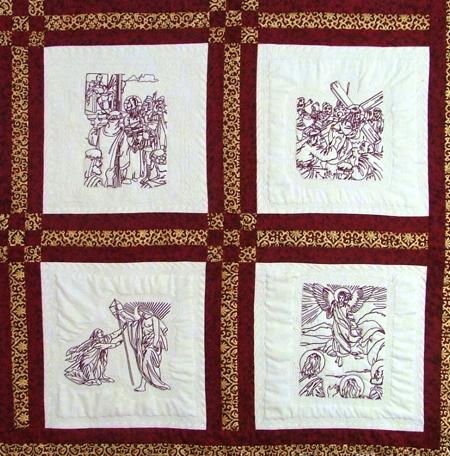
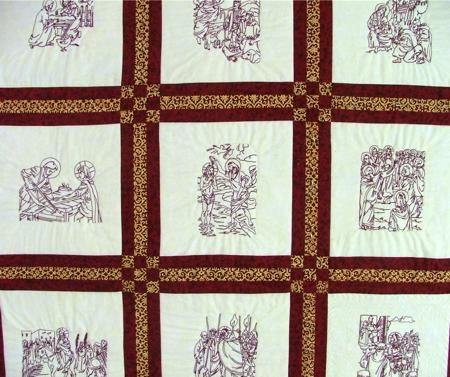
For this project we used all 14 designs from the Life of Jesus Redwork Set and also the Healing of Jairus Daughter and Noli me tangere episodes.
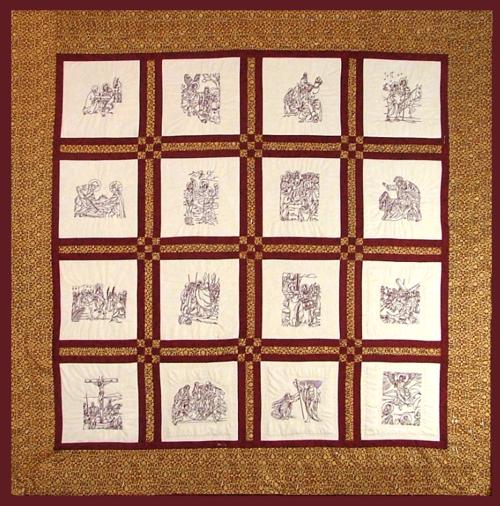
The finished size of the quilt is about 60" x 60". We used three 100% cotton fabrics - very light cream fabric for the blocks with embroidery (1 yard), dark burgundy for sashing, binding and backing (about 3 yards), burgundy patterned with gold gabric for sashing and borders (2 yards for mitered corners, or about 1 1/2 yard for boxed corners).
We assembled the top first, then embroidered it.
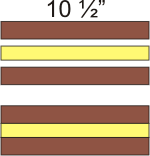
Out of light cream fabric cut 16 squares 10 1/2" x 10 1/2" each.
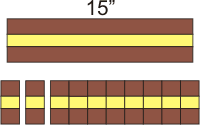
Out of burgundy fabric cut:
48 strips 1 1/2" x 10 1/2" (for the sashing)
2 strips 1 1/2" x 50" (for the first border)
2 strips 1 1/2" x 51" (for the first border)
4 strips 1 1/2" x 15" (for the nine patch block in the sashing)
Out of burgundy with gold fabric cut:
24 strips 1 1/2" x 10 1/2" (for the sashing)
3 strips 1 1/2" x 15" (for the nine patch block in the sashing)
5 strips 6 1/2 x 66" (for borders with mitered corners)
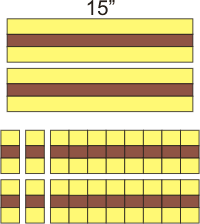
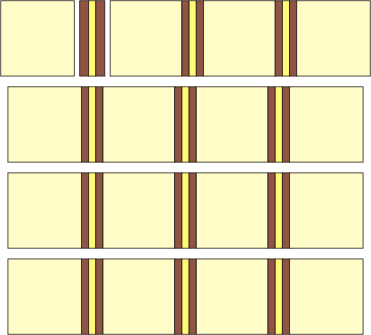
Step One: To make a nine patch block for the sashing, take two burgundy and one gold 15" long strips and stitch them together as shown. Press the seams towards the burgundy fabric. Then, cut the new strip into 1 1/2" wide strips. The 15" strip should produce 10 strips each.
Now, take four gold and two burgundy 15" strips and stitch them together as shown into two 15" bands. Cut them into 1 1/2" wide strips. You should get 20 strips.
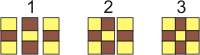
Out of the strips you got, make 9 squares, as shown below:
Step Two: Stitch together the 1 1/2" x 10 1/2" strips in the following order: burgundy - gold - burgundy, as shown below. You will get a total of 24 such strips.
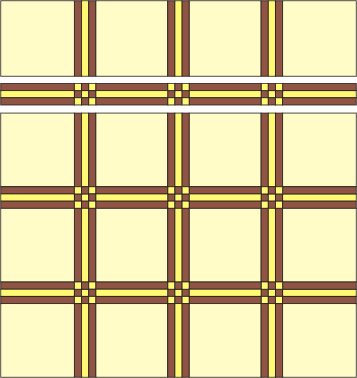
Step Three: Assemble the horizontal sashing as shown below.You'll get a total of 3 strips.

Step Four: Assemble the rows. You need a total of 4.
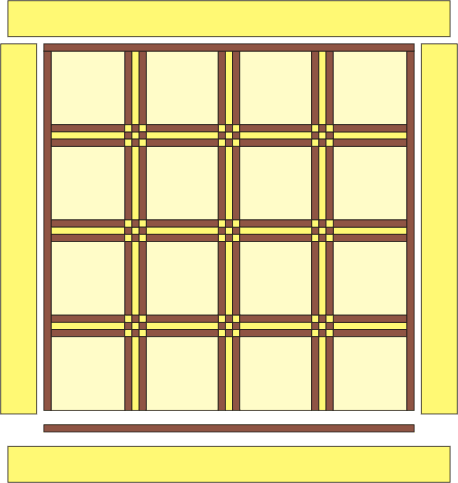
Step Five: Assemble the top.
Step Six: Add the borders.
To stabilize the fabric we used low loft DreamPoly batting. You can also stabilize each block with your favorite cut-away stabilizer. Embroider the centers of the blocks with the designs from the New Testament Redwork Section. Cut away the excess stabilizer as close to the embroidery as possible.
Now place the backing on a flat surface (table) face down. Cover with batting. Spread your working piece over it.
Pin all three layers together with 1" pins and start quilting. We quilted along the lines of the embroidery, made stippling around the embroidery and then stitched in the ditch on the blocks and sashing. We quilted the borders with straight lines which continue the lines of the stars.
For the backing we used the same burgundy fabric as for the quilt top.
After the quilting is finished, press the work with heavy steam and square the work -- all corners should be 90 degrees and opposite sides should be of the same length.
Finish the raw edges with the binding. We used the same burgundy fabric for the binding.
We hope that you liked our idea and will come up with many of your own.


