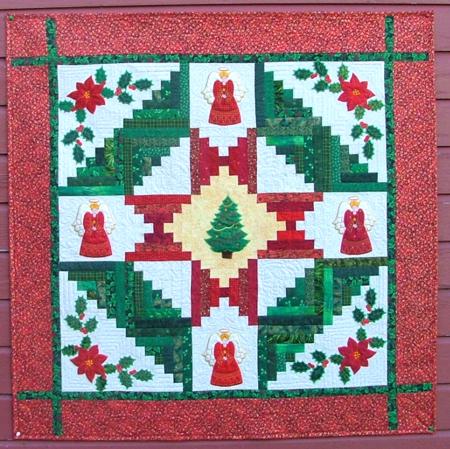
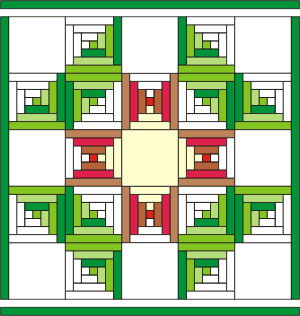
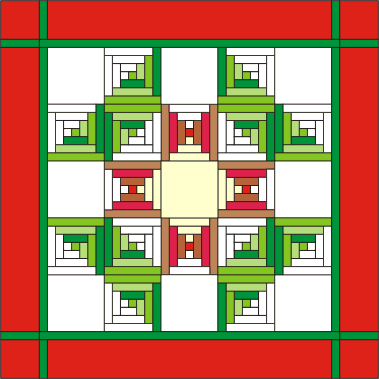
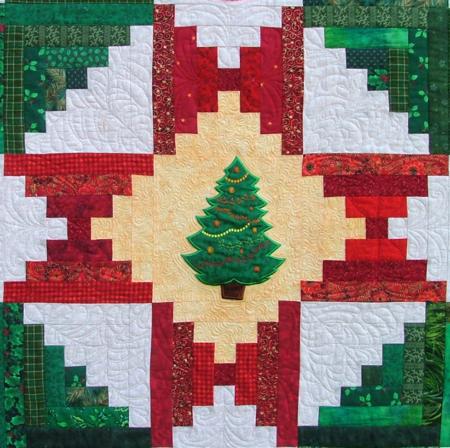
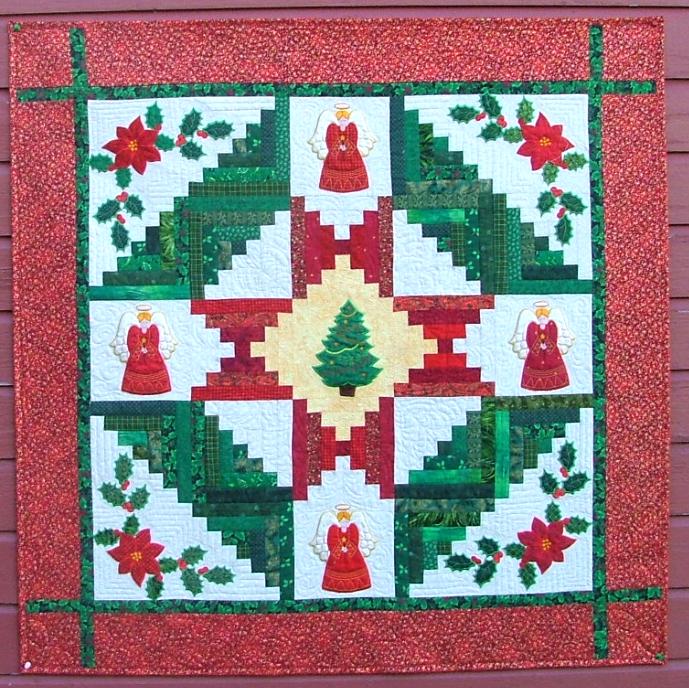
| For this wall quilt we used traditional Log Cabin and Courthouse Steps blocks and the applique designs from the Christmas Quilt Applique Set. |
Click here to enlarge |
| The finished size of the wall quilt is about 46" x 46". The finished size of the blocks is 7" x 7" (7 1/2" x 7 1/2" unfinished). The width of the strips is 1 1/2". You will need 100% cotton fabrics:
About 1 yard of white fabric, one fat quarter of pale yellow fabric; and lots of scraps of green and red fabrics for the blocks.
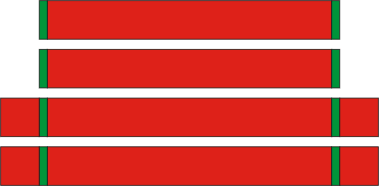
For the first border, you'll need about 1/4 yard of green fabric, and for the second border and the binding you'll need about 3/4 yards of red fabric.
You'll also need batting and backing.
|
| The Log Cabin block and its variation, Courthouse Steps, is an old favourite that dates back to the 19th century. The Log Cabin pattern can be found in many books and magazines. We recommend Log Cabin Quilts Unlimited by Patricia Cox and Maggi McCormick Gordon as a comprehensive source of patterns and tips on quilts with this block. |
|
Cutting:
|
| All measurements include 1/4" seam allowance. 1. Out of white fabric, cut eight squares measuring 7 1/2" x 7 1/2" and several strips 1 1/2" wide and as long as the fabric is wide. Subcut the strips into:
16 squares 1 1/2" x 1 1/2";
12 strips 1 1/2" x 2 1/2";
16 strips 1 1/2" x 3 1/2";
12 strips 1 1/2" x 4 1/2";
16 strips 1 1/2" x 5 1/2";
12 strips 1 1/2" x 6 1/2".
2. Out of yellow fabric, cut a 7 1/2" x 7 1/2" square and several strips 1 1/2" wide and as long as the fabric allows. Subcut the strips into:
4 squares 1 1/2" x 1 1/2";
4 strips 1 1/2" x 3 1/2";
4 strips 1 1/2" x 5 1/2".
3. Out of green scraps, cut strips 1 1/2" wide and subcut them into:
12 squares 1 1/2" x 1 1/2";
12 strips 1 1/2" x 2 1/2";
12 strips 1 1/2" x 3 1/2";
12 strips 1 1/2" x 4 1/2";
12 strips 1 1/2" x 5 1/2";
12 strips 1 1/2" x 6 1/2".
12 strips 1 1/2" x 7 1/2".
4. Out of red scraps, cut strips 1 1/2" wide and subcut them into:
4 squares 1 1/2" x 1 1/2";
8 strips 1 1/2" x 3 1/2";
8 strips 1 1/2" x 5 1 2/".
8 strips 1 1/2" x 7 1/2".
5. For the first border, out of green fabric, cut:
2 strips 1 1/2" x 35 1/2"
2 strips 1 1/2" x 37 1/2"
6. For the second border, out of the red fabric, cut
2 strips 5" x 35 1/2"
2 strips 5" x 35 1/2"
4 squares 5" x 5".
And out of green fabric, cut:
8 strips 1 1/2" x 5".
|
|
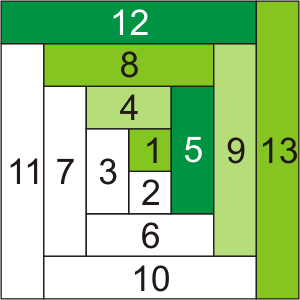
Assembling the Log Cabin block
|
| For this block, use only white and green pieces. You have to assemble 12 blocks like this one.Start assembling with the green 1 1/2" x 1 1/2" square in the center and work outwards in a clockwise direction, according to the numbering on the diagram. |
|
|
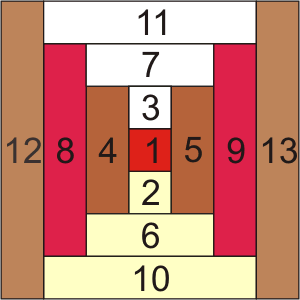
Assembling the Courthouse Steps block:
|
| For this block, use white, yellow and red pieces. You have to assemble 4 blocks like this one. Again, start in the center and work outwards, following the numbering on the diagram. |
|
|
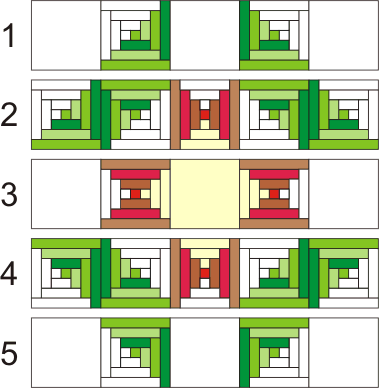
Assembling the quilt top:
|
| 1. Assemble the rows: |
|
| 2. Add the first border. |
|
| 3. Assemble the second border. |
|
| 4. Add the second border. |
|
|
Embroidering
|
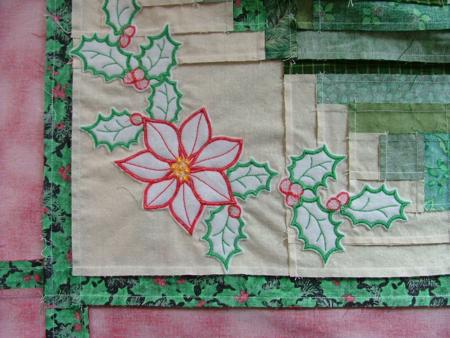
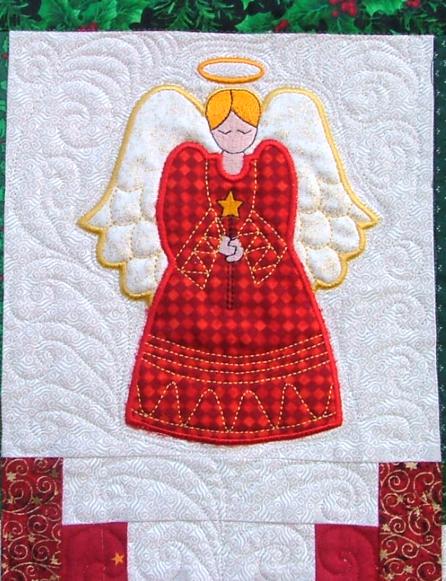
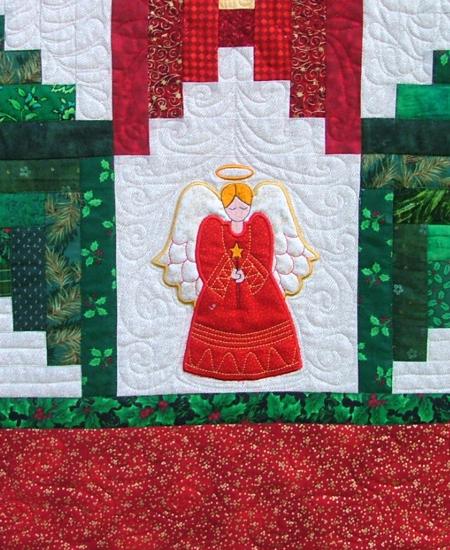
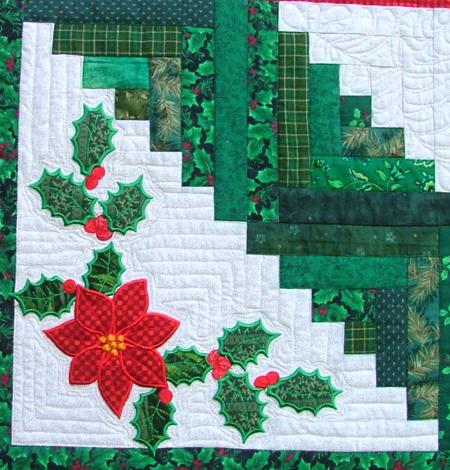
| After the quilt top is assembled, embroider the applique from the Christmas Quilt Applique Set. The instructions on making the applique are included with the designs. We embroidered the Tree in the central yellow block, four Angels in the white blocks and Poinsettia and Holly in the corners of the quilt. We tried to get a trapunto effect. To achieve this, we placed low-loft Dream Poly batting under the fabric instead of stabilizer and embroidered the applique designs over this. Then, we cut away the batting as close to the embroidery as possible. This is a picture of the back after the batting has been cut away:
|
|
|
Quilting:
|
| When the embroidery was finished, we made a traditional "sandwich" out of the backing, batting and top, pinned all three layers together with 1" pins and started quilting. We quilted along the lines of the applique and echo-quilted around each embroidery pattern. Then we quilted everything else in a free-motion style. |
|
| After the quilting was finished, we squared the workpiece and finish the raw edges with binding. |
| Here are some more close-ups of the quilt: |
|
|

|
|
|
|
Back to Projects Page
|


